“Can you just… make those peanut butter balls again?” my sister texted me at 10:47 PM on a Tuesday. No hello, no context. Just that. And honestly? I knew exactly what she meant.
I had brought a container of these high-protein peanut butter energy balls to a family picnic the weekend before, and apparently, they had become a problem. My brother-in-law ate seven before lunch. My niece asked if they were “healthy cookie dough” (she wasn’t wrong). My mom, who usually side-eyes anything that isn’t a traditional dessert, asked for the recipe twice.
That’s the thing about these no-bake energy balls. They don’t look like much sitting in the fridge—just humble little spheres of peanut butter goodness. But one bite, and people get obsessed. They’re rich without being heavy. Sweet without being sugary. Filling without making you feel like you need a nap.
I started making these about two years ago when my afternoon coffee-and-granola-bar routine stopped cutting it. I wanted something that would actually keep me going until dinner, something I could grab without thinking, and something that didn’t taste like cardboard wrapped in ambition. After a few experiments (and one truly regrettable batch that was more protein powder than anything else), I landed on this version. And honestly? I haven’t looked back since.
These energy balls have become my kitchen MVP. They’re the snack I make when I have fifteen minutes and a food processor. The thing I pack for road trips. The answer to “what’s for snack?” at 3 PM. And if you’re the kind of person who needs a snack that actually works as hard as you do, I think you’re going to love them too.
Why You’ll Love This Recipe
Let me tell you straight up—these aren’t your average energy balls. I’ve made dozens of versions over the years, and this one hits different. Here’s why this recipe has earned a permanent spot in my weekly meal prep rotation:
- Comes Together in 10 Minutes – No oven. No stovetop. No complicated steps. If you can dump ingredients into a bowl and stir, you can make these. Honestly, the hardest part is waiting for them to chill.
- Simple Ingredients, No Grocery Store Drama – You probably have most of this stuff in your pantry right now. Peanut butter, oats, honey, protein powder. That’s basically it. No weird superfood powders or specialty items that cost $15 a bag.
- Perfect for Busy Weeks – These are my go-to for hectic mornings, afternoon slumps, and post-workout refueling. I keep a batch in the fridge at all times, and it’s saved me from so many sad vending machine decisions.
- Actually Filling – With about 8 grams of protein per ball, these actually keep you full. Not the kind of snack that leaves you hungry twenty minutes later. I’ve tested this during long work days, and they hold up.
- Crowd-Pleaser for All Ages – My niece calls them “healthy cookie dough.” My gym buddy calls them “the best thing I’ve eaten all week.” Kids and adults both go crazy for them, which is rare for anything with the word “protein” in the name.
What really sets this recipe apart is the texture. I’ve eaten my share of dry, crumbly energy balls that taste like disappointment wrapped in oats. Not these. These are soft, chewy, and just the right amount of sticky—like a peanut butter cookie that decided to get its life together. The secret is getting the wet-to-dry ratio just right, and I’ve done the testing so you don’t have to.
If you’re someone who loves quick, no-fuss snacks that actually taste good, this is your recipe. It’s the kind of thing you make once and then wonder how you ever lived without it.
What Ingredients You Will Need
This recipe uses simple, wholesome ingredients to deliver big flavor and satisfying texture without any fuss. Most of these are pantry staples, which makes these energy balls perfect for spontaneous snack emergencies.
- Creamy Peanut Butter (1 cup / 240g) – The backbone of this recipe. I use natural peanut butter with just peanuts and salt—no added sugar or oil. The natural oils help bind everything together without making the balls greasy. If you use processed peanut butter like Skippy or Jif, your balls will be slightly sweeter and firmer. Both work, just know the texture shifts slightly. I personally love the Smucker’s Natural or Kirkland Signature organic peanut butter for this.
- Rolled Oats (1 ½ cups / 135g) – Old-fashioned rolled oats give the best texture here. They add chewiness and fiber without turning into mush. Quick oats work in a pinch, but the texture will be softer and less satisfying. Steel-cut oats are too hard—don’t use those unless you want a jaw workout. For a gluten-free option, make sure your oats are certified gluten-free.
- Vanilla Protein Powder (½ cup / 50g) – This is where the protein boost comes from. I use a vanilla whey or plant-based protein powder. The vanilla flavor complements the peanut butter beautifully. If your protein powder is unsweetened, you might want to add an extra tablespoon of honey. I’ve tested this with Orgain Simple vanilla plant-based protein and Optimum Nutrition Gold Standard whey—both work great.
- Honey (⅓ cup / 110g) – The natural sweetener that also helps bind everything together. Maple syrup works as a substitute, though the flavor will be slightly different—more caramel notes, less floral sweetness. Agave nectar is another option, but it makes the mixture a bit stickier. If you’re vegan, use maple syrup or brown rice syrup.
- Ground Flaxseed (2 tablespoons / 14g) – This is my secret ingredient for better texture and a little extra nutrition. Flaxseed absorbs moisture and helps the balls hold their shape without being dry. It also adds omega-3s and fiber. You can skip it if you don’t have it, but the balls will be softer and might not hold together as well. Chia seeds work as a substitute, though they add little crunchy bits.
- Dark Chocolate Chips (⅓ cup / 60g) – Tiny pockets of melted chocolate make every bite exciting. I use mini dark chocolate chips so they distribute evenly. Regular-sized chips work too, but you’ll get bigger chocolate chunks. If you’re watching sugar, use sugar-free chocolate chips or cacao nibs for a more intense, less sweet option.
- Pinch of Sea Salt (¼ teaspoon) – This is non-negotiable in my kitchen. A little salt balances the sweetness and makes the peanut butter flavor pop. If your peanut butter is already salted, you can skip this, but honestly, I still add it. The contrast is worth it.
Optional Add-Ins: I sometimes throw in a tablespoon of chia seeds for extra fiber, or a handful of unsweetened shredded coconut for texture. If I’m feeling fancy, I’ll add a teaspoon of cinnamon or a splash of vanilla extract. These are flexible—feel free to play around based on what you have in your pantry.
Ingredient Selection Tip: For the best texture, make sure your peanut butter is well-stirred before measuring. Natural peanut butter separates in the jar, and if you scoop from the top without mixing, you’ll end up with too much oil and not enough peanut solids. Give it a good stir—your energy balls will thank you.
Equipment Needed
You don’t need a fancy kitchen to make these energy balls. Here’s what I use:
- Large Mixing Bowl – Any medium-to-large bowl works. I use a glass mixing bowl because it doesn’t hold onto smells, but ceramic or stainless steel are fine too.
- Measuring Cups and Spoons – Accurate measurements matter here, especially for the peanut butter and honey. If you’re off by too much, the texture can go from perfect to crumbly or sticky.
- Rubber Spatula or Wooden Spoon – For mixing everything together. A rubber spatula is my preference because it scrapes the sides clean and helps you get every last bit of the mixture.
- Baking Sheet or Plate – To hold the energy balls while they chill. Line it with parchment paper or wax paper for easy cleanup.
- Cookie Scoop (Optional but Helpful) – A 1-inch or 1.5-inch cookie scoop makes perfectly uniform balls. If you don’t have one, just use your hands—I do that half the time anyway.
- Air-Tight Container – For storing the finished energy balls. A glass meal prep container or a plastic container with a tight lid works perfectly.
Budget-Friendly Tip: You don’t need a food processor for this recipe—everything mixes by hand. That’s one less appliance to wash, and it keeps things simple. If you have a cookie scoop, great. If not, your hands are the original kitchen tool, and they work just fine.
Preparation Method
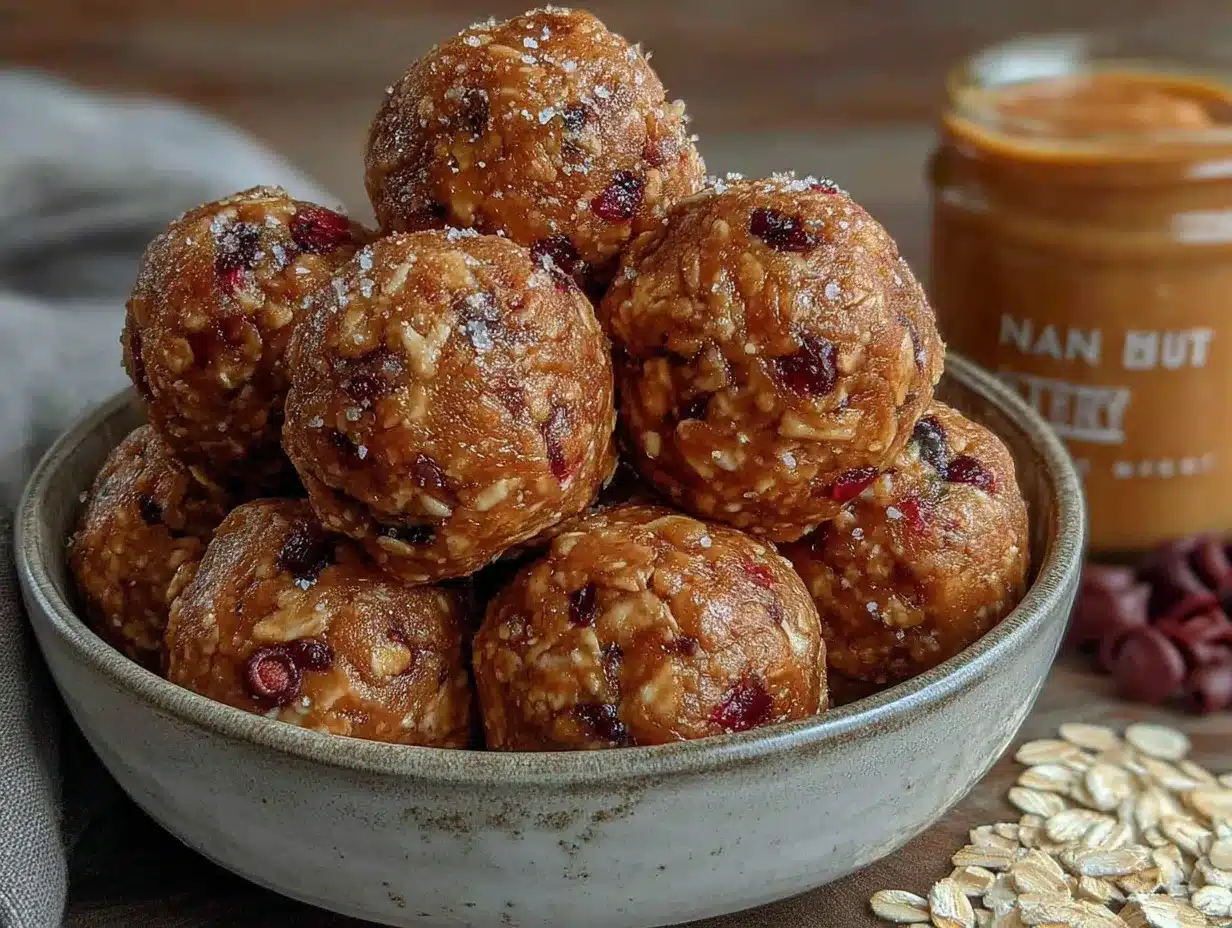
Let me walk you through this step by step. I’ve made these more times than I can count, so I’ll share all the little tricks I’ve picked up along the way.
- Prep Your Workspace – Before you start, line a baking sheet or large plate with parchment paper. This gives you a place to set the formed energy balls before they go into the fridge. Trust me, trying to do this after your hands are sticky is a recipe for frustration.
- Combine the Dry Ingredients – In your large mixing bowl, add the rolled oats, vanilla protein powder, ground flaxseed, and sea salt. Give them a quick stir with your spatula or spoon until everything is evenly distributed. This step ensures the protein powder doesn’t clump up when you add the wet ingredients. I learned this the hard way after biting into a pocket of straight protein powder—not pleasant.
- Add the Wet Ingredients – Spoon in the creamy peanut butter and drizzle the honey over the dry mixture. Don’t dump everything in one spot—spread it around a little for easier mixing. This is where the magic starts to happen.
- Mix Until Combined – Using your rubber spatula or wooden spoon, stir everything together. Start with a folding motion, pressing the mixture against the sides of the bowl to help it come together. At first, it will look dry and crumbly—that’s normal. Keep going. After about 30 seconds of vigorous stirring, the peanut butter and honey will start to bind everything into a cohesive dough. You want the mixture to hold together when you press it between your fingers. If it’s too dry, add a teaspoon of honey or water. If it’s too sticky, add a tablespoon of oats.
- Fold in the Chocolate Chips – Once the base mixture is well combined, gently fold in the dark chocolate chips. Make sure they’re evenly distributed throughout the dough. If you add them too early, they might melt from the warmth of your hands during mixing—still delicious, but you lose those nice chocolate chunks.
- Chill the Mixture (Optional but Recommended) – Pop the bowl in the refrigerator for 15-20 minutes. This step isn’t strictly necessary, but it makes rolling the balls much easier. The mixture firms up, so your hands stay cleaner and the balls hold their shape better. If you’re in a rush, skip this—just know your hands will get a little sticky.
- Roll into Balls – Using your hands or a cookie scoop, portion out the mixture. I aim for balls about 1 to 1.5 inches in diameter—roughly a tablespoon of mixture each. Roll them between your palms gently to form smooth spheres. Don’t squeeze too hard or they’ll be dense. You want them just firm enough to hold together. This recipe makes about 18-20 energy balls, depending on how big you roll them.
- Place on Prepared Baking Sheet – As you finish each ball, set it on the parchment-lined baking sheet. Leave a little space between them so they don’t stick together. Once all the balls are formed, transfer the baking sheet to the refrigerator.
- Chill for at Least 30 Minutes – This is the hardest part—waiting. The chilling time allows the flavors to meld and the texture to set properly. After 30 minutes, the energy balls will be firm enough to handle without falling apart. For best results, let them chill for an hour.
- Transfer to Storage Container – Once chilled, move the energy balls to an air-tight container. Layer them between sheets of parchment paper if stacking to prevent sticking. They’re ready to eat immediately or store for later.
Sensory Cue: When you’re mixing, the dough should feel like a thick, slightly sticky cookie dough. It should hold its shape when pressed but still be pliable enough to roll easily. The smell will be incredible—warm peanut butter with hints of vanilla and chocolate. If it smells like a Reese’s peanut butter cup had a baby with an oatmeal cookie, you’re on the right track.
Cooking Tips & Techniques
After making these energy balls more times than I can count, I’ve picked up a few tricks that make a real difference. Here are the things I wish someone had told me when I started:
The Texture Test – Before you commit to rolling all the balls, test one first. Squeeze a small amount of mixture in your hand. If it holds together without crumbling, you’re good. If it falls apart, add a little more honey or peanut butter. If it’s too sticky to handle, add more oats or protein powder. This five-second test saves you from rolling a whole batch that won’t hold together.
Wet Hands, Better Rolling – If the mixture is sticking to your hands while rolling, lightly dampen your palms with water. Not soaking wet, just a little moisture. This creates a barrier that keeps the dough from sticking. I learned this trick from making traditional energy balls, and it works every time.
Don’t Overmix – Once the ingredients come together, stop mixing. Overworking the dough can make the energy balls dense and tough. You want them tender and chewy, not like little hockey pucks. Stir just until everything is combined and no dry patches remain.
Room Temperature Matters – If your kitchen is warm, the peanut butter and honey will be softer, and the mixture will be stickier. In cold weather, things firm up faster. Adjust your expectations based on the season. In summer, you’ll definitely want that chill step before rolling.
My Biggest Failure – I once tried to make these with crunchy peanut butter because I thought the extra texture would be nice. It was not nice. The peanut pieces made the balls crumbly and hard to roll. Stick with creamy peanut butter for the best results. If you want crunch, add the chocolate chips or some chopped nuts instead.
Batch Consistency – For evenly sized energy balls, use a cookie scoop. I have a 1.5-inch scoop that makes perfect portions every time. If you’re counting macros or calories, this helps keep things consistent. Without a scoop, aim for balls that are roughly the size of a golf ball.
Multitasking Strategy – While the mixture chills, wash your mixing bowl and spatula. That way, when you’re done rolling, cleanup is minimal. I also like to prep my storage container during this time so everything’s ready to go.
Variations & Adaptations
One of the best things about this recipe is how flexible it is. Here are some variations I’ve tried and loved:
Chocolate Peanut Butter Version – Add 2 tablespoons of unsweetened cocoa powder to the dry ingredients. The chocolate-peanut butter combo is classic for a reason. You might need an extra tablespoon of honey to balance the bitterness of the cocoa. This version tastes like a healthier version of a Reese’s cup—honestly, it’s dangerous.
Vegan Adaptation – Swap the honey for maple syrup or brown rice syrup. Use a vegan plant-based protein powder instead of whey. Everything else stays the same. The texture will be slightly different—maple syrup is thinner than honey, so the mixture might be a touch stickier—but the flavor is still fantastic.
Nut-Free Option – Substitute the peanut butter with sunflower seed butter or tahini. Sunflower seed butter works best because it has a similar consistency. Just know that the flavor will change—sunflower butter is less sweet and more savory. You might want to add an extra tablespoon of honey to compensate. Also, sunflower seed butter can react with baking soda if you ever bake these, but since we’re not baking here, you’re fine.
Seasonal Twist – In the fall, I add ½ teaspoon of pumpkin pie spice and swap the chocolate chips for dried cranberries. In the summer, I fold in ¼ cup of freeze-dried strawberries for a fruity pop. Around the holidays, a sprinkle of cinnamon and some white chocolate chips make these feel festive.
Low-Carb Adaptation – Replace the rolled oats with unsweetened shredded coconut and almond flour. Use a low-carb protein powder and sugar-free chocolate chips. The texture will be different—denser and more coconut-forward—but the protein content stays high and the carbs drop significantly.
Cookie Dough Inspired – Add 1 teaspoon of vanilla extract and an extra 2 tablespoons of mini chocolate chips. The result tastes remarkably like edible cookie dough. My niece begs for this version every time she visits. I don’t blame her.
Serving & Storage Suggestions
These energy balls are best served cold, straight from the refrigerator. The chill keeps them firm and chewy, and the flavors are more pronounced when they’re cold. If you let them sit at room temperature for too long, they soften and can lose their shape.
Serving Ideas:
- Pre-Workout Fuel – Eat one about 30 minutes before exercise for sustained energy. The combination of oats and peanut butter provides complex carbs and protein that won’t spike your blood sugar.
- Afternoon Pick-Me-Up – Pair one with a cup of coffee or tea. The sweetness of the honey and chocolate complements the bitterness of coffee beautifully.
- Lunchbox Addition – Pack one or two in a lunchbox for a satisfying midday snack. They hold up well for a few hours at room temperature, so they’re perfect for school or work lunches.
- Dessert Alternative – Serve them as a healthier dessert option. They’re sweet enough to satisfy a sugar craving without the guilt. I’ve brought these to dinner parties, and they disappear faster than the actual desserts.
Storage Instructions:
- Refrigerator – Store in an air-tight container in the refrigerator for up to 2 weeks. I use a glass meal prep container with a tight lid. Layer them between parchment paper if stacking to prevent sticking.
- Freezer – These freeze beautifully. Place the energy balls on a baking sheet and freeze until solid (about 1 hour). Transfer to a freezer-safe bag or container. They’ll keep for up to 3 months. To thaw, just leave them in the refrigerator overnight or let them sit at room temperature for 15-20 minutes.
- Room Temperature – If you’re taking them on the go, they’re fine at room temperature for a few hours. I wouldn’t leave them out all day, though—they get too soft and can become a sticky mess.
Flavor Development: The flavors actually get better after a day in the fridge. The oats soften slightly, the peanut butter mellows, and everything melds together. I always think these taste best on day two or three. Make them ahead of time if you can—your future self will thank you.
Nutritional Information & Benefits
Here’s the estimated nutritional breakdown for one energy ball (based on 20 balls per batch):
| Nutrient | Amount Per Ball |
|---|---|
| Calories | 145 |
| Protein | 8g |
| Carbohydrates | 16g |
| Fiber | 3g |
| Sugar | 8g |
| Fat | 7g |
| Saturated Fat | 2g |
| Sodium | 85mg |
These numbers will vary based on the specific brands you use and the size of your energy balls. If you’re tracking macros, I recommend calculating based on your exact ingredients.
Health Benefits:
- High Protein – With 8 grams of protein per ball, these are an excellent post-workout snack or meal replacement option. The protein helps with muscle repair and keeps you feeling full longer.
- Healthy Fats – Peanut butter provides monounsaturated and polyunsaturated fats that support heart health. These good fats also help you absorb fat-soluble vitamins.
- Fiber-Rich – Oats and flaxseed contribute 3 grams of fiber per ball, supporting digestive health and stable blood sugar levels.
- Omega-3s – Ground flaxseed is a plant-based source of omega-3 fatty acids, which are important for brain health and reducing inflammation.
- No Refined Sugar – Sweetened with honey and dark chocolate, these energy balls are free from refined white sugar. The natural sugars come with additional nutrients and antioxidants.
Dietary Considerations: This recipe is naturally vegetarian. For gluten-free, use certified gluten-free oats. For vegan, use maple syrup and plant-based protein powder. For nut-free, substitute sunflower seed butter. Contains peanuts (unless substituted), oats, and may contain dairy from whey protein and chocolate chips—check your labels if you have allergies.
Personal Perspective: I love that these energy balls feel like a treat but actually support my active lifestyle. They’re not a health food in the boring sense—they genuinely taste good. But knowing I’m getting protein, fiber, and healthy fats while satisfying my sweet tooth? That’s a win in my book.
Conclusion
These easy high-protein peanut butter energy balls are the kind of recipe that earns a permanent spot in your kitchen rotation. They’re quick, simple, and genuinely delicious—no compromise required. Whether you need a post-workout refuel, an afternoon pick-me-up, or a healthier dessert option, these little balls of goodness deliver every time.
What I love most about this recipe is how forgiving it is. Don’t have flaxseed? Skip it. Want to use almond butter instead of peanut butter? Go for it. Craving a chocolate version? Add some cocoa powder. This is a recipe that adapts to what you have and what you like. It’s hard to mess up, and even the “mistakes” usually taste great.
I encourage you to make a batch this week. Try them as-is first, then experiment with your favorite add-ins. Maybe you’ll discover a combination that becomes your signature snack. And when your friends and family ask for the recipe (because they will), send them my way.
If you’re looking for more quick, healthy snack ideas, you might also enjoy these no-bake peanut butter treats for when you want something more indulgent. Or, if you’re prepping for a busy week, these high-protein chicken kabobs pair perfectly with a couple of energy balls for a balanced meal.
I’d love to hear how these turn out for you! Drop a comment below and let me know what variations you tried. Did you add coconut? Swap the chocolate for dried fruit? Make them vegan? Share your creations—I’m always looking for new ideas to test in my own kitchen.
Until next time, happy snacking!
Frequently Asked Questions
Can I use quick oats instead of rolled oats?
Yes, you can use quick oats, but the texture will be softer and less chewy. Quick oats absorb moisture faster and break down more during mixing, resulting in a denser, smoother energy ball. If that sounds good to you, go for it. I personally prefer rolled oats for the texture, but quick oats work in a pinch.
How long do these energy balls last in the fridge?
Stored in an air-tight container, these energy balls will stay fresh in the refrigerator for up to 2 weeks. After about a week, they might start to dry out slightly, but they’re still perfectly edible. I usually make a batch on Sunday and they’re gone by Friday—they never last long enough to go bad.
Can I freeze these energy balls?
Absolutely! Freeze them on a baking sheet until solid, then transfer to a freezer-safe bag or container. They’ll keep for up to 3 months. To thaw, move them to the refrigerator overnight or let them sit at room temperature for 15-20 minutes. I always keep a stash in the freezer for busy weeks.
My mixture is too dry. What should I do?
If your mixture feels crumbly and won’t hold together when pressed, it needs more moisture. Add a tablespoon of honey or peanut butter at a time, mixing well after each addition, until the dough comes together. The most common cause of dry mixture is using a protein powder that’s very absorbent—different brands behave differently, so adjust accordingly.
Can I make these without protein powder?
Yes, but the texture and nutrition will change. If you skip the protein powder, replace it with an equal amount of rolled oats or almond flour. You might also need to adjust the wet ingredients slightly since protein powder absorbs moisture differently. The balls will be lower in protein but still delicious. If you’re looking for a high-protein snack, though, I recommend keeping the protein powder. If you’re looking for other high-protein meal prep ideas, these grilled chicken meal prep bowls are another great option.
Pin This Recipe!
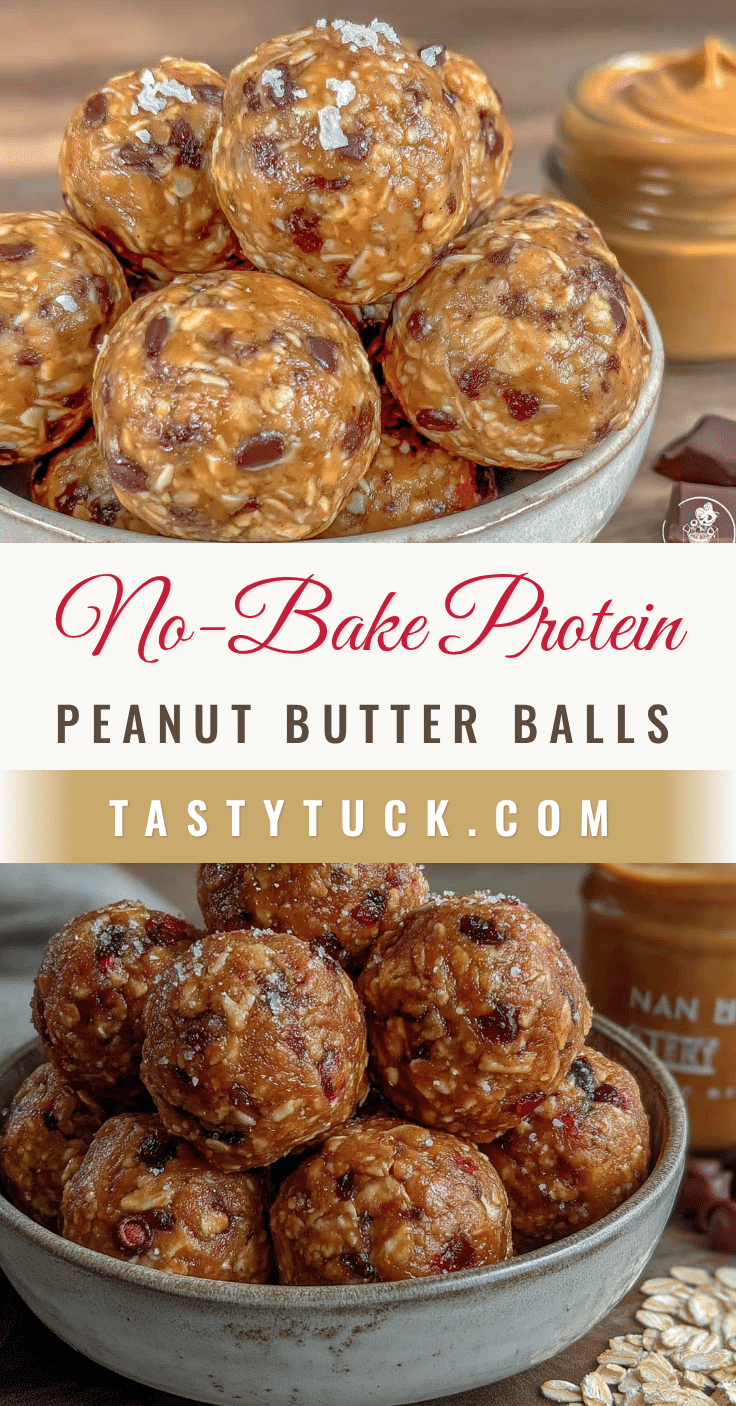
Easy High-Protein Peanut Butter Energy Balls: Best No-Bake Snack

These no-bake peanut butter energy balls are rich, chewy, and packed with protein. Made with simple pantry ingredients, they come together in 10 minutes and make the perfect healthy snack for busy weeks.
- Prep Time: 10 minutes
- Cook Time: 0 minutes
- Total Time: 40 minutes (includes chilling)
- Yield: 18-20 energy balls 1x
- Category: Snack
- Cuisine: American
Ingredients
- 1 cup (240g) creamy peanut butter
- 1 ½ cups (135g) rolled oats
- ½ cup (50g) vanilla protein powder
- ⅓ cup (110g) honey
- 2 tablespoons (14g) ground flaxseed
- ⅓ cup (60g) dark chocolate chips
- ¼ teaspoon sea salt
Instructions
- Line a baking sheet or large plate with parchment paper.
- In a large mixing bowl, combine rolled oats, vanilla protein powder, ground flaxseed, and sea salt. Stir until evenly distributed.
- Add creamy peanut butter and honey to the dry mixture. Stir with a rubber spatula or wooden spoon until a cohesive dough forms. If too dry, add a teaspoon of honey or water; if too sticky, add a tablespoon of oats.
- Gently fold in dark chocolate chips until evenly distributed.
- Optional: Refrigerate the mixture for 15-20 minutes to make rolling easier.
- Using your hands or a cookie scoop, portion the mixture into 1 to 1.5-inch balls (about 1 tablespoon each). Roll gently between palms to form smooth spheres.
- Place the balls on the prepared baking sheet. Refrigerate for at least 30 minutes (1 hour for best results) to set.
- Transfer to an air-tight container. Store in the refrigerator for up to 2 weeks or freeze for up to 3 months.
Notes
For best texture, use well-stirred natural peanut butter. If mixture is too dry, add more honey or peanut butter; if too sticky, add more oats or protein powder. Wet hands slightly to prevent sticking when rolling. Flavors improve after a day in the fridge.
Nutrition
- Serving Size: 1 energy ball
- Calories: 145
- Sugar: 8
- Sodium: 85
- Fat: 7
- Saturated Fat: 2
- Carbohydrates: 16
- Fiber: 3
- Protein: 8
Keywords: peanut butter energy balls, high protein snack, no bake energy balls, healthy snack, meal prep snack


