I was standing in line at the DMV—a place where culinary inspiration goes to die—when the woman behind the counter started telling me about her Halloween party. She wasn’t a professional chef or a famous food blogger. She was a middle-aged woman named Carol who processed license renewals by day and apparently threw the most talked-about Halloween parties in town. “You want to know the secret?” she asked, stamping my paperwork. “It’s not the decorations. It’s the mummy hot dogs.”
I blinked at her. Mummy hot dogs? I’d seen the Pinterest versions before—cute, sure, but nothing to write home about. But Carol leaned forward with the intensity of someone sharing classified information. “You have to use crescent dough,” she whispered. “And you have to wrap them loose. That’s the trick.”
Honestly, I almost forgot about the conversation by the time I got back to my car. But that Halloween, with a party of my own to host, I found myself standing in the grocery store aisle staring at tubes of crescent dough. What the heck, I thought. Let’s see what Carol was so excited about. I grabbed three cans, a pack of hot dogs, and some candy eyes, fully expecting a cute but forgettable snack.
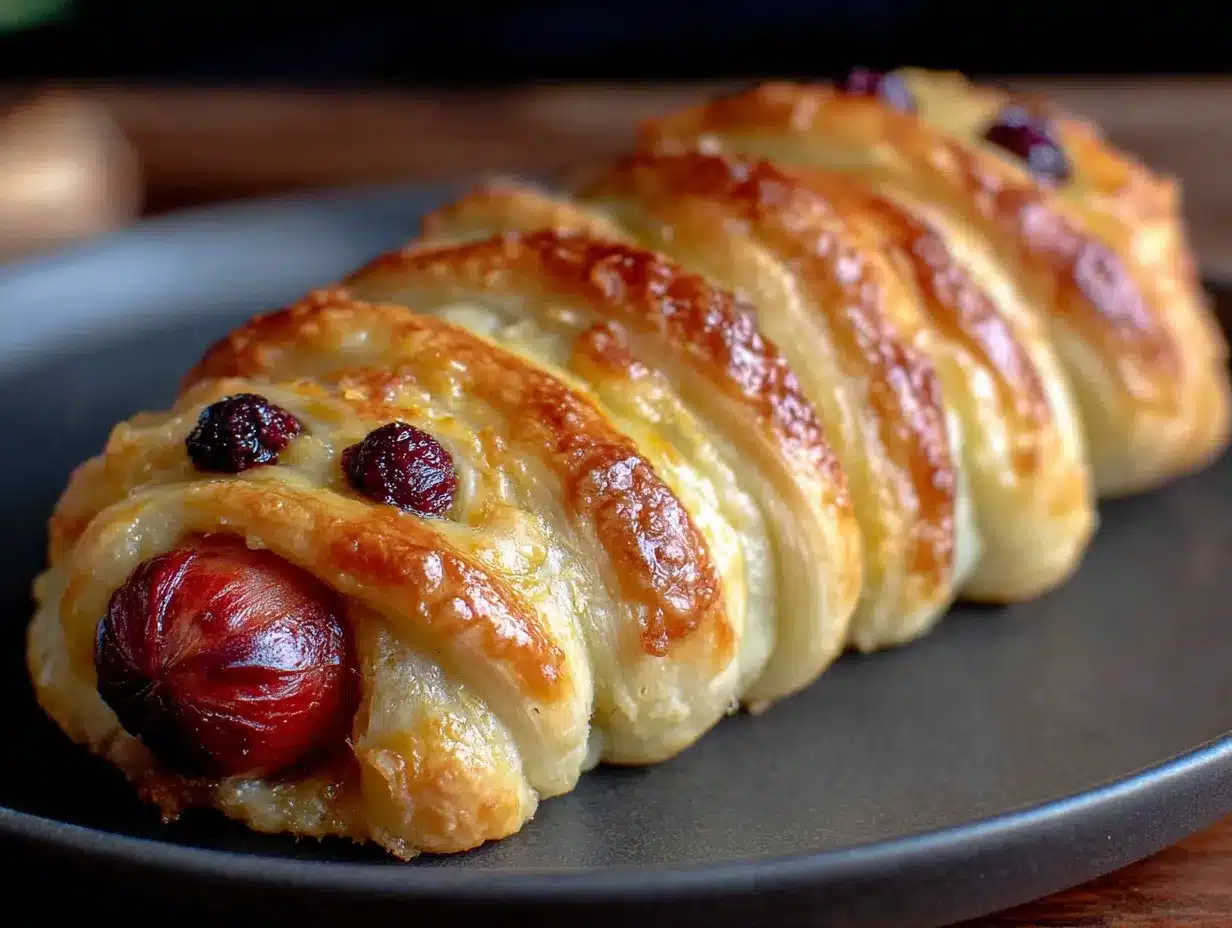
The first batch came out of the oven, and let me tell you—I actually laughed out loud. They looked ridiculous and wonderful, all wrapped up in their little doughy bandages. But the real shock came when my guests started eating them. Those things disappeared faster than anything else on the table. People were standing around the platter, grabbing seconds, asking for the recipe. Carol from the DMV had been right all along.
Maybe you’ve been there—you spend hours on a fancy main dish, and what gets devoured first is the silly, fun thing you threw together as an afterthought. That’s the magic of these mummy hot dogs. They’re not trying to be fancy. They’re just trying to be delicious and a little bit ridiculous. And somehow, that’s exactly what makes them unforgettable.
So here we are. A recipe I learned from a DMV employee, of all people, that has become my go-to for every gathering. It’s the dish I bring to potlucks, the appetizer I make for game nights, and the thing my friends now request by name. Carol, wherever you are, thank you. You changed my hosting game forever.
Why You’ll Love This Recipe
Let me be honest with you—I’ve tested a lot of appetizer recipes in my time as a food blogger. Some are complicated. Some require ingredients you’ve never heard of. And some just don’t deliver on the flavor front. These mummy hot dogs? They’re the exception to every rule.
- Ready in 20 Minutes: From fridge to table in under half an hour. When guests are arriving and you realize you need something hot and satisfying, this is your rescue recipe.
- Simple Ingredients: Crescent dough, hot dogs, and candy eyes. That’s it. No fancy grocery store runs required. You probably have most of this in your kitchen right now.
- Perfect for Halloween Parties: Obviously, these shine on October 31st. But honestly? I make them year-round. They’re a hit at football parties, birthday gatherings, and casual get-togethers where people just want to eat something fun.
- Crowd-Pleaser: I’ve served these to kids, adults, picky eaters, and food snobs. Every single person reaches for another one. There’s something about the combination of flaky, buttery dough and savory hot dog that just works.
- Unbelievably Fun: Let’s face it—food should be enjoyable. These mummy hot dogs make people smile before they even take a bite. And that first bite? The contrast between the crispy golden dough and the juicy hot dog inside is pure comfort food magic.
What makes this recipe different from all the other mummy hot dog recipes out there? It’s the technique. Most recipes tell you to wrap the dough tightly around the hot dog. That’s a mistake. The loose wrapping is what gives these mummies their signature look and texture. The dough puffs up in the gaps, creating those perfect little bandage-like wrinkles. Trust me on this one—I learned it from Carol, and I’ve never gone back.
What Ingredients You Will Need
This recipe keeps things beautifully simple. You don’t need a dozen ingredients or specialized items. Just a few staples that come together to create something genuinely memorable. Here’s what you’ll need and why each ingredient matters.
For the Mummies
- 2 cans (8 oz each) refrigerated crescent roll dough: I recommend Pillsbury for consistent results. The dough unrolls into triangles that are perfect for cutting into strips. If you can find the sheets of crescent dough (without the perforations), those work even better—less waste and easier cutting.
- 10-12 hot dogs: Use your favorite brand. I personally prefer all-beef hot dogs for richer flavor and better texture. They hold up well during baking and don’t get that weird rubbery texture some cheaper brands develop. For a party, go with standard-size hot dogs rather than jumbo—they’re easier to eat and look cuter wrapped up.
- Candy eyes (about 20-24): You can find these at any grocery store or craft store during Halloween season. I buy extra packs whenever I see them because I use them for everything. If you can’t find candy eyes, you can make your own with black and white frosting—but honestly, the store-bought ones are easier and look better.
For the Topping
- 1 large egg: For the egg wash. This gives the dough that beautiful golden-brown color after baking. If you forget to set out an egg, you can use milk or melted butter instead—the color won’t be quite as deep, but it’ll still look good.
- 1 tablespoon water: To thin out the egg wash. You want it thin enough to brush easily but thick enough to coat the dough.
- Optional: Everything bagel seasoning, sesame seeds, or flaky salt: I sometimes sprinkle these on before baking for extra flavor and texture. The everything bagel seasoning is especially good—it adds that savory, garlicky punch that complements the hot dog perfectly.
For Serving
- Ketchup, mustard, or your favorite dipping sauces: I like to serve these with a few different options so guests can customize. Spicy mustard is a personal favorite—it cuts through the richness of the dough and hot dog beautifully.
One thing I want to emphasize: don’t overthink the ingredients. This is one of those recipes where the whole is greater than the sum of its parts. You’re not trying to create a gourmet experience here. You’re creating something fun, delicious, and comforting that people will genuinely enjoy. The simplicity is the point.
Equipment Needed
You don’t need a professional kitchen to make these mummy hot dogs. In fact, you probably already have everything you need.
- Baking sheet: A standard half-sheet pan works perfectly. Line it with parchment paper for easy cleanup—trust me, the melted butter from the dough can get sticky.
- Sharp knife or pizza cutter: For cutting the crescent dough into strips. A pizza cutter makes this job incredibly easy, but a sharp knife works just fine. I’ve used both, and honestly, the pizza cutter is my preference—it glides through the dough without pulling or tearing it.
- Pastry brush: For applying the egg wash. If you don’t have one, you can use a clean, unused paintbrush or even the back of a spoon. I’ve done all three, and the pastry brush gives the most even coating.
- Cutting board: Any clean surface for cutting the dough. Make sure it’s dry so the dough doesn’t stick.
- Small bowl: For whisking the egg wash. A ramekin works great for this.
- Toothpicks (optional): If you’re having trouble getting the candy eyes to stay on, you can use a tiny dab of frosting or a toothpick to secure them. I’ve found that pressing them gently into the dough right after baking works best.
If you’re making these for a large party, I recommend having two baking sheets so you can bake all the mummies at once. Nothing’s worse than having a tray of finished mummies getting cold while the second batch bakes. But if you only have one sheet, just keep the first batch warm in a low oven (200°F) while the second batch cooks.
Preparation Method
Alright, let’s get to the fun part. Here’s how to make these mummy hot dogs step by step. I’ve tested this method dozens of times, and this is the version that works every single time.
- Preheat your oven to 375°F (190°C). Line a baking sheet with parchment paper. This is important—the dough can stick to unlined sheets, and nobody wants to scrape mummy bits off a pan. While the oven is heating, take your crescent dough out of the fridge. You want it cold but pliable—not rock hard, but not room temperature either.
- Unroll the crescent dough. If you’re using the perforated triangles, gently press the seams together to create a solid sheet of dough. If you’re using the seamless sheets, you’re already ahead of the game. Place the dough on your cutting board and use a pizza cutter or sharp knife to cut it into thin strips. I aim for strips about 1/2 inch wide—any thinner and they tear, any wider and they look more like blankets than bandages.
- Wrap the hot dogs. Here’s where Carol’s advice comes in. Take a hot dog and start wrapping a strip of dough around it, leaving small gaps between each wrap. Don’t pull the dough tight! You want it loose enough that the dough can puff up as it bakes, creating those lovely wrinkled bandage effects. Overlap the dough slightly as you go, but keep it loose. Leave a small space at the top of the hot dog for the eyes—about an inch of exposed hot dog is perfect.
- Place the wrapped hot dogs on the baking sheet. Space them about 2 inches apart—they’ll expand as they bake, and you don’t want them touching. If you’re making a large batch, use two sheets or work in batches. Don’t overcrowd the pan.
- Make the egg wash. In a small bowl, whisk together the egg and water until well combined. Brush this mixture over each mummy, making sure to coat all the exposed dough. This is what gives them that beautiful golden color. Don’t skip this step—it makes a huge difference in the final appearance.
- Bake for 12-15 minutes, or until the dough is golden brown and the hot dogs are heated through. Keep an eye on them toward the end—ovens vary, and you don’t want burnt mummies. The dough should be puffed and golden, with darker brown spots where the egg wash caramelized.
- Add the eyes immediately after baking. As soon as the mummies come out of the oven, gently press two candy eyes into the exposed hot dog at the top. The heat will help them stick. If you wait too long, the hot dog cools and the eyes won’t adhere as well. Work quickly but gently—you don’t want to burn your fingers.
- Let them cool for 2-3 minutes before transferring to a serving platter. This allows the dough to set slightly so it doesn’t fall apart when you move them. But don’t let them cool completely—these are best served warm.
A few things I’ve learned the hard way: If your dough strips are tearing, they might be too cold. Let them sit at room temperature for a few minutes before cutting. If your mummies are browning too quickly on the bottom, your baking sheet might be too close to the bottom heating element. Move the rack to the middle position. And if you’re making these ahead of time for a party, you can prepare them up to step 4 and refrigerate them for up to 4 hours before baking. Just add a few extra minutes to the baking time.
Cooking Tips & Techniques
After making these mummy hot dogs more times than I care to count (and messing up plenty of them along the way), I’ve gathered some tips that will save you time and frustration.
The loose wrap is non-negotiable. I cannot stress this enough. The first time I made these, I wrapped the dough tight because I thought it would look neater. Wrong. The dough didn’t puff up, the hot dog looked like a sad striped sausage, and nobody was impressed. The loose wrap creates those beautiful wrinkles that make these look like actual mummies. It also creates little pockets where the butter from the dough melts and creates these incredible crispy edges. You want those edges.
Don’t overwork the dough. Crescent dough is delicate. The more you handle it, the tougher it gets. Cut your strips quickly and wrap them gently. If the dough starts feeling sticky or warm, pop it back in the fridge for a few minutes. Cold dough is much easier to work with.
Use the right hot dog-to-dough ratio. I’ve tried this with jumbo hot dogs, and the dough-to-meat ratio is off. You end up with too much hot dog and not enough dough. Standard-size hot dogs are the sweet spot. If you want to get fancy, you can use cocktail sausages or little smokies for a bite-size version—just cut your dough strips even thinner and reduce the baking time to 8-10 minutes.
Make extra. Seriously. Double the recipe. I’ve never once had leftovers of these. Even when I thought I made enough, they disappeared. There’s something about the combination of warm, flaky dough and savory hot dog that people can’t resist. Plus, they’re small enough that people eat two or three without thinking about it.
Timing is everything. These are best served within 15 minutes of coming out of the oven. The dough is at its flakiest and most delicious right after baking. If you need to make them ahead, I recommend preparing them through the wrapping stage and baking just before serving. Your guests will thank you.
Variations & Adaptations
One of the best things about this recipe is how customizable it is. Here are some variations I’ve tried and loved.
Spicy Mummy Dogs: Before wrapping, brush the hot dogs with sriracha or your favorite hot sauce. The heat cuts through the richness of the dough beautifully. I’ve also tried stuffing a thin slice of jalapeño between the hot dog and the dough—spicy and delicious.
Cheesy Mummy Dogs: Cut a slit lengthwise in each hot dog and insert a thin strip of cheddar or pepper jack cheese before wrapping. The cheese melts as the mummy bakes, creating a gooey surprise inside. Just be careful—the cheese gets hot and can burn your mouth if you bite in too quickly.
Bacon-Wrapped Mummies: For the truly indulgent, wrap a half-slice of bacon around the hot dog before adding the crescent dough strips. Bake as directed, but add 2-3 minutes to the cooking time to ensure the bacon is fully cooked. This version is dangerously good—I’ve had guests eat four or five of these without stopping.
Vegetarian Option: Use plant-based hot dogs instead of traditional ones. I’ve tested this with several brands, and they work perfectly. The cooking time remains the same. Just make sure your crescent dough is also vegan—some brands use butter, so check the label.
Breakfast Mummies: Swap the hot dogs for breakfast sausages or link sausages. These make a fun addition to a Halloween morning breakfast or brunch. Serve with maple syrup for dipping—the sweet and savory combination is surprisingly good.
I’ve also experimented with different doughs. While crescent dough is my favorite for its flaky texture, puff pastry works beautifully too. It’s a bit more work to cut into strips, but the layers are even more impressive. Just keep in mind that puff pastry takes a few minutes longer to bake and can be more delicate to handle.
Serving & Storage Suggestions
These mummy hot dogs are at their absolute best when served warm, right after baking. The dough is flaky, the hot dog is juicy, and the candy eyes are perfectly adhered. Here’s how to serve them for maximum impact.
Presentation tips: Arrange the mummies on a large platter in a circle, with the eyes facing outward. You can create a spooky scene by adding some pretzel stick “bones” or black olive “spiders” around the edges. I like to serve them with small bowls of ketchup, mustard, and ranch dressing for dipping. The contrast of the red, yellow, and white sauces against the golden mummies looks great on a table.
What to serve alongside: These pair beautifully with other party foods. I often serve them alongside a big bowl of chili, some deviled eggs, and a vegetable platter. For Halloween parties, they’re perfect with witch finger cookies or pumpkin-shaped cheese balls. For non-Halloween gatherings, they work great with other finger foods like meatballs, sliders, or stuffed mushrooms.
Storage instructions: If you have leftovers (which, let’s be honest, is rare), store them in an airtight container in the refrigerator for up to 3 days. The dough will soften as it sits, but they’re still tasty. To reheat, place them on a baking sheet in a 350°F oven for 5-7 minutes. The microwave works in a pinch, but the dough won’t be as crispy. I don’t recommend freezing these—the texture of the hot dog and dough changes too much during thawing.
Make-ahead tip: You can prepare the mummies up to the point of baking and refrigerate them for up to 4 hours. Just cover the baking sheet with plastic wrap and pop it in the fridge. When you’re ready to bake, add 2-3 minutes to the cooking time to account for the cold start. This is a lifesaver when you’re hosting a party and want to minimize last-minute work.
Nutritional Information & Benefits
Let’s be real—these mummy hot dogs are a treat, not a health food. But here’s what you should know if you’re keeping track.
Per serving (2 mummies): Approximately 350-400 calories, 22g fat, 30g carbohydrates, 12g protein, 800mg sodium. These numbers will vary based on the brand of hot dogs and crescent dough you use.
Health benefits (yes, there are some): Hot dogs do provide protein and iron. The crescent dough offers carbohydrates for energy. And if you use all-beef hot dogs, you’re getting a decent amount of B vitamins and zinc. Plus, the act of making and sharing these with others has mental health benefits—cooking and sharing food is a form of connection and joy.
Dietary considerations: These are not gluten-free (crescent dough contains wheat flour). They’re also not dairy-free unless you find specific brands (some crescent doughs contain butter). If you have guests with dietary restrictions, consider offering a vegetable platter or fruit skewers as an alternative. For those avoiding processed meats, turkey or chicken hot dogs work well as a substitute.
My personal take: I believe in balance. These mummy hot dogs are for celebrations and gatherings—they’re not an everyday food. When you make them, enjoy them fully. Don’t stress about the nutritional content. The joy of sharing food with people you care about is its own kind of nourishment.
Conclusion
These mummy hot dogs with crescent dough have become my secret weapon for hosting. They’re quick, they’re fun, and they genuinely impress people. Every time I bring them to a party, someone asks for the recipe. Every time I serve them at my own gatherings, they disappear before the main course even hits the table.
What I love most about this recipe is how it brings people together. There’s something about food that looks like little mummies that makes everyone smile. Kids love them. Adults love them. Even the people who claim they don’t eat hot dogs end up reaching for a second one. It’s the kind of recipe that makes you look like a hero without any of the stress.
I encourage you to make these your own. Try the cheesy version. Add some spice. Experiment with different dipping sauces. The beauty of this recipe is its flexibility—once you know the basic technique, you can adapt it to any occasion or taste preference.
So go ahead. Grab some crescent dough and hot dogs. Invite some people over. And remember—the loose wrap is the secret. Carol from the DMV would be proud.
Have you made these mummy hot dogs? I’d love to hear about your variations and how they turned out. Drop a comment below and share your creation—I read every single one. And if you’re looking for more fun party appetizers, check out my Halloween party snacks collection for more crowd-pleasing ideas. Happy cooking, friends!
Frequently Asked Questions
Can I make these mummy hot dogs ahead of time?
Yes! You can prepare them up to the point of baking and refrigerate for up to 4 hours. Just add 2-3 minutes to the baking time. I don’t recommend baking them fully ahead of time, as the dough loses its flakiness.
What if I can’t find candy eyes?
No problem! You can use small dots of black and white frosting to make eyes, or simply skip the eyes altogether. The mummies still look great without them—they just look like bandaged hot dogs instead of monsters.
Can I use a different type of dough?
Absolutely. Puff pastry works beautifully, as does homemade pizza dough. Just adjust the baking time accordingly. Puff pastry takes about 15-18 minutes, while pizza dough might need a bit longer. Keep an eye on them and look for golden brown color.
How do I prevent the dough from tearing?
Cold dough tears more easily. Let it sit at room temperature for 5-10 minutes before cutting. Also, use a sharp knife or pizza cutter—dull blades pull at the dough instead of cutting cleanly. If the dough does tear, just press it back together gently.
Can I freeze these mummy hot dogs?
I don’t recommend it. The texture of both the hot dog and the dough changes during freezing and thawing. The dough becomes soggy, and the hot dog can become rubbery. If you need to make a large batch, prepare them through the wrapping stage and refrigerate instead.
Pin This Recipe!

Easy Mummy Hot Dogs with Crescent Dough: A 20-Minute Guest Favorite
These mummy hot dogs are a fun, quick, and delicious appetizer perfect for Halloween parties or any gathering. Made with crescent dough, hot dogs, and candy eyes, they’re ready in just 20 minutes and always a crowd-pleaser.
- Prep Time: 10 minutes
- Cook Time: 15 minutes
- Total Time: 25 minutes
- Yield: 10-12 servings 1x
- Category: Appetizer
- Cuisine: American
Ingredients
- 2 cans (8 oz each) refrigerated crescent roll dough
- 10–12 hot dogs
- 20–24 candy eyes
- 1 large egg
- 1 tablespoon water
- Optional: everything bagel seasoning, sesame seeds, or flaky salt
- Ketchup, mustard, or favorite dipping sauces for serving
Instructions
- Preheat oven to 375°F (190°C). Line a baking sheet with parchment paper.
- Unroll the crescent dough. If using perforated triangles, press seams together to create a solid sheet. Cut dough into thin strips about 1/2 inch wide.
- Wrap each hot dog with a strip of dough, leaving small gaps between wraps. Do not pull the dough tight; keep it loose to allow puffing. Leave about 1 inch of hot dog exposed at the top for eyes.
- Place wrapped hot dogs on the prepared baking sheet, spacing them about 2 inches apart.
- In a small bowl, whisk together egg and water to make an egg wash. Brush over each mummy, coating all exposed dough.
- Bake for 12-15 minutes, until dough is golden brown and hot dogs are heated through.
- Immediately after baking, gently press two candy eyes into the exposed hot dog at the top of each mummy.
- Let cool for 2-3 minutes before transferring to a serving platter. Serve warm.
Notes
The loose wrap is key for the mummy look. Don’t overwork the dough. For best results, serve within 15 minutes of baking. Can be prepared up to 4 hours ahead and refrigerated before baking.
Nutrition
- Serving Size: 2 mummies
- Calories: 375
- Sugar: 5
- Sodium: 800
- Fat: 22
- Saturated Fat: 8
- Carbohydrates: 30
- Fiber: 1
- Protein: 12
Keywords: mummy hot dogs, crescent dough, Halloween appetizer, easy party food, hot dog recipe, fun finger food


