I want pumpkin cheesecake right now, but the oven is full of cast iron and there’s no way I’m waiting for a water bath to cool. That’s the kind of thought that hits you on a Tuesday afternoon in October when the weather finally turns crisp and all you can think about is that creamy, spiced filling against a buttery crust. Except I don’t have the patience for a traditional cheesecake, and honestly, I don’t think I ever did.
So I started messing around in the kitchen with a block of cream cheese, a can of pumpkin puree, and a box of graham crackers. The first batch was too soft. The second one? Too much gelatin, and it tasted like Jell-O gone wrong. But the third time, something clicked. I let the cream cheese sit out long enough to get truly soft. I used just enough pumpkin to give it that fall flavor without making the filling weepy. And I pressed the crust down like I meant it—firm, even, no crumbling edges.
These No-Bake Pumpkin Cheesecake Bars ended up being the kind of dessert that makes you close your eyes after the first bite. My neighbor texted me for the recipe before I even finished washing the dishes. That’s when I knew I had something worth sharing. No oven required, no stress, just pure fall comfort in a pan.
Why You’ll Love This Recipe
I’ve tested this recipe about six times now, and each batch taught me something new. The first time, I used cold cream cheese straight from the fridge. Big mistake. The filling turned out lumpy and never set right. The second time, I overdid the pumpkin, and the bars tasted more like pumpkin mush than cheesecake. But by round three, I had it dialed in. These bars are the result of actual trial and error, not guesswork.
Here’s why these No-Bake Pumpkin Cheesecake Bars stand out from every other recipe you’ll find:
- Quick & Easy: You only need about 20 minutes of active prep time. The rest is just chilling in the fridge. Perfect for busy weeknights or last-minute holiday entertaining.
- Simple Ingredients: No fancy grocery store runs. Cream cheese, pumpkin puree, graham crackers, butter, sugar, and a few spices. That’s it.
- Perfect for Fall Gatherings: Whether it’s Thanksgiving, a Friendsgiving potluck, or just a cozy Sunday at home, these bars fit right in.
- Crowd-Pleaser: Kids love the creamy texture. Adults appreciate the sophisticated pumpkin spice flavor. Everyone goes back for seconds.
- Unbelievably Delicious: The texture is silky smooth, the crust is perfectly buttery, and the pumpkin flavor is warm without being overwhelming. It’s comfort food in bar form.
What makes these bars different from the rest is the technique. I use a small amount of gelatin to stabilize the filling without making it rubbery. The result is a firm, sliceable bar that still feels luxuriously creamy on your tongue. And the crust? I press it into the pan with the bottom of a measuring cup to get that perfect, even layer that holds everything together.
This isn’t just another pumpkin dessert. It’s the one that disappears first at every gathering. The one people ask for by name. The one that makes you look like a baking genius without ever turning on the oven.
What Ingredients You Will Need
This recipe uses simple, wholesome ingredients that come together to create something truly special. Most of these are pantry staples, especially during fall. Here’s what you’ll need:
For the Graham Cracker Crust
- 2 cups graham cracker crumbs (about 14-16 full sheets, crushed fine)
- 1/2 cup unsalted butter, melted (I use Kerrygold for the richest flavor)
- 1/4 cup granulated sugar
- 1/4 teaspoon salt (balances the sweetness perfectly)
For the Pumpkin Cheesecake Filling
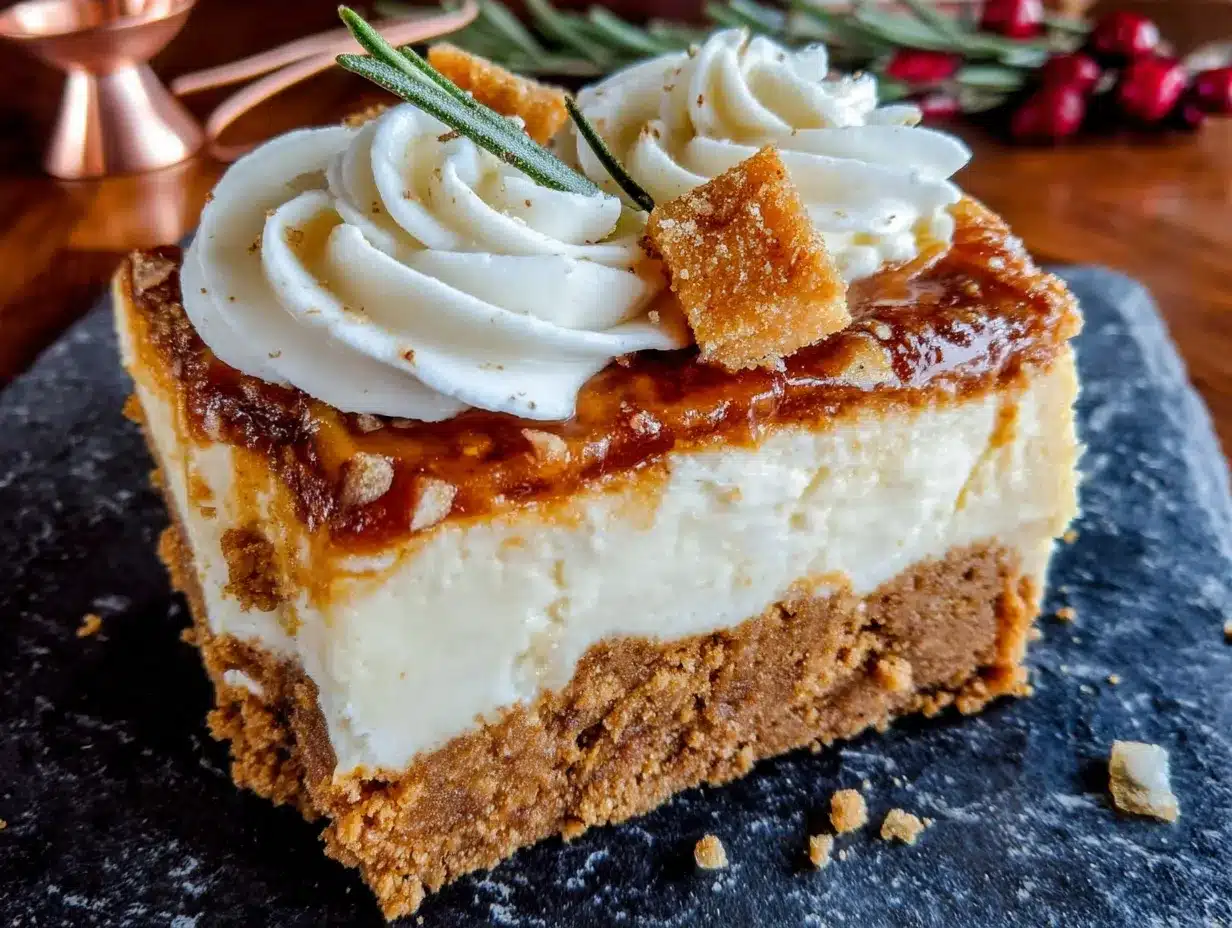
- 16 ounces cream cheese, softened to room temperature (full-fat works best for texture)
- 1 cup pumpkin puree (not pumpkin pie filling—make sure it’s 100% pure pumpkin)
- 1/2 cup granulated sugar
- 1/4 cup packed brown sugar (adds depth and molasses notes)
- 1 teaspoon vanilla extract
- 1 teaspoon pumpkin pie spice (or make your own with cinnamon, nutmeg, ginger, and cloves)
- 1/2 teaspoon ground cinnamon
- 1/4 teaspoon salt
- 1 tablespoon unflavored gelatin powder (I recommend Knox brand)
- 3 tablespoons cold water (for blooming the gelatin)
- 1 cup heavy whipping cream, cold
Optional Toppings
- Whipped cream (homemade is best, but store-bought works in a pinch)
- Caramel sauce (store-bought or homemade)
- Crushed pecans or walnuts
- Extra pumpkin pie spice for dusting
A few notes on ingredients: Use full-fat cream cheese for the creamiest texture. Low-fat versions contain more water and can make the filling runny. For the pumpkin puree, I like Libby’s brand—it’s consistently thick and flavorful. If you’re feeling adventurous, you can substitute the graham crackers with crushed ginger snaps or shortbread cookies for a different flavor profile.
Equipment Needed
You don’t need a fancy kitchen to make these No-Bake Pumpkin Cheesecake Bars. Here’s what you’ll need:
- 9×9-inch square baking pan (an 8×8 works too, just make the bars slightly thicker)
- Parchment paper (for easy lifting and clean slicing)
- Mixing bowls (one large, one medium)
- Electric hand mixer or stand mixer (a whisk and some elbow grease work too, but a mixer makes it easier)
- Measuring cups and spoons
- Spatula (for scraping every bit of filling into the pan)
- Small saucepan or microwave-safe bowl (for melting butter and blooming gelatin)
- Food processor or zip-top bag and rolling pin (for crushing graham crackers)
- Plastic wrap or aluminum foil (for covering while chilling)
If you don’t have a food processor, don’t worry. Place the graham crackers in a zip-top bag and crush them with a rolling pin. It’s a little more work, but honestly, it’s kind of therapeutic. I’ve made this crust both ways, and the texture turns out the same.
For the gelatin, you’ll need a small bowl to bloom it in. A ramekin works perfectly. And if you’re using a metal pan, line it well with parchment paper so the bars lift out cleanly. I learned that the hard way after my first batch stuck to the bottom.
Preparation Method
Let me walk you through this step by step. Trust me, if I can do this without messing it up, you can too.
- Prepare the pan. Line your 9×9-inch baking pan with parchment paper, leaving some overhang on two opposite sides. This creates handles for lifting the bars out later. Set it aside.
- Make the crust. In a medium bowl, combine 2 cups graham cracker crumbs, 1/4 cup granulated sugar, and 1/4 teaspoon salt. Pour in 1/2 cup melted butter and stir until every crumb is coated. The mixture should look like wet sand and hold together when you squeeze it. Press this mixture firmly into the bottom of your prepared pan. Use the bottom of a measuring cup or a flat glass to press it down evenly. Really press hard—a loose crust will crumble when you cut the bars. Place the pan in the refrigerator while you make the filling.
- Bloom the gelatin. In a small bowl, sprinkle 1 tablespoon unflavored gelatin powder over 3 tablespoons cold water. Let it sit for 5-10 minutes until it becomes thick and spongy. This is called blooming, and it’s crucial for smooth, lump-free gelatin.
- Warm the gelatin. After blooming, heat the gelatin mixture in the microwave for 10-15 seconds or in a small saucepan over low heat for about 30 seconds. Stir until it becomes liquid again. Be careful not to boil it—you just want it warm enough to dissolve. Set it aside to cool slightly.
- Beat the cream cheese. In a large bowl, beat 16 ounces softened cream cheese with an electric mixer on medium speed until smooth and creamy, about 2 minutes. Scrape down the sides of the bowl. Add 1/2 cup granulated sugar and 1/4 cup packed brown sugar, and beat until combined, about 1 minute more.
- Add the pumpkin and spices. Add 1 cup pumpkin puree, 1 teaspoon vanilla extract, 1 teaspoon pumpkin pie spice, 1/2 teaspoon ground cinnamon, and 1/4 teaspoon salt. Beat on medium speed until everything is well combined and smooth. The mixture should be a beautiful, deep orange color. Taste it here—it should be sweet, spiced, and delicious.
- Incorporate the gelatin. With the mixer running on low speed, slowly pour in the cooled liquid gelatin. Mix just until combined, about 30 seconds. Don’t overmix, or the gelatin can start to set prematurely.
- Whip the cream. In a separate bowl, beat 1 cup cold heavy whipping cream on medium-high speed until stiff peaks form. This takes about 3-4 minutes. You’re looking for peaks that stand up straight when you lift the beaters. Be careful not to overwhip into butter—stop as soon as it’s stiff.
- Fold everything together. Gently fold the whipped cream into the pumpkin-cream cheese mixture. Use a spatula and a gentle hand. Fold until you don’t see any white streaks, but don’t stir vigorously. You want to keep the air in the whipped cream for a light, mousse-like texture.
- Assemble the bars. Remove the crust from the refrigerator. Pour the filling over the crust and spread it evenly with a spatula. Give the pan a gentle tap on the counter to release any air bubbles.
- Chill. Cover the pan with plastic wrap or foil and refrigerate for at least 6 hours, but overnight is best. The bars need this time to set properly. If you try to cut them too early, they’ll be soft and messy. Patience pays off here.
- Slice and serve. Once fully set, lift the bars out of the pan using the parchment paper overhang. Place on a cutting board and use a sharp knife to slice into squares. For clean cuts, wipe the knife clean between each slice. Serve cold with whipped cream, caramel sauce, or a dusting of cinnamon.
Cooking Tips & Techniques
I’ve made this recipe enough times to know exactly where things can go wrong. Here are the tips I wish someone had told me:
Room temperature cream cheese is non-negotiable. I know, I know, you’re in a hurry. But cold cream cheese creates lumps that never fully smooth out. Let it sit on the counter for at least an hour before you start. If you’re really pressed for time, cut it into small cubes and let them sit for 20 minutes.
Don’t skip the gelatin. I tried making these bars without it once, thinking the cream cheese and whipped cream would be enough. They weren’t. The bars were too soft to slice cleanly and had a texture more like pudding than cheesecake. The gelatin gives these bars that perfect sliceable consistency without making them rubbery.
Press the crust firmly. This is where most people mess up. A loose crust falls apart when you cut the bars. Use the bottom of a measuring cup and really lean into it. You want the crust to be compact and even. I press for a full 30 seconds, moving the cup around to cover the entire surface.
Let the bars chill overnight. I know it’s hard to wait. But 6 hours is the absolute minimum, and overnight gives you the best texture. The flavors meld together, the gelatin fully sets, and the crust firms up perfectly. If you cut them too early, you’ll end up with a mess.
Use a sharp knife for clean slices. Run the knife under hot water, wipe it dry, then slice. Wipe the blade clean between each cut. This gives you those gorgeous, Instagram-worthy bars with clean edges.
Variations & Adaptations
One of the best things about this recipe is how easy it is to adapt. Here are some variations I’ve tried and loved:
Gluten-Free Version
Swap the graham crackers for gluten-free graham crackers or use crushed gluten-free shortbread cookies. The rest of the recipe is naturally gluten-free, so you’re good to go. I’ve made this for friends with celiac disease, and they couldn’t tell the difference.
Vegan Option
Use vegan cream cheese (I like Kite Hill or Violife) and coconut cream instead of heavy whipping cream. For the gelatin, use agar agar powder instead—use 1 tablespoon agar agar bloomed in 3 tablespoons water, then heated until dissolved. The texture is slightly different, but still delicious.
Pumpkin Spice Latte Bars
Add 1 tablespoon instant espresso powder to the filling along with the spices. The coffee flavor enhances the pumpkin and makes these taste like your favorite fall coffee drink. I tried this on a whim one morning, and it’s now my husband’s favorite version.
Gingersnap Crust
Instead of graham crackers, use crushed gingersnap cookies. The spicy, molasses flavor of the ginger snaps pairs beautifully with the pumpkin filling. This is my go-to for Thanksgiving because it feels a little more sophisticated.
No-Gelatin Version
If you prefer not to use gelatin, you can substitute it with 1 tablespoon cornstarch mixed with 2 tablespoons water. Cook the cornstarch mixture in a small saucepan until it thickens, then let it cool before adding it to the filling. The texture will be a bit softer, but still sliceable after a full overnight chill.
Serving & Storage Suggestions
These No-Bake Pumpkin Cheesecake Bars are best served cold, straight from the refrigerator. The texture is firm but creamy, and the flavors are more pronounced when they’re chilled. I like to let them sit at room temperature for about 5 minutes before serving to take the chill off, but that’s a personal preference.
For presentation, I top each bar with a dollop of whipped cream, a drizzle of caramel sauce, and a light dusting of pumpkin pie spice. If I’m feeling fancy, I add a few candied pecans on top. The contrast of the creamy filling, the crunchy nuts, and the sweet caramel is absolutely divine.
These bars pair beautifully with a hot cup of coffee, a chai latte, or a glass of cold milk. They’re also fantastic alongside other fall desserts like peach cobbler or peach bars for a dessert spread that covers all the bases.
Storage: Store the bars in an airtight container in the refrigerator for up to 5 days. The flavor actually improves after the first day as the spices meld with the cream cheese. If you’re stacking them, place a sheet of parchment paper between layers to prevent sticking.
Freezing: These bars freeze beautifully. Wrap individual bars tightly in plastic wrap, then place them in a freezer-safe bag or container. They’ll keep for up to 3 months. To thaw, transfer a bar to the refrigerator overnight. Don’t microwave them—they’ll get soggy.
Make-Ahead Tip: These bars are perfect for make-ahead entertaining. You can prepare them up to 2 days in advance and keep them in the refrigerator. Just add the toppings right before serving for the freshest presentation.
Nutritional Information & Benefits
Here’s the estimated nutritional breakdown for one bar (based on 9 servings):
- Calories: 385
- Fat: 26g
- Saturated Fat: 16g
- Carbohydrates: 34g
- Sugar: 24g
- Protein: 6g
- Fiber: 1g
- Sodium: 310mg
While these bars are definitely a treat, they do offer some nutritional benefits. Pumpkin is packed with vitamin A, which supports eye health and immune function. It’s also a good source of fiber and antioxidants. The cream cheese provides calcium and protein, while the spices—cinnamon, nutmeg, ginger—have anti-inflammatory properties.
If you’re watching your sugar intake, you can reduce the sugar to 1/2 cup total without sacrificing too much texture. The pumpkin adds natural sweetness, so the bars won’t taste bland. For a lower-fat option, use Neufchâtel cheese instead of cream cheese and light coconut cream instead of heavy whipping cream.
These bars are vegetarian-friendly but not vegan (unless you use the substitutions mentioned above). They contain dairy, gluten (unless you use gluten-free graham crackers), and gelatin, so they’re not suitable for a strict vegetarian or halal diet without modifications.
FAQs
Can I use pumpkin pie filling instead of pumpkin puree?
I wouldn’t recommend it. Pumpkin pie filling is pre-sweetened and spiced, so it throws off the sugar and spice balance in this recipe. The texture is also different—pumpkin pie filling is thicker and contains stabilizers that can make the cheesecake filling gummy. Stick with 100% pure pumpkin puree for the best results.
Why are my bars too soft and not setting?
This usually happens for one of three reasons: the gelatin wasn’t bloomed properly, the bars weren’t chilled long enough, or the cream cheese was too cold. Make sure you bloom the gelatin for the full 5-10 minutes, chill the bars for at least 6 hours (overnight is better), and let your cream cheese come to room temperature before starting.
Can I make these bars dairy-free?
Yes! Use vegan cream cheese, coconut cream (the solid part from a can of full-fat coconut milk) instead of heavy cream, and a dairy-free butter alternative for the crust. For the gelatin, use agar agar powder as a substitute. The texture will be slightly different, but still delicious and creamy.
How do I get clean, perfect slices?
Use a sharp knife and run it under hot water before each cut. Wipe the blade dry and clean between slices. This prevents the filling from sticking to the knife and gives you those gorgeous, clean edges. Chilling the bars overnight also makes slicing much easier.
Can I double this recipe for a larger pan?
Absolutely. Double all the ingredients and use a 9×13-inch pan. The chilling time might increase slightly—give it at least 8 hours or overnight. You’ll get about 16-20 bars depending on how you slice them. This is my go-to for larger gatherings and holiday parties.
Conclusion
These No-Bake Pumpkin Cheesecake Bars have become my fall signature dessert, and for good reason. They’re creamy, spiced perfectly, and come together without ever turning on the oven. The first time I brought them to a Friendsgiving, they disappeared before the pie even got sliced. People asked for the recipe before they even finished eating.
What I love most about this recipe is how forgiving it is. You can adapt it to your dietary needs, switch up the crust, or add your favorite toppings. It’s a canvas for fall flavors, and it always delivers. Whether you’re making these for Thanksgiving, a cozy night in, or just because you’re craving something pumpkin, they won’t let you down.
I’d love to hear how these turn out for you. Drop a comment below and let me know if you tried any variations, what toppings you used, or just how fast they disappeared at your house. And if you’re looking for more no-bake desserts, check out my no-bake peanut butter pie or these no-bake Oreo dessert for more easy, crowd-pleasing treats.
Happy fall baking—or rather, happy fall no-baking! Trust me, your oven will thank you.
Pin This Recipe!
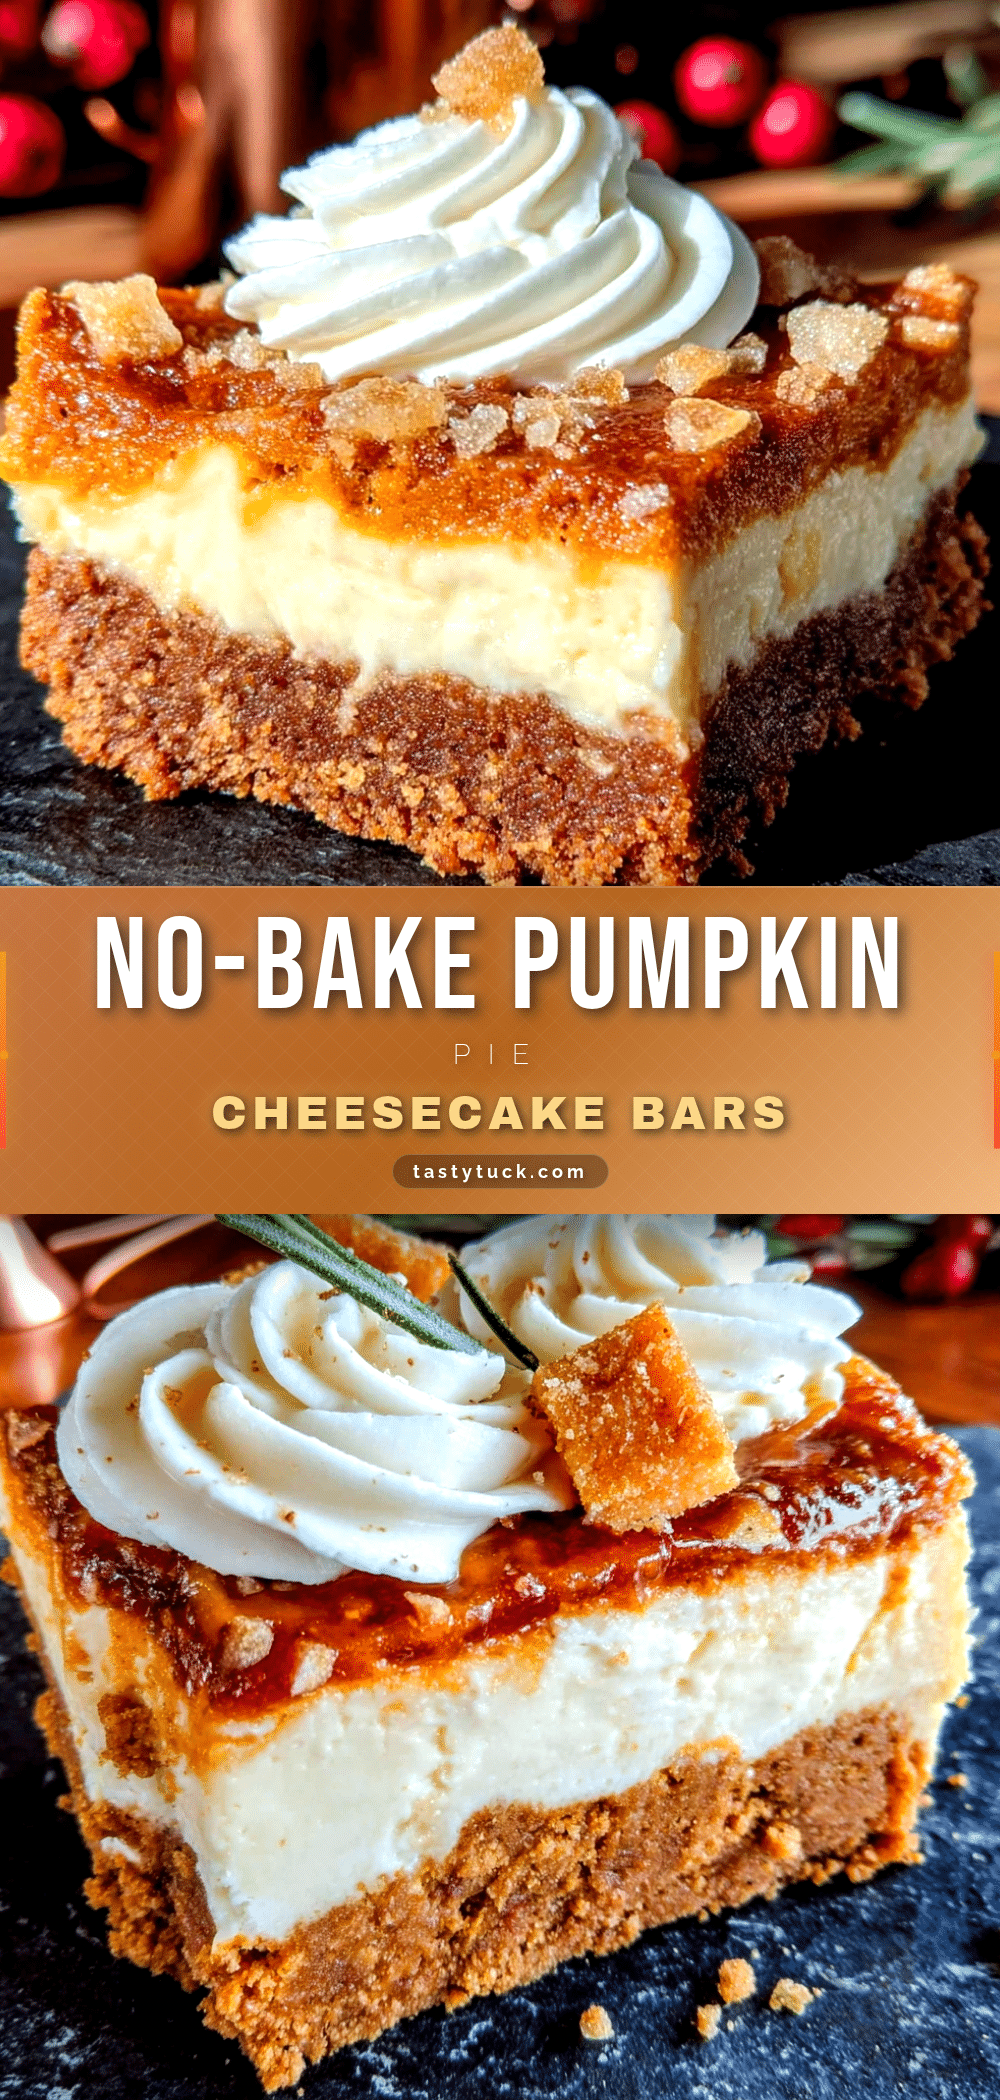
Easy No-Bake Pumpkin Cheesecake Bars Recipe
These No-Bake Pumpkin Cheesecake Bars are creamy, spiced perfectly, and come together without ever turning on the oven. They’re the perfect fall dessert for busy weeknights or holiday gatherings.
- Prep Time: 20 minutes
- Cook Time: 0 minutes
- Total Time: 6 hours 20 minutes (includes chilling)
- Yield: 9 servings 1x
- Category: Dessert
- Cuisine: American
Ingredients
- 2 cups graham cracker crumbs (about 14–16 full sheets, crushed fine)
- 1/2 cup unsalted butter, melted
- 1/4 cup granulated sugar
- 1/4 teaspoon salt
- 16 ounces cream cheese, softened to room temperature
- 1 cup pumpkin puree (not pumpkin pie filling)
- 1/2 cup granulated sugar
- 1/4 cup packed brown sugar
- 1 teaspoon vanilla extract
- 1 teaspoon pumpkin pie spice
- 1/2 teaspoon ground cinnamon
- 1/4 teaspoon salt
- 1 tablespoon unflavored gelatin powder
- 3 tablespoons cold water
- 1 cup heavy whipping cream, cold
Instructions
- Prepare the pan. Line your 9×9-inch baking pan with parchment paper, leaving some overhang on two opposite sides. Set aside.
- Make the crust. In a medium bowl, combine 2 cups graham cracker crumbs, 1/4 cup granulated sugar, and 1/4 teaspoon salt. Pour in 1/2 cup melted butter and stir until every crumb is coated. Press this mixture firmly into the bottom of your prepared pan. Place the pan in the refrigerator while you make the filling.
- Bloom the gelatin. In a small bowl, sprinkle 1 tablespoon unflavored gelatin powder over 3 tablespoons cold water. Let it sit for 5-10 minutes until it becomes thick and spongy.
- Warm the gelatin. After blooming, heat the gelatin mixture in the microwave for 10-15 seconds or in a small saucepan over low heat for about 30 seconds. Stir until it becomes liquid again. Set aside to cool slightly.
- Beat the cream cheese. In a large bowl, beat 16 ounces softened cream cheese with an electric mixer on medium speed until smooth and creamy, about 2 minutes. Add 1/2 cup granulated sugar and 1/4 cup packed brown sugar, and beat until combined, about 1 minute more.
- Add the pumpkin and spices. Add 1 cup pumpkin puree, 1 teaspoon vanilla extract, 1 teaspoon pumpkin pie spice, 1/2 teaspoon ground cinnamon, and 1/4 teaspoon salt. Beat on medium speed until well combined and smooth.
- Incorporate the gelatin. With the mixer running on low speed, slowly pour in the cooled liquid gelatin. Mix just until combined, about 30 seconds.
- Whip the cream. In a separate bowl, beat 1 cup cold heavy whipping cream on medium-high speed until stiff peaks form, about 3-4 minutes.
- Fold everything together. Gently fold the whipped cream into the pumpkin-cream cheese mixture using a spatula until no white streaks remain.
- Assemble the bars. Remove the crust from the refrigerator. Pour the filling over the crust and spread it evenly with a spatula. Give the pan a gentle tap on the counter to release any air bubbles.
- Chill. Cover the pan with plastic wrap or foil and refrigerate for at least 6 hours, but overnight is best.
- Slice and serve. Once fully set, lift the bars out of the pan using the parchment paper overhang. Place on a cutting board and use a sharp knife to slice into squares. Serve cold with whipped cream, caramel sauce, or a dusting of cinnamon.
Notes
Room temperature cream cheese is non-negotiable. Don’t skip the gelatin. Press the crust firmly. Let the bars chill overnight for best texture. Use a sharp knife for clean slices.
Nutrition
- Serving Size: 1 bar
- Calories: 385
- Sugar: 24
- Sodium: 310
- Fat: 26
- Saturated Fat: 16
- Carbohydrates: 34
- Fiber: 1
- Protein: 6
Keywords: no-bake pumpkin cheesecake bars, pumpkin cheesecake bars, no-bake pumpkin dessert, fall dessert, pumpkin bars, easy pumpkin cheesecake


