The last grain of rice was gone, and my husband was scraping the pan with a fork. Not even mad about it. That’s when I knew this one-pan garlic butter chicken and rice was sticking around for good.
Honestly, I wasn’t trying to create anything special that Tuesday night. I had a pack of chicken thighs in the fridge, a head of garlic that was starting to sprout, and a hankering for something warm that wouldn’t dirty every pot in my kitchen. You know those nights? Where you just want dinner to happen without it feeling like a whole production.
I’d made plenty of chicken and rice dishes before, but they always came out one of two ways: the rice was mushy, or the chicken was dry. Sometimes both. That’s a sad plate of food, let me tell you. So I started playing around with the order of operations, the liquid ratio, and — here’s the real secret — the way garlic butter works when it’s not just a finishing touch but the backbone of the whole dish.
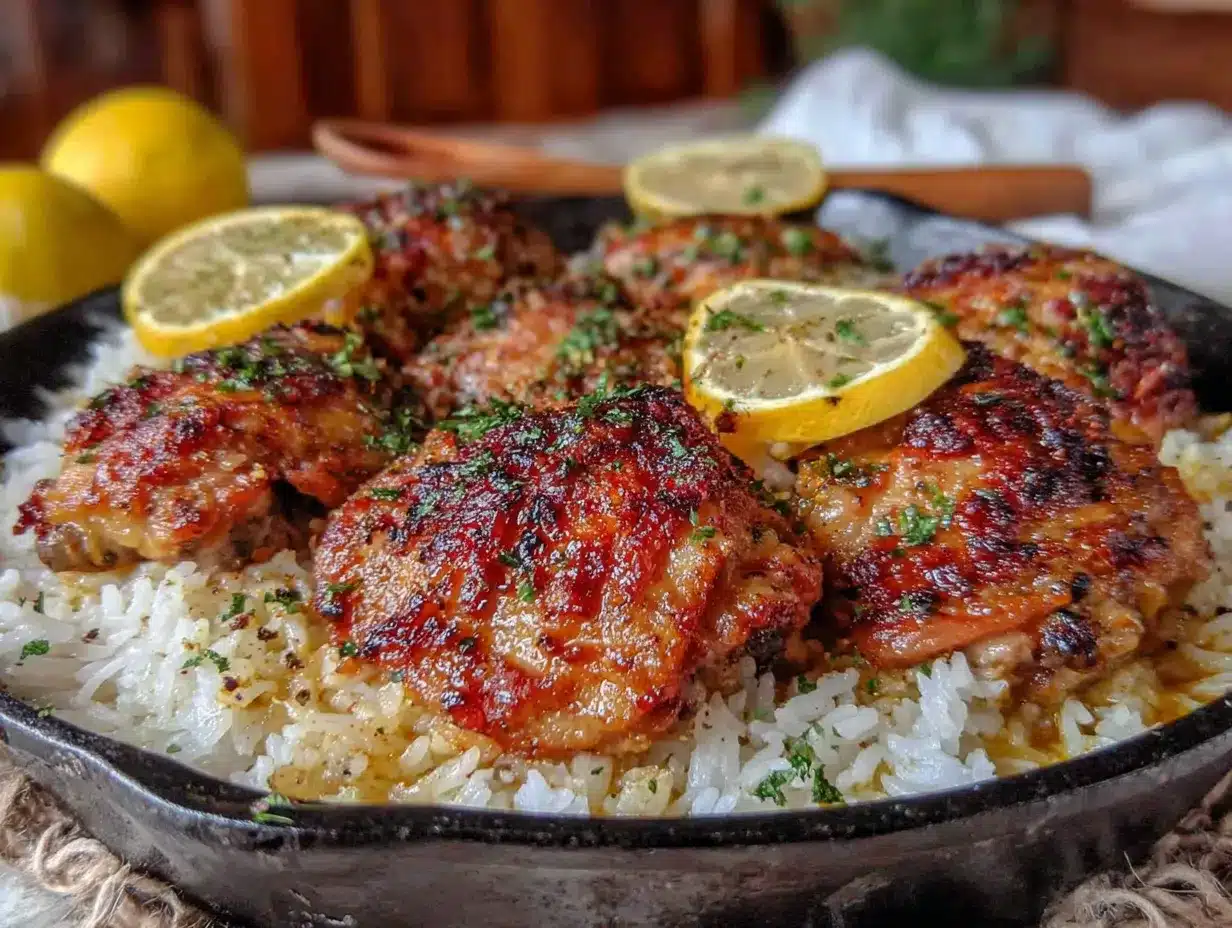
What came out of that pan was the kind of dinner that makes you close your eyes after the first bite. The rice was fluffy, each grain separate and slick with buttery garlic flavor. The chicken had that golden-brown crust on the outside and was so tender it practically fell apart. And the best part? One pan. That’s it. No side dishes to make, no extra pots to scrub, no complicated techniques.
This easy one-pan garlic butter chicken and rice has become my go-to for those nights when I want something that feels like a hug on a plate but doesn’t require a culinary degree or a sink full of dishes. It’s the recipe I make when I need a win in the kitchen. And honestly? It delivers every single time.
Why You’ll Love This Recipe
Let me tell you why this one-pan garlic butter chicken and rice is about to become your new weeknight hero. I’ve tested this recipe more times than I care to admit — through burnt batches, watery rice, and one particularly memorable incident where I forgot the garlic entirely. Yes, that happened. But each failure taught me something, and what I’m sharing with you is the perfected version.
- One Pan, Minimal Mess: Everything cooks in a single skillet or Dutch oven. That means less time washing dishes and more time actually enjoying your dinner. My sink thanks me every time I make this.
- Simple Pantry Ingredients: You probably already have most of what you need. Chicken, rice, garlic, butter, broth, and a few seasonings. No fancy trips to specialty stores required.
- Perfect for Busy Weeknights: From start to finish, this comes together in about 45 minutes. Most of that time is hands-off while the rice does its thing.
- Family-Approved: I’ve served this to picky eaters, dinner guests, and my in-laws. Every single person went back for seconds. It’s one of those rare dishes that pleases everyone at the table.
- Unbelievably Flavorful: The garlic butter isn’t just a drizzle on top — it’s infused into every layer of this dish. The rice absorbs all that savory goodness, and the chicken gets perfectly browned before simmering to tender perfection.
What sets this recipe apart from other chicken and rice dishes is the technique. Instead of dumping everything in at once and hoping for the best, we’re building flavor in stages. The chicken gets a proper sear, the garlic blooms in butter just until fragrant, and the rice toasts briefly before the liquid goes in. These small steps make a huge difference in the final dish.
This isn’t just another weeknight dinner — it’s the kind of meal that makes you look forward to cooking again. It’s comfort food that doesn’t weigh you down, with flavors that feel both familiar and somehow elevated. And the best part? You get to eat it straight from the pan if you want. No judgment here.
What Ingredients You Will Need
This recipe uses simple, wholesome ingredients that work together to create something genuinely special. The magic is in how they’re combined, not in any exotic or hard-to-find items. Here’s what you’ll need:
- Chicken Thighs (1.5 lbs / 680g) — Bone-in, skin-on thighs are my preference here. The skin gets beautifully crispy during the sear, and the bones add extra flavor to the rice as it cooks. You can use boneless, skinless thighs if you prefer, just reduce the cooking time slightly. I’ve also made this with chicken breasts, but thighs stay juicier and more forgiving.
- Long-Grain White Rice (1.5 cups / 300g) — Basmati or jasmine work beautifully. The key is to rinse the rice thoroughly before using it. This removes excess starch and prevents the rice from turning gummy. I learned this the hard way after serving what I can only describe as garlic butter porridge. Not my finest moment.
- Garlic (8-10 cloves) — Yes, that’s a lot. Don’t skimp. The garlic mellows as it cooks, becoming sweet and nutty rather than sharp and aggressive. I’ve used pre-minced garlic in a pinch, but fresh cloves really do make a difference here. Trust me on this one.
- Unsalted Butter (4 tablespoons / 56g) — We’re using butter as both a cooking fat and a flavor base. Using unsalted butter lets you control the sodium level. If you only have salted butter, just reduce the added salt by about ¼ teaspoon.
- Chicken Broth (2.5 cups / 590ml) — Low-sodium is best so you can control the seasoning. I’ve used both boxed broth and homemade, and both work well. In a pinch, you can use water with an extra bouillon cube, but broth gives you deeper flavor.
- Yellow Onion (1 medium) — Diced small. The onion adds sweetness and depth to the rice. It practically melts into the dish as it cooks, so don’t worry about chunky bits of onion if that’s not your thing.
- Dried Thyme (1 teaspoon) — Thyme and chicken are a classic pairing. The earthy, slightly floral notes complement the garlic butter beautifully. You can substitute with dried rosemary or oregano if that’s what you have.
- Paprika (1 teaspoon) — I use sweet paprika for color and a mild, warm flavor. Smoked paprika would also work if you want a deeper, smokier profile.
- Salt and Black Pepper — To taste. I usually start with 1 teaspoon of salt and ½ teaspoon of pepper, then adjust at the end.
- Fresh Parsley (for garnish) — Optional, but highly recommended. A sprinkle of fresh parsley right before serving adds color and a fresh counterpoint to all that rich, buttery goodness.
- Lemon Wedges (for serving) — Also optional, but a squeeze of lemon juice right before eating brightens up the whole dish. It cuts through the richness and makes the flavors pop.
For the best results, I recommend using Swanson chicken broth for its consistent flavor, and Land O’Lakes unsalted butter for its creaminess. But honestly, this recipe is forgiving enough that even with store-brand ingredients, you’ll end up with something delicious.
Equipment Needed
One of the best things about this recipe is how little equipment it requires. Here’s what you’ll need:
- Large Skillet or Dutch Oven (12-inch / 30cm) — This is your main vessel. A heavy-bottomed pan with a tight-fitting lid is ideal. I use my trusty cast iron skillet for this recipe, but a stainless steel or non-stick pan with an oven-safe lid works just as well. The key is that it needs to hold everything comfortably without crowding.
- Sharp Knife and Cutting Board — For prepping your garlic, onion, and parsley. A good chef’s knife makes this part quick and painless.
- Measuring Cups and Spoons — Accuracy matters here, especially with the rice-to-liquid ratio. I’ve learned that eyeballing it leads to sad, crunchy rice.
- Wooden Spoon or Spatula — For stirring and scraping up those delicious browned bits from the bottom of the pan. Those bits are flavor gold.
- Tongs — For flipping the chicken and handling it without piercing the skin. Tongs give you better control than a fork.
- Fine-Mesh Strainer — For rinsing the rice. This step is non-negotiable if you want fluffy, separate grains instead of a gluey mess.
If you don’t have a Dutch oven, don’t worry. A deep, wide skillet with a lid will work perfectly. Just make sure it’s oven-safe if you plan to finish the dish in the oven. And if your skillet doesn’t have a lid, a sheet of aluminum foil tightly crimped around the edges works as a great substitute.
Preparation Method
Alright, let’s get cooking. This one-pan garlic butter chicken and rice comes together in a few simple stages. Take your time with each step — the payoff is worth it.
Step 1: Prep Your Ingredients
Start by rinsing 1.5 cups (300g) of long-grain rice under cold water in a fine-mesh strainer until the water runs clear. This usually takes about 30 seconds to a minute. Set the rice aside to drain. While it’s draining, dice your onion, peel and mince your garlic cloves, and pat your chicken thighs dry with paper towels. Season the chicken generously on both sides with salt, pepper, and ½ teaspoon of the paprika.
Step 2: Sear the Chicken
Place your skillet or Dutch oven over medium-high heat and add 2 tablespoons of the butter. Once the butter is melted and sizzling (but not browning), place the chicken thighs skin-side down in the pan. Don’t crowd them — work in batches if needed. Let them cook undisturbed for 5-6 minutes until the skin is golden brown and crispy. Flip and cook for another 3-4 minutes on the other side. The chicken won’t be fully cooked through yet, and that’s okay. Transfer the chicken to a plate and set aside.
Step 3: Sauté the Aromatics
Reduce the heat to medium. There should be about 2 tablespoons of rendered chicken fat and butter left in the pan. If there’s more, pour off the excess. If there’s less, add another tablespoon of butter. Add the diced onion and cook for 3-4 minutes, stirring occasionally, until softened and translucent. Add the minced garlic and cook for exactly 30 seconds — just until fragrant. Garlic burns fast, and burnt garlic tastes bitter. Don’t walk away during this step.
Step 4: Toast the Rice
Add the rinsed and drained rice to the pan. Stir it into the onion and garlic mixture, letting it toast for about 2 minutes. You’ll notice the rice grains start to turn slightly translucent at the edges and smell nutty. This step is crucial for preventing mushy rice later. Stir constantly to keep the garlic from burning.
Step 5: Add the Liquid
Pour in 2.5 cups (590ml) of chicken broth. Add the remaining ½ teaspoon of paprika, the dried thyme, and ½ teaspoon of salt (more or less to taste). Give everything a good stir, scraping up any browned bits from the bottom of the pan — that’s where so much flavor lives. Bring the liquid to a gentle boil.
Step 6: Nestle the Chicken Back In
Once the broth is boiling, place the seared chicken thighs back into the pan, nestling them into the rice. The rice should be mostly submerged in liquid, with the chicken sitting on top. If the liquid level looks low, add a splash more broth or water. Cover the pan with a tight-fitting lid.
Step 7: Simmer and Cook
Reduce the heat to low. Let everything simmer gently for 20-25 minutes. Don’t lift the lid during this time — I know it’s tempting, but all that steam is what cooks the rice perfectly. Set a timer and walk away. After 20 minutes, check the rice. It should be tender and have absorbed most of the liquid. If it’s still a bit firm, cover and cook for another 5 minutes.
Step 8: Rest and Finish
Once the rice is tender, turn off the heat. Remove the lid and let the pan rest for 5 minutes. This allows any remaining steam to finish cooking the rice and lets the flavors settle. During this time, the rice will continue to absorb any last bits of liquid. After resting, fluff the rice gently with a fork. Taste and adjust seasoning if needed. Dot the remaining 2 tablespoons of butter over the top of the chicken and rice. The residual heat will melt it into a glorious, glossy finish.
Step 9: Garnish and Serve
Sprinkle with fresh chopped parsley and serve with lemon wedges on the side. A squeeze of lemon right before eating really makes the dish sing. Serve straight from the pan for maximum cozy vibes.
One thing I’ve learned from making this dozens of times: patience is your friend. Don’t rush the sear, don’t skip the rice toasting, and for the love of all things good, don’t lift that lid while it’s simmering. Trust the process, and you’ll be rewarded with the best one-pan garlic butter chicken and rice of your life.
Cooking Tips & Techniques
After making this recipe more times than I can count, I’ve picked up a few tricks that make a real difference. Here are my best tips for perfect results every time:
Don’t Skip the Rice Rinsing
I know it’s an extra step, but rinsing the rice until the water runs clear removes the surface starch that turns rice gluey. The first time I made this, I was in a hurry and skipped this step. The result was a sticky, clumpy mess that looked more like risotto than fluffy rice. Learn from my mistakes.
Get That Sear Right
A proper sear on the chicken isn’t just about appearances — it’s about flavor. Those browned bits on the bottom of the pan after searing are called fond, and they’re pure flavor gold. When you add the broth later, those bits dissolve into the liquid and infuse the rice with deep, savory notes. If your chicken isn’t browning, your pan might not be hot enough, or you might be crowding it. Give the chicken space.
Watch Your Garlic
Garlic is the star of this dish, but it’s also the most temperamental ingredient. It goes from fragrant to burnt in seconds. When you add the minced garlic to the pan, keep it moving and don’t let it sit still. Thirty seconds is plenty of time. If you see it turning brown, pull the pan off the heat immediately.
Resist the Lid-Lifting Urge
I can’t stress this enough. Every time you lift the lid, steam escapes, and that steam is what cooks your rice. Set a timer, walk away, and don’t peek. If you’re worried about the liquid level, trust the ratio. It’s been tested.
Let It Rest
That 5-minute rest at the end isn’t optional. It allows the rice to finish absorbing any remaining liquid and lets the chicken juices redistribute. Cutting into the chicken right away will result in dry meat. Patience, my friend.
I once made the mistake of cranking the heat to high to speed up the cooking process. The result? Burnt bottom, undercooked rice, and sad, dry chicken. Low and slow is the way to go. Trust the method, and you’ll be rewarded with a perfect dinner every single time.
Variations & Adaptations
One of the things I love about this one-pan garlic butter chicken and rice is how adaptable it is. Here are some variations I’ve tried and loved:
Vegetarian Version
Swap the chicken for a can of drained chickpeas or a block of cubed firm tofu (pressed and pan-fried until golden). Use vegetable broth instead of chicken broth. The garlic butter rice is so flavorful on its own that you won’t miss the meat. I’ve made this for my vegetarian friends, and they always ask for the recipe.
Spicy Kick
Add ½ teaspoon of red pepper flakes along with the garlic, or swap the sweet paprika for smoked paprika and add a pinch of cayenne pepper. The heat cuts through the richness of the butter beautifully. My husband loves this version — he adds extra chili flakes at the table like a madman.
Herb Garden Variation
In addition to the thyme, add a sprig of fresh rosemary and a couple of fresh sage leaves to the pan when you add the broth. Remove the herb sprigs before serving. The aromatics infuse the rice with an earthy, almost woodsy flavor that’s incredible with the garlic butter.
Brown Rice Option
If you prefer brown rice, increase the broth to 3 cups (710ml) and extend the cooking time to 40-45 minutes. Brown rice needs more liquid and more time to become tender. The result is nuttier and chewier, with a different but equally delicious texture.
Vegetable Add-Ins
Feel free to add vegetables to make it a complete one-pan meal. Sliced mushrooms, diced bell peppers, or frozen peas (added in the last 5 minutes of cooking) all work beautifully. I’ve added a handful of baby spinach right at the end, stirring until it wilts into the rice. It’s an easy way to sneak in some greens.
My personal favorite variation is adding a handful of frozen peas and a squeeze of lemon juice at the end. The sweetness of the peas and the brightness of the lemon balance the rich garlic butter perfectly. It’s become my go-to version for spring and summer dinners.
Serving & Storage Suggestions
This one-pan garlic butter chicken and rice is a complete meal on its own, but here are some ideas for serving and storing it:
Serving Suggestions
Serve this dish straight from the pan for a cozy, family-style dinner. I like to set the pan on a trivet in the middle of the table with a stack of plates and let everyone help themselves. The lemon wedges on the side are non-negotiable in my house — that squeeze of acid really wakes up all the flavors.
If you want to round out the meal, a simple green salad with a lemon vinaigrette is a great side. The freshness of the salad contrasts nicely with the rich, buttery rice. You could also serve it with steamed green beans or roasted asparagus for some extra vegetables on the plate.
For a heartier meal, I’ve been known to serve this alongside a bowl of comforting Olive Garden loaded pasta e fagioli soup for the ultimate cozy dinner spread. The hearty soup and the savory chicken rice make for a satisfying combo on chilly nights.
Storage Instructions
Store any leftovers in an airtight container in the refrigerator for up to 4 days. The flavors actually meld and deepen overnight, so leftovers are often even better the next day. I’ve been known to make a double batch just so I have lunch for the week.
Reheating Tips
The best way to reheat this dish is in a skillet over medium-low heat with a splash of chicken broth or water. Add about 2 tablespoons of liquid per serving, cover, and heat for 5-7 minutes, stirring occasionally. This brings back the moisture without making the rice mushy. You can also reheat individual portions in the microwave — just cover the bowl with a damp paper towel to create steam.
Freezer Instructions
This dish freezes surprisingly well. Let it cool completely, then transfer to a freezer-safe container. It will keep for up to 3 months. To thaw, move it to the refrigerator overnight. Reheat using the stovetop method described above. I like to freeze individual portions for quick lunches on busy days.
One note: the rice will soften slightly after freezing and reheating, but the flavor remains excellent. If you’re planning to freeze this, you might want to undercook the rice by just a couple of minutes initially so it holds up better after thawing.
Nutritional Information & Benefits
Here’s the estimated nutritional breakdown for one serving of this one-pan garlic butter chicken and rice (based on 4 servings):
| Nutrient | Amount Per Serving |
|---|---|
| Calories | 485 |
| Protein | 32g |
| Carbohydrates | 48g |
| Fat | 18g |
| Saturated Fat | 8g |
| Fiber | 1g |
| Sodium | 720mg |
This dish offers a good balance of protein and carbohydrates, making it a satisfying meal that will keep you full for hours. The chicken provides high-quality protein essential for muscle repair and maintenance. Garlic is known for its potential immune-boosting properties and contains compounds that may support heart health. Butter, while high in saturated fat, also provides fat-soluble vitamins A, D, E, and K.
For those watching their sodium intake, you can reduce the salt and use low-sodium broth to bring the numbers down. This recipe is naturally gluten-free, making it a great option for those with celiac disease or gluten sensitivity. It’s also nut-free, egg-free, and soy-free, though as always, check your specific ingredient labels to be sure.
If you’re looking for a lighter option, you can reduce the butter to 3 tablespoons total and use chicken breast instead of thighs. The dish will still be delicious, just a bit leaner. And if you’re following a low-carb or keto diet, this might not be the best fit due to the rice, but you could try serving the garlic butter chicken over cauliflower rice instead.
Conclusion
This easy one-pan garlic butter chicken and rice has become a staple in my kitchen for good reason. It’s the kind of recipe that proves you don’t need fancy ingredients or complicated techniques to make something genuinely delicious. Just good food, cooked with care, in one pan.
I love that this recipe is forgiving enough for a beginner cook but satisfying enough for someone who’s been in the kitchen for years. It’s the meal I turn to when I need a guaranteed win — whether it’s a busy Tuesday night, a lazy Sunday, or when I’m cooking for friends and want to look like I tried harder than I actually did.
If you’re looking for another one-pan wonder to add to your rotation, I also love making this easy loaded BBQ chicken crockpot recipe for those days when I want dinner to cook itself while I’m at work. Both recipes prove that simple ingredients and smart techniques are all you need for a memorable meal.
I’d love to hear how this turns out for you. Did you make any substitutions? Add any extra vegetables? Find a new favorite way to serve it? Drop a comment below and let me know. And if you share a photo on social media, tag me — I love seeing your creations.
Now go ahead, grab that skillet, and make yourself some dinner. You deserve it.
Frequently Asked Questions
Can I use chicken breast instead of chicken thighs?
Absolutely. Boneless, skinless chicken breasts will work, but they cook faster and can dry out more easily. Reduce the initial sear time to 3-4 minutes per side, and check for doneness after 18-20 minutes of simmering. The internal temperature should reach 165°F (74°C).
Why is my rice still crunchy after 20 minutes?
A few possibilities: your heat might have been too low, your lid might not have been tight enough (letting steam escape), or you might have used a different type of rice that requires more cooking time. If your rice is still crunchy, add ¼ cup of broth or water, cover tightly, and cook for another 5-7 minutes.
Can I make this in a slow cooker or Instant Pot?
Yes, with adjustments. For the Instant Pot, use the sauté function to sear the chicken and cook the aromatics, then add the rice and broth. Pressure cook on high for 5 minutes with a natural release. For a slow cooker, sear the chicken first, then add all ingredients and cook on low for 4-5 hours or high for 2-3 hours. Note that slow cooker rice can be mushier than stovetop versions.
Can I use brown rice instead of white rice?
Yes, but you’ll need to adjust the liquid and cooking time. Use 3 cups of broth instead of 2.5, and simmer for 40-45 minutes instead of 20-25. Brown rice has a nuttier flavor and chewier texture that works well with the garlic butter.
How do I prevent the rice from burning on the bottom?
Make sure your heat is on low once you add the liquid and cover the pan. A heavy-bottomed pan also helps distribute heat evenly. If you’re worried about burning, you can place the pan in a 375°F (190°C) oven instead of simmering on the stovetop. Cook for 25-30 minutes, covered.
Pin This Recipe!

Easy One-Pan Garlic Butter Chicken and Rice

A simple, flavorful one-pan meal featuring juicy chicken thighs and fluffy rice infused with garlic butter. Perfect for busy weeknights, this dish requires minimal cleanup and delivers maximum comfort.
- Prep Time: 15 minutes
- Cook Time: 30 minutes
- Total Time: 45 minutes
- Yield: 4 servings 1x
- Category: Main Course
- Cuisine: American
Ingredients
- 1.5 lbs (680g) bone-in, skin-on chicken thighs
- 1.5 cups (300g) long-grain white rice (basmati or jasmine), rinsed
- 8–10 cloves garlic, minced
- 4 tablespoons (56g) unsalted butter, divided
- 2.5 cups (590ml) low-sodium chicken broth
- 1 medium yellow onion, diced
- 1 teaspoon dried thyme
- 1 teaspoon sweet paprika, divided
- Salt and black pepper to taste
- Fresh parsley, chopped (for garnish)
- Lemon wedges (for serving)
Instructions
- Rinse the rice under cold water until the water runs clear. Drain and set aside. Pat the chicken thighs dry and season generously with salt, pepper, and ½ teaspoon paprika.
- Heat 2 tablespoons butter in a large skillet or Dutch oven over medium-high heat. Sear the chicken skin-side down for 5-6 minutes until golden brown. Flip and cook 3-4 minutes more. Transfer chicken to a plate.
- Reduce heat to medium. Add the diced onion and cook 3-4 minutes until softened. Add the minced garlic and cook 30 seconds until fragrant.
- Add the rinsed rice to the pan and stir for 2 minutes until the grains turn slightly translucent and smell nutty.
- Pour in the chicken broth, remaining ½ teaspoon paprika, dried thyme, and ½ teaspoon salt. Stir, scraping up any browned bits. Bring to a gentle boil.
- Nestle the seared chicken thighs into the rice. Cover with a tight-fitting lid, reduce heat to low, and simmer for 20-25 minutes without lifting the lid.
- Remove from heat and let rest, covered, for 5 minutes. Fluff the rice with a fork. Dot with the remaining 2 tablespoons butter.
- Garnish with fresh parsley and serve with lemon wedges.
Notes
For best results, don’t skip rinsing the rice or toasting it. Resist lifting the lid while simmering. Let the dish rest for 5 minutes before serving. For a vegetarian version, swap chicken for chickpeas or tofu and use vegetable broth. For a spicy kick, add red pepper flakes with the garlic.
Nutrition
- Serving Size: 1 serving (about 1.5
- Calories: 485
- Sugar: 2
- Sodium: 720
- Fat: 18
- Saturated Fat: 8
- Carbohydrates: 48
- Fiber: 1
- Protein: 32
Keywords: one-pan, garlic butter, chicken, rice, weeknight dinner, easy, skillet meal


