The way the beans hold their shape after eight hours in the crockpot—that’s the thing I was chasing. Not mush, not blown-out skins floating in a thin broth, but beans that still have a little resistance when you bite down, each one carrying that smoky paprika coating like a tiny, tender jacket. I spent a whole winter trying to get there, and honestly, I burnt a few batches before I figured out the trick.
It started on a Tuesday in February when I came home late, starving, and the only thing in the pantry was a bag of dried pintos and a can of fire-roasted tomatoes I’d bought on a whim. I threw it all in the slow cooker with some smoked paprika I’d picked up at a spice shop (the kind that smells like a campfire), and by the time I woke up the next morning, the whole apartment smelled like a backyard cookout. That first bowl was good—but it wasn’t right. The beans were too soft, the broth was thin, and the smoke flavor had faded into the background. So I kept tweaking.
This version, the one I’m sharing now, is the result of about fifteen different attempts. It’s got three types of beans (kidney, black, and pinto) because each one brings a different texture, and the smoky flavor comes from a combo of smoked paprika, chipotle in adobo, and a little liquid smoke. It’s thick enough to eat with a spoon, but not so thick it’s like chili paste. And the best part? You dump everything in the crockpot and walk away. No browning, no soaking, no fuss. Just a really, really good bowl of chili that tastes like you spent all day on it.
I think that’s why this recipe stuck with me. It’s not fancy. It’s not complicated. But every time I make it, I remember that Tuesday night when I was too tired to cook and ended up creating something I’d keep coming back to. That’s the kind of recipe worth holding onto.
Why You’ll Love This Recipe
I’ve tested this chili about a dozen times, and I can honestly say it’s the one I keep coming back to. Here’s why it works so well for real life—not just for a food blog photo shoot.
- Completely Hands-Off : No sautéing, no pre-cooking beans, no standing over the stove. You literally open cans, dump them in, and let the crockpot do the work. It’s the definition of set-it-and-forget-it.
- Pantry-Friendly Ingredients : Canned beans, canned tomatoes, spices, and a few pantry staples. No fancy trips to a specialty store. I’ve made this with whatever beans I had on hand, and it always works.
- Perfect for Meal Prep : This chili actually gets better after a day or two in the fridge. I make a big batch on Sunday and eat it for lunches all week. It freezes beautifully, too.
- Crowd-Pleasing Flavor : The smoky depth from the paprika and chipotle makes it taste like it simmered all day over a fire. Even my friends who claim they “don’t like bean chili” ask for seconds.
- Naturally Healthy : Packed with fiber, plant-based protein, and zero added sugars (if you watch your canned goods). It’s a meal that actually fills you up without weighing you down.
What makes this different from every other crockpot chili recipe out there? It’s the layering of smoke. Most recipes just use chili powder and call it a day. But I use three different sources of smoke—smoked paprika, chipotle peppers, and a tiny splash of liquid smoke—to build a flavor that feels deep and complex, not just spicy. It’s the kind of chili that makes you pause after the first bite and go, “Huh, what is that?”
This is the recipe I make when I want something that feels like a hug in a bowl. It’s cozy, it’s satisfying, and it’s the kind of meal that makes a gray Tuesday feel a little brighter.
What Ingredients You Will Need
This recipe uses simple, wholesome ingredients that you probably already have in your pantry. The magic is in how they come together. Here’s what you’ll need:
For the Chili Base
- Canned kidney beans (15 oz, drained and rinsed) – They hold their shape well and add a meaty texture. I prefer the dark red variety for deeper color.
- Canned black beans (15 oz, drained and rinsed) – These add a creamy, almost buttery texture when they cook down.
- Canned pinto beans (15 oz, drained and rinsed) – They break down slightly as they cook, helping to thicken the chili naturally.
- Fire-roasted diced tomatoes (15 oz, undrained) – The charred flavor adds another layer of smokiness. I use Muir Glen or Hunt’s Fire Roasted.
- Tomato sauce (8 oz) – This gives the chili a smooth, rich base without being too acidic.
- Yellow onion (1 medium, diced) – Adds sweetness and depth as it cooks down.
- Garlic (4 cloves, minced) – Non-negotiable for flavor.
- Vegetable broth (1 cup) – Use low-sodium so you can control the salt level.
For the Smoky Seasoning Blend
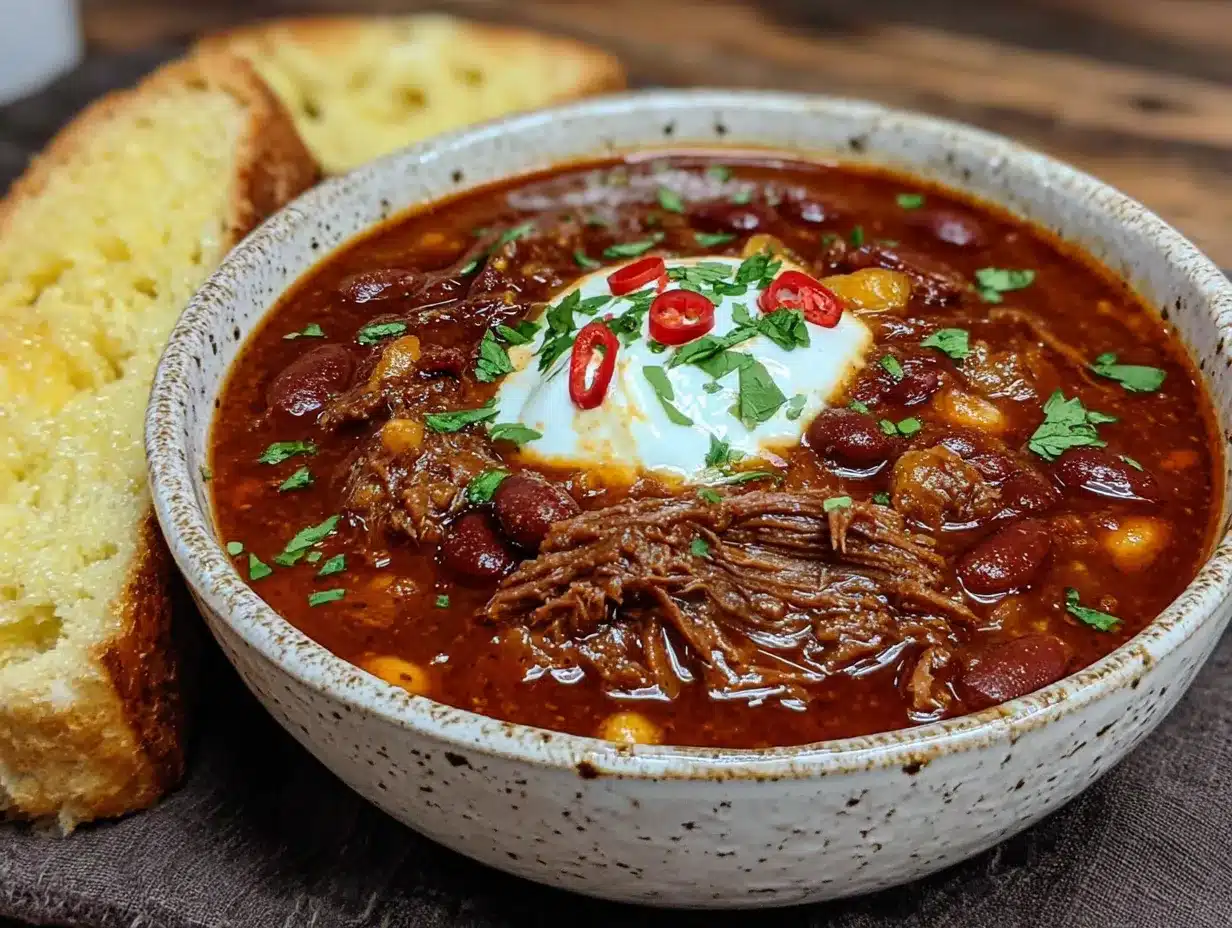
- Smoked paprika (2 tablespoons) – This is the star. Use the sweet or hot variety depending on your heat preference.
- Chipotle pepper in adobo sauce (1 pepper, minced, plus 1 teaspoon of the sauce) – Adds heat and a deep, almost bacon-like smokiness. If you’re sensitive to spice, start with half a pepper.
- Liquid smoke (½ teaspoon) – A little goes a long way. This is the secret ingredient that makes people think you roasted peppers over an open flame.
- Chili powder (1 tablespoon) – Use a good-quality blend. I like McCormick or a local spice shop blend.
- Cumin (1 teaspoon, ground) – Adds warmth and earthiness.
- Dried oregano (1 teaspoon) – Mexican oregano is best if you have it, but regular works fine.
- Salt (1 teaspoon, or to taste)
- Black pepper (½ teaspoon)
Optional but Recommended Add-Ins
- Frozen corn (1 cup) – Adds sweetness and a pop of color. Stir in during the last 30 minutes.
- Bell pepper (1, diced) – I use green for a slightly bitter edge, but red or yellow works too.
- Fresh cilantro (¼ cup, chopped) – For garnish and freshness.
- Lime juice (from ½ lime) – Brightens everything up right before serving.
Ingredient tip: If you want to use dried beans instead of canned, you’ll need to soak and cook them separately first. Dried beans won’t cook properly in the acidic tomato environment of a slow cooker. I learned this the hard way—rock-hard beans after 10 hours. Not fun.
Equipment Needed
You don’t need a lot of fancy gear for this recipe, which is part of why I love it. Here’s what you’ll need:
- Slow cooker (crockpot) – A 6-quart model is ideal for this recipe. If you have a smaller one (4-quart), it’ll still work, but you might need to cut the recipe in half.
- Cutting board and sharp knife – For dicing the onion and mincing the garlic. A dull knife makes this job miserable.
- Can opener – Obvious, but make sure it’s not about to break. I’ve had one snap mid-can and it was a mess.
- Measuring spoons – For the spices. I prefer the magnetic ones that stick together so I don’t lose them in the drawer.
- Wooden spoon or spatula – For stirring. Avoid metal utensils if your crockpot has a non-stick insert.
- Colander – For rinsing and draining the canned beans.
- Ladle – For serving. A deep, wide ladle works best for getting all the good stuff from the bottom.
If you don’t have a slow cooker, you can make this on the stovetop in a heavy-bottomed pot. Simmer it on low for about 1.5 to 2 hours, stirring occasionally. The flavor won’t be quite as deep, but it’ll still be delicious. An Instant Pot also works—just use the slow cook setting or pressure cook on high for 15 minutes with a natural release.
Preparation Method
This is the easiest chili you’ll ever make. No browning, no soaking, no complicated steps. Just dump and go. But there are a few little tricks that make a big difference in the final flavor.
- Prep your produce. Dice the onion and mince the garlic. If you’re using a bell pepper or frozen corn, get those ready too. I like to do all my chopping before I even open a can—keeps things organized.
- Drain and rinse the beans. Open all three cans of beans, pour them into a colander, and give them a good rinse under cold water. This washes away the excess sodium and the starchy liquid that can make chili taste canned. Let them drain while you get everything else ready.
- Layer the ingredients in the crockpot. Start with the diced onion and minced garlic on the bottom. Then add the drained beans, the fire-roasted tomatoes (with their juices), and the tomato sauce. Pour in the vegetable broth.
- Add the seasonings. Sprinkle the smoked paprika, chili powder, cumin, dried oregano, salt, and black pepper over the top. Add the minced chipotle pepper and the teaspoon of adobo sauce. Drizzle in the liquid smoke. Don’t stir yet—just let everything sit on top.
- Stir it all together. Use a wooden spoon to mix everything thoroughly. Make sure the spices are evenly distributed and there are no dry pockets of seasoning. The chili will look a little thin at this point—that’s normal.
- Cook on low for 6-8 hours or high for 3-4 hours. I prefer low and slow because it gives the flavors more time to meld. The chili is ready when the onions are translucent and the broth has thickened slightly. If you’re using a bell pepper, add it during the last hour so it stays slightly firm.
- Add any last-minute ingredients. If you’re using frozen corn, stir it in during the last 30 minutes of cooking. This keeps it bright and sweet instead of mushy.
- Taste and adjust. Right before serving, give the chili a taste. Does it need more salt? A squeeze of lime? Another dash of smoked paprika? This is your chance to dial it in. I almost always add a little more salt and a splash of lime juice.
- Serve and garnish. Ladle the chili into bowls and top with your favorite garnishes. I go with fresh cilantro, diced red onion, a dollop of sour cream, and a few slices of avocado. Shredded cheddar cheese is also a solid choice.
Visual cue: When the chili is done, the beans should be tender but still intact. The broth should have thickened to a consistency that coats the back of a spoon. If it’s still too thin, let it cook uncovered for another 30 minutes to reduce.
Personal tip: I always taste the chili about an hour before it’s done. That way, if I need to adjust the seasoning, it has time to meld. I’ve forgotten to do this before and ended up with a bland chili that I tried to fix at the last minute—it never works as well.
Cooking Tips & Techniques
After making this chili more times than I can count, I’ve picked up a few tricks that make a real difference. Here’s what I’ve learned the hard way so you don’t have to.
Don’t skip the rinsing step. I know it’s tempting to just dump the beans straight in with their liquid, but that starchy, salty liquid will make your chili taste like a can of soup. Rinsing gives you a cleaner, more homemade flavor. Trust me on this one.
Toast your spices for extra depth. If you have an extra five minutes, toast the smoked paprika, chili powder, and cumin in a dry skillet over medium heat for about 30 seconds until they smell fragrant. This wakes up the oils and makes the flavor much more intense. I do this when I’m feeling fancy, but it’s not required.
Watch the liquid smoke. A little goes a long, long way. Half a teaspoon is plenty. If you add too much, the chili will taste like you’re eating a campfire. I learned this the hard way when I got heavy-handed and ended up with chili that tasted like a charcoal briquette.
Layer your flavors. If you have time, sauté the onion and garlic in a pan with a little oil before adding them to the crockpot. This caramelizes the sugars and adds a sweetness that you just can’t get from raw onion. I do this when I’m making chili for company, but for weeknights, I skip it and it’s still great.
Don’t lift the lid. Every time you open the crockpot, you lose heat and add about 20 minutes to the cooking time. Resist the urge to peek. I know it’s hard, but trust the process.
Make it ahead of time. This chili is even better the next day. The flavors continue to meld in the fridge, and the texture thickens up beautifully. I often make it a day ahead and reheat it for dinner. It’s one of those recipes that rewards patience.
Variations & Adaptations
One of the best things about this chili is how flexible it is. Here are some ways to make it your own:
Make It Meatier
If you want a heartier chili, add 1 pound of cooked ground beef, turkey, or sausage. Brown it in a skillet first, drain the fat, and stir it in with the beans. I’ve done this with spicy Italian sausage and it was incredible—the fennel and red pepper flakes added a whole new dimension.
Go Vegetarian or Vegan
This recipe is already vegetarian as written. To make it vegan, just skip the sour cream and cheese toppings. Use a vegan-friendly broth (most vegetable broths are) and load up on the avocado and cilantro for richness and freshness.
Spice It Up (or Down)
For a milder chili, skip the chipotle pepper and use only 1 tablespoon of smoked paprika. For a spicier version, add an extra chipotle pepper, a pinch of cayenne, or a diced jalapeño (seeds and all). I’ve also added a dash of hot sauce at the end for a last-minute kick.
Swap the Beans
Don’t have all three types of beans? No problem. Use whatever you have on hand. Cannellini beans, chickpeas, or even lentils work well. Just keep the total amount around 45 ounces (three cans).
Change the Cooking Method
Stovetop: Simmer in a heavy pot on low for 1.5-2 hours. Instant Pot: Sauté the onion and garlic on the sauté setting, then add everything else and pressure cook on high for 15 minutes with a natural release. Both methods work great.
Add a Smoky Twist
If you really love that smoky flavor, try adding a dried chipotle pepper (rehydrated and chopped) or a teaspoon of smoked salt at the end. I once added a few drops of mesquite liquid smoke by accident and it was a happy mistake—gave the chili a slightly different, almost barbecue-like flavor.
Serving & Storage Suggestions
This chili is incredibly versatile when it comes to serving. Here’s how I like to enjoy it:
Serving temperature: Serve it hot, straight from the crockpot. The smoky aroma will fill your kitchen and make everyone’s mouth water before they even sit down.
Toppings bar: Set out bowls of shredded cheddar cheese, diced red onion, fresh cilantro, sour cream or Greek yogurt, sliced avocado, pickled jalapeños, and crushed tortilla chips. Let everyone build their own bowl. It makes dinner feel like an event.
What to serve with it: A slice of crusty bread or a warm cornbread muffin is perfect for sopping up the broth. I also love serving it over rice or quinoa for a heartier meal. If you’re feeling extra, make a batch of my crispy cast iron cornbread skillet on the side—the buttery, crunchy edges are the perfect contrast to the smoky chili.
Storage: Let the chili cool completely, then transfer it to an airtight container. It will keep in the refrigerator for up to 5 days. The flavors actually get better after a day or two.
Freezing: This chili freezes beautifully. Portion it into freezer-safe bags or containers, leaving about an inch of headroom for expansion. It will keep for up to 3 months. Thaw overnight in the fridge before reheating.
Reheating: Reheat on the stovetop over medium-low heat, stirring occasionally, until warmed through. Add a splash of broth or water if it’s too thick. You can also reheat individual portions in the microwave in 30-second bursts, stirring between each one.
Flavor development: I’ve noticed that the smoky flavor becomes more pronounced after the chili sits in the fridge overnight. It’s almost like the ingredients need time to get to know each other. So don’t be afraid to make this a day ahead—it’s actually better that way.
Nutritional Information & Benefits
Here’s an approximate nutritional breakdown for one serving (about 1.5 cups, without toppings):
| Nutrient | Amount per Serving |
|---|---|
| Calories | 285 |
| Protein | 15g |
| Carbohydrates | 50g |
| Fiber | 16g |
| Fat | 2g |
| Sodium | 680mg (varies by broth and canned goods) |
Health benefits: This chili is packed with fiber from the three types of beans, which supports healthy digestion and keeps you feeling full. The smoked paprika is rich in antioxidants, and the garlic and onions provide prebiotics that feed your gut microbiome. It’s also naturally low in fat and free from added sugars, making it a great option for anyone watching their waistline or blood sugar.
Dietary considerations: This recipe is naturally gluten-free, dairy-free (if you skip the toppings), and vegan-friendly. It’s also nut-free and soy-free, so it works for most common dietary restrictions. If you’re watching your sodium, use low-sodium broth and no-salt-added canned tomatoes and beans.
Personal note: I love that this chili is both satisfying and good for you. It’s the kind of meal that makes me feel like I’m taking care of myself without having to think too hard about it. That’s a win in my book.
Conclusion
This Hearty Smoky Three-Bean Crockpot Chili is the kind of recipe that earns a permanent spot in your rotation. It’s easy, it’s deeply flavorful, and it makes your whole house smell amazing with almost no effort on your part. Whether you’re feeding a crowd on game day, meal-prepping for a busy week, or just craving a cozy bowl of comfort on a cold evening, this chili delivers every single time.
What I love most about this recipe is how forgiving it is. You can swap beans, adjust the heat, add meat or keep it vegan—it always turns out delicious. It’s a recipe that adapts to you, not the other way around. And honestly, that’s the kind of cooking I want more of in my life.
I’d love to hear how this chili turns out for you. Did you add any fun toppings? Swap in a different bean? Make it extra spicy? Drop a comment below and let me know—I read every single one, and your tweaks might inspire someone else’s next dinner. And if you loved it, share it with a friend who needs a good crockpot recipe in their life.
Now go fill that crockpot and let the magic happen. Your future self (and your taste buds) will thank you.
Frequently Asked Questions
Can I use dried beans instead of canned?
You can, but you need to cook them separately first. Dried beans won’t soften properly in the acidic environment of the slow cooker. Soak them overnight, then boil them until tender before adding them to the crockpot with the other ingredients.
How can I thicken the chili if it’s too thin?
If your chili is soupier than you’d like, remove the lid and let it cook on high for another 30-45 minutes to let some of the liquid evaporate. You can also mash a few of the beans against the side of the pot with a spoon—the starch will help thicken the broth naturally.
Can I make this on the stovetop instead of a crockpot?
Absolutely. Just combine everything in a heavy-bottomed pot and simmer on low for about 1.5 to 2 hours, stirring occasionally. The flavor won’t be quite as deep as the slow-cooked version, but it’s still delicious and comes together faster.
What are the best toppings for this chili?
My go-to toppings are fresh cilantro, diced red onion, a dollop of sour cream or Greek yogurt, sliced avocado, and a squeeze of lime juice. Shredded cheddar cheese, pickled jalapeños, and crushed tortilla chips are also fantastic. Set up a toppings bar and let everyone customize their bowl.
How long does this chili last in the fridge?
It will keep for up to 5 days in an airtight container in the refrigerator. The flavors actually improve after a day or two. It also freezes beautifully for up to 3 months—just thaw overnight in the fridge and reheat on the stovetop or in the microwave.
Pin This Recipe!
Hearty Smoky Three-Bean Crockpot Chili

This easy slow cooker chili features three types of beans and a deep smoky flavor from smoked paprika, chipotle, and liquid smoke. It’s a hands-off, pantry-friendly meal that’s perfect for meal prep and tastes even better the next day.
- Prep Time: 15 minutes
- Cook Time: 6-8 hours (low) or 3-4 hours (high)
- Total Time: 6 hours 15 minutes to 8 hours 15 minutes
- Yield: 6 servings 1x
- Category: Main Course
- Cuisine: American
Ingredients
- 1 can (15 oz) kidney beans, drained and rinsed
- 1 can (15 oz) black beans, drained and rinsed
- 1 can (15 oz) pinto beans, drained and rinsed
- 1 can (15 oz) fire-roasted diced tomatoes, undrained
- 1 can (8 oz) tomato sauce
- 1 medium yellow onion, diced
- 4 cloves garlic, minced
- 1 cup vegetable broth, low-sodium
- 2 tablespoons smoked paprika
- 1 chipotle pepper in adobo sauce, minced, plus 1 teaspoon adobo sauce
- 1/2 teaspoon liquid smoke
- 1 tablespoon chili powder
- 1 teaspoon ground cumin
- 1 teaspoon dried oregano (preferably Mexican)
- 1 teaspoon salt (or to taste)
- 1/2 teaspoon black pepper
- 1 cup frozen corn (optional)
- 1 bell pepper, diced (optional)
- 1/4 cup fresh cilantro, chopped (for garnish)
- Juice of 1/2 lime (for serving)
Instructions
- Dice the onion and mince the garlic. If using bell pepper or frozen corn, prepare those as well.
- Drain and rinse all three cans of beans in a colander under cold water. Let drain.
- Layer the diced onion and minced garlic on the bottom of a 6-quart slow cooker.
- Add the drained beans, fire-roasted tomatoes (with juices), tomato sauce, and vegetable broth.
- Sprinkle the smoked paprika, chili powder, cumin, oregano, salt, and black pepper over the top. Add the minced chipotle pepper, adobo sauce, and liquid smoke. Do not stir yet.
- Stir everything together thoroughly with a wooden spoon until spices are evenly distributed.
- Cover and cook on low for 6-8 hours or on high for 3-4 hours, until onions are translucent and broth has thickened slightly.
- If using bell pepper, add it during the last hour of cooking. If using frozen corn, stir it in during the last 30 minutes.
- Taste and adjust seasoning, adding more salt or a squeeze of lime juice as needed.
- Serve hot, garnished with fresh cilantro, diced red onion, sour cream, avocado, or other desired toppings.
Notes
For deeper flavor, toast the smoked paprika, chili powder, and cumin in a dry skillet for 30 seconds before adding. If using dried beans, cook them separately first as they won’t soften in the acidic slow cooker environment. The chili thickens as it sits and tastes even better the next day.
Nutrition
- Serving Size: 1.5 cups (without to
- Calories: 285
- Sugar: 8
- Sodium: 680
- Fat: 2
- Carbohydrates: 50
- Fiber: 16
- Protein: 15
Keywords: crockpot chili, slow cooker chili, three-bean chili, smoky chili, vegetarian chili, vegan chili, easy chili recipe, meal prep chili


