By the fourth batch in two weeks, I finally stopped measuring the horseradish. The first time I made homemade fire cider, I followed every rule—wearing gloves, dicing the ginger into perfect little matchsticks, and meticulously layering the ingredients in a quart jar like I was assembling some kind of edible art project. It was fine. Good, even. But by the third batch, I was tossing in extra garlic cloves with the skins still on because I ran out of patience, and I stopped worrying about whether the turmeric would stain my cutting board (spoiler: it always does).
Honestly? That third batch was the best one yet. There’s something about letting go of the precision and just trusting the process that makes this stuff sing. I started making it because I was tired of spending twelve bucks on a tiny bottle at the health food store, especially during that stretch between January and March when everyone in my house seems to be sniffling or coughing or both. The first sip of my own brew was so aggressively spicy it made my eyes water, but I kept going back for more. That’s when I knew I had something worth keeping around.
This homemade fire cider recipe isn’t about perfection. It’s about building a little bit of resilience into your daily routine, one spicy shot at a time. It’s the kind of thing that makes you feel like you’re actually doing something for yourself, even if the rest of your day falls apart.
Why You’ll Love This Recipe
I’ve tested this fire cider recipe through multiple cold seasons now, and I can tell you with confidence—it’s the real deal. This isn’t just another wellness trend that fades after a few weeks. This is the kind of kitchen staple that earns a permanent spot in your fridge door.
- Simple Ingredients : You probably already have most of these in your pantry right now. Garlic, onions, ginger, horseradish—these are kitchen heroes, not specialty items.
- Cost-Effective : Store-bought fire cider can run you fifteen to twenty dollars for a small bottle. Making it at home costs a fraction of that, and you get way more control over what goes in it.
- Customizable : Don’t like something? Leave it out. Want more heat? Add extra jalapeño. This recipe bends to your preferences, not the other way around.
- Winter Wellness Staple : When the cold weather hits and everyone around you is coming down with something, having a jar of this in the fridge feels like a secret weapon. It’s not medicine—but it sure feels like support.
- Deeply Satisfying to Make : There’s something almost therapeutic about chopping all those roots and aromatics, layering them in a jar, and watching the vinegar slowly turn that deep, rich amber color over the next few weeks.
What makes this version different from the others I’ve tried? It’s the balance. Some recipes go so heavy on the horseradish that you can’t taste anything else. Others are so mellow they barely register. This one hits that sweet spot where every sip wakes you up without punishing you. I’ve tested it on friends, family, and even my skeptical neighbor who swore she’d never try “weird vinegar stuff.” She asked for the recipe last week.
What Ingredients You Will Need
This recipe uses simple, whole ingredients that work together to create a potent, flavorful tonic. Most of these are pantry staples or easy to find at any grocery store, and each one brings something important to the mix.
- Raw apple cider vinegar – 4 cups (960 ml) – Look for the kind with the “mother” – that cloudy, cobwebby stuff floating around. Bragg’s is my go-to, but any raw, unfiltered brand works. The mother contains beneficial bacteria and enzymes that make this whole thing worth doing.
- Fresh ginger root – 1/2 cup (about 85 g), thinly sliced – No need to peel it if you scrub it well. The skin has plenty of flavor and nutrients. I slice it into thin coins rather than grating because it infuses more evenly.
- Fresh turmeric root – 1/4 cup (about 50 g), thinly sliced – This one will stain everything it touches, including your hands, your cutting board, and possibly your favorite kitchen towel. Wear gloves if you care about that sort of thing. I’ve accepted my fate.
- Fresh horseradish root – 1/4 cup (about 40 g), grated or thinly sliced – This is where the heat comes from. Fresh horseradish is a totally different beast than the jarred stuff. It’s sharp, pungent, and clears your sinuses in seconds.
- Garlic cloves – 10 to 12 cloves, smashed – Smashing them releases more of the good stuff. Leave the skins on for extra nutrients, or peel them if you prefer a cleaner look.
- Yellow onion – 1 medium, roughly chopped – Red onion works too, but yellow gives a milder, slightly sweeter base note.
- Jalapeño pepper – 1 medium, sliced – Seeds and all, unless you want less heat. I leave the seeds in because I like the kick.
- Lemon – 1 medium, thinly sliced – Use organic if you can, since you’re leaving the peel on. The rind adds a bright, citrusy note that cuts through all that spice.
- Fresh rosemary – 2 to 3 sprigs – I’ve used dried in a pinch, but fresh is better. It adds an earthy, piney aroma that rounds everything out.
- Fresh thyme – 4 to 5 sprigs – Another herb that infuses beautifully. Don’t skip it—it adds depth you’ll miss if it’s gone.
- Whole black peppercorns – 1 teaspoon – They add a subtle warmth and help with absorption of the turmeric.
- Raw honey – 2 to 3 tablespoons (adjust to taste) – Added after steeping, not before. Honey is antimicrobial and adds just enough sweetness to make the vinegar palatable without turning it into a sugary drink.
I’ve made this with both organic and conventional produce, and honestly, the difference is minimal. Use what you have access to. The magic is in the combination, not the certification.
Equipment Needed
You don’t need much to make fire cider, which is part of the appeal. Here’s what you’ll want to have on hand:
- A quart-sized glass jar (32 oz / 950 ml) with a tight-fitting lid – Mason jars work perfectly. Avoid plastic, since the vinegar can leach chemicals over the steeping period.
- A sharp chef’s knife – You’ll be slicing through tough roots and ginger, so a dull knife is just asking for trouble. I learned this the hard way when my knife slipped on a turmeric root and I spent ten minutes scrubbing yellow off the cabinet.
- A cutting board – Preferably one you don’t mind staining. Turmeric is basically nature’s permanent marker.
- A wooden spoon or chopstick – For stirring and poking ingredients down into the vinegar. Metal can react with the acidity, so stick with wood or silicone.
- Cheesecloth or a fine-mesh strainer – For straining after the steeping period. Cheesecloth gives you a clearer liquid, but a fine-mesh strainer works just fine if you don’t mind a little sediment.
- A funnel – Makes transferring the strained liquid into bottles way less messy. Trust me on this one.
- Glass bottles or jars for storage – Swing-top bottles are nice, but any clean glass jar with a lid works. I reuse old kombucha bottles.
If you don’t have a cheesecloth, a clean cotton kitchen towel works in a pinch. I’ve also used coffee filters, though that takes forever. Budget-friendly options are everywhere—none of this equipment needs to be fancy.
Preparation Method
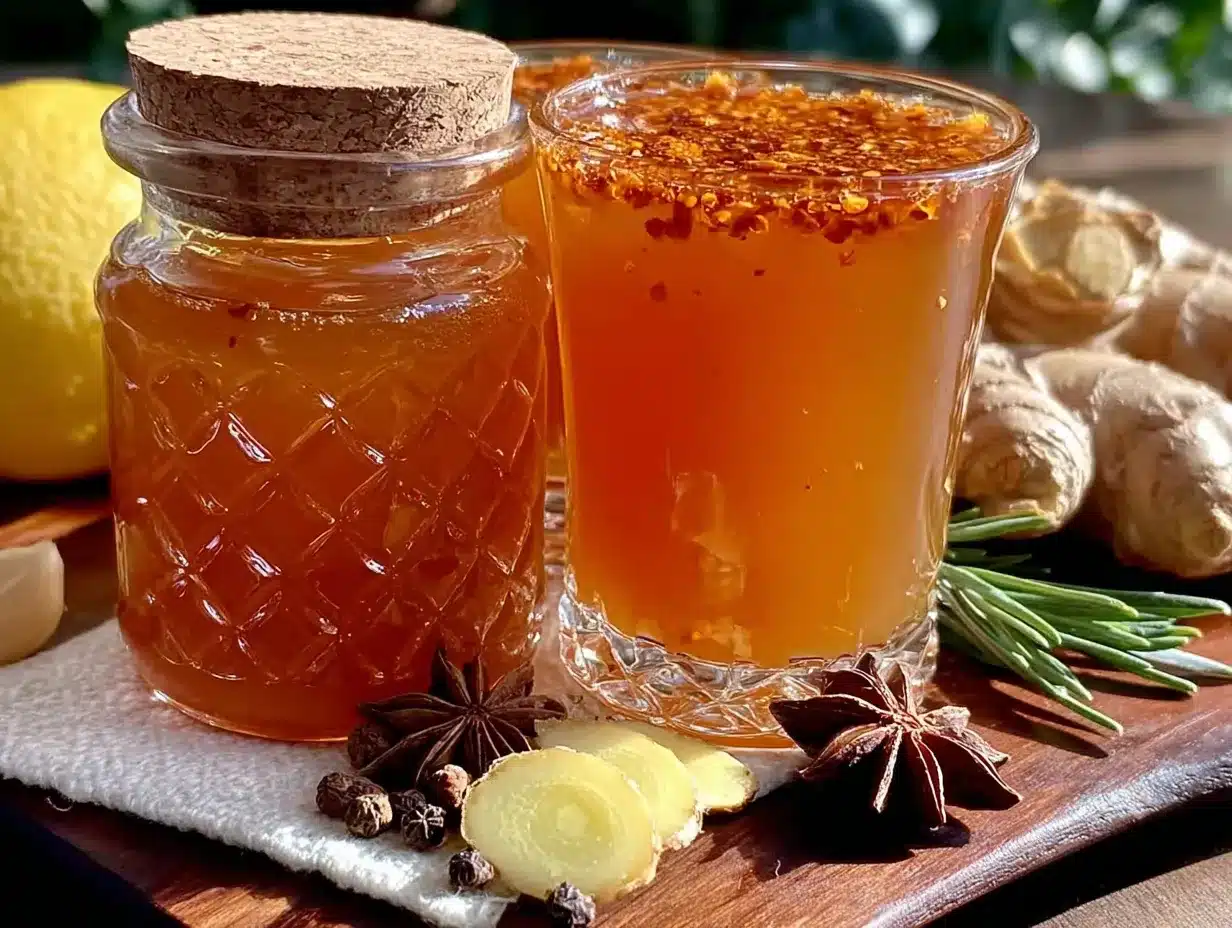
Making fire cider is more about patience than skill. The actual hands-on time is maybe twenty minutes. The rest is just waiting. Here’s how it goes:
- Prep your produce. Wash everything thoroughly. Scrub the ginger and turmeric with a vegetable brush—you don’t need to peel them. Slice the ginger and turmeric into thin coins, about 1/8-inch thick. Smash the garlic cloves with the flat side of your knife. Roughly chop the onion. Slice the jalapeño into rings, seeds included. Thinly slice the lemon.
- Layer everything in the jar. Start with the harder roots—ginger, turmeric, horseradish—at the bottom. Then add the garlic, onion, jalapeño, and lemon slices. Tuck the rosemary and thyme sprigs down the sides. Sprinkle in the peppercorns. Don’t pack it too tight; you want the vinegar to be able to flow around everything.
- Pour in the vinegar. Slowly pour the raw apple cider vinegar over the ingredients until everything is completely submerged. You may need a little more or less than 4 cups depending on how tightly you packed the jar. Leave about half an inch of headspace at the top.
- Seal and shake. Screw the lid on tightly and give the jar a good shake. You’ll see bubbles rising as the vinegar starts working immediately.
- Store and wait. Place the jar in a cool, dark place—a kitchen cabinet works perfectly. Let it steep for 3 to 4 weeks. I know that sounds like forever, but the flavor really deepens over time. I’ve gone as long as 6 weeks, and it only gets better. Shake the jar every few days to redistribute the ingredients.
- Check for doneness. After 3 weeks, start tasting it. It should be pungent, spicy, and slightly sour with a hint of sweetness from the lemon. If it tastes like it could use more time, let it go another week.
- Strain and sweeten. When you’re happy with the flavor, strain the liquid through a cheesecloth-lined strainer into a clean bowl or large measuring cup. Squeeze or press the solids to extract as much liquid as possible—there’s a lot of goodness still in there. Discard the solids (compost them if you can). Stir in the raw honey until it dissolves completely. Start with 2 tablespoons and add more if you want it sweeter.
- Bottle and refrigerate. Pour the finished fire cider into clean glass bottles or jars using a funnel. Store in the refrigerator. It will keep for up to 6 months, though mine never lasts that long.
A note on timing: I usually start a batch in early fall so it’s ready by the time cold season hits. But honestly, I make it year-round now because I’ve gotten hooked on using it in salad dressings and marinades too.
Cooking Tips & Techniques
I’ve made plenty of mistakes with fire cider over the years, and I’m sharing them so you don’t have to repeat them.
Don’t skimp on the horseradish. The first time I made this, I was timid with the horseradish because I was scared of the heat. The result was a fire cider that was basically just fancy vinegar. Horseradish is the backbone of this recipe—it’s what gives it that sinus-clearing, wake-up-call quality. Be generous.
Slice, don’t grate. I know some recipes call for grating the ginger and turmeric, but I’ve found that slicing them into coins creates a cleaner final product. Grated roots turn into a muddy sediment that’s hard to strain out, and they release their flavor too quickly. Slices give you a more controlled infusion.
Use the right vinegar. This is non-negotiable. Raw, unfiltered apple cider vinegar with the mother is what makes this work. The pasteurized stuff won’t have the same beneficial bacteria, and it just doesn’t taste as vibrant. I’ve tried it with white vinegar in a pinch, and it was a sad, flat experience.
Patience is a virtue. I know it’s tempting to start sipping after a week, but the flavor really needs time to develop. At two weeks, it’s still harsh and one-dimensional. At four weeks, it’s complex, rounded, and almost mellow despite the heat. I once opened a batch at three weeks and was disappointed, so I let it go another ten days. The difference was night and day.
Label your jar. This sounds silly, but I’ve definitely forgotten when I started a batch. I now write the date on a piece of masking tape and stick it right on the jar. Future you will thank present you.
Multitask your prep. While you have the cutting board out, chop extra ginger and turmeric and freeze them for smoothies or tea. It’s the same amount of cleanup either way.
Variations & Adaptations
One of the best things about fire cider is how customizable it is. Here are some variations I’ve tried and loved:
- Milder version : Cut the horseradish in half and remove the seeds from the jalapeño. You’ll still get plenty of flavor without the intense heat. This is what I make for my mom, who likes the idea of fire cider but not the experience of feeling like her face is melting off.
- Extra-herby version : Add a few sprigs of fresh oregano, sage, or even a small sprig of fresh mint. I did this one summer when my herb garden was overflowing, and the mint added a surprising freshness that worked beautifully with the lemon.
- Spiced version : Toss in a cinnamon stick, a few star anise pods, and a strip of orange peel. This turns it into something almost festive—perfect for the holiday season when you want a little extra warmth in your daily routine.
- Low-sugar version : Skip the honey entirely or use just a teaspoon. The lemon provides enough brightness that you won’t miss the sweetness much. This is my go-to when I’m trying to cut back on sugar.
- Fermented version : If you’re into fermentation, you can add a tablespoon of whey or a probiotic capsule to encourage more active fermentation. This makes it even fizzier and more complex, though it needs to be refrigerated promptly and used within a few weeks.
I once made a batch with habanero instead of jalapeño, and let me tell you—that was a mistake. It was so spicy I could barely take a full shot. Stick with jalapeño unless you’re a serious heat seeker.
Serving & Storage Suggestions
Fire cider is versatile, and how you use it matters almost as much as how you make it.
As a daily shot. The most common way to take it is as a 1-ounce shot (about 2 tablespoons) first thing in the morning. I chase it with a glass of water because the vinegar can be harsh on an empty stomach for some people. If you’re new to it, start with a teaspoon and work your way up.
In salad dressings. This is my secret weapon. Swap out half the vinegar in your favorite vinaigrette for fire cider, and suddenly your salad has this incredible depth and spice. It’s especially good on hearty greens like kale or in a fresh strawberry poppyseed salad where the heat contrasts nicely with the sweetness.
In marinades. Use it as a base for marinades for chicken, pork, or tofu. The acidity tenderizes the meat while the spices infuse deeply. I’ve used it in my high-protein chicken kabobs with fantastic results—the ginger and garlic really come through after a few hours.
In soups and stews. A splash of fire cider added to a pot of soup right before serving brightens everything up. Try it in a loaded Brunswick stew for an unexpected kick that cuts through the richness.
Storage. Keep your fire cider in the refrigerator. It will last 6 months or more, though the flavor will gradually mellow over time. I’ve never had a batch go bad, but if you see mold or it smells off, toss it and start fresh. Don’t leave it at room temperature after you’ve added the honey—fermentation can restart and create pressure in the bottle.
Freezing. You can freeze fire cider in ice cube trays for longer storage. Pop out a cube and thaw it when you need a quick shot or a flavor boost. The texture might change slightly, but the flavor stays intact.
Nutritional Information & Benefits
Fire cider isn’t a medicine, but it’s packed with ingredients that have been used for their health-supporting properties for centuries. Here’s a rough breakdown per 1-ounce (30 ml) serving:
- Calories: 10-15 (mostly from the honey)
- Carbohydrates: 2-3 g
- Sugar: 1-2 g (from honey and lemon)
- Sodium: 2-5 mg
Key benefits by ingredient:
- Apple cider vinegar is rich in acetic acid, which may support digestion and help stabilize blood sugar levels when consumed as part of a balanced diet.
- Ginger and turmeric are both well-known for their anti-inflammatory properties. Turmeric’s curcumin is better absorbed when paired with black pepper, which is why I always include those peppercorns.
- Garlic and onion contain allicin and quercetin, compounds that support immune function. They’re the heavy lifters in this recipe.
- Horseradish contains glucosinolates, which have been studied for their antimicrobial effects. Plus, it’s a natural decongestant—you’ll feel that immediately.
- Raw honey is antimicrobial and soothing for sore throats. It also makes the whole thing actually drinkable.
Dietary considerations: This recipe is naturally gluten-free, dairy-free, and vegan if you skip the honey (use maple syrup instead). It’s also Whole30-compliant if you use a compliant vinegar and skip the honey. Potential allergens include honey and, rarely, sensitivities to nightshades like jalapeño.
Conclusion
Making your own fire cider is one of those kitchen projects that feels deeply satisfying from start to finish. You get to connect with your food in a way that’s rare in our grab-and-go world—chopping roots by hand, watching the vinegar transform over weeks, and finally tasting something you built from scratch. It’s not complicated, and it doesn’t require fancy equipment or hard-to-find ingredients. It just takes a little time and a willingness to trust the process.
I love this recipe because it’s become a ritual for me. Every fall, I make a batch, label it with the date, and tuck it into the fridge door. And every morning through the winter, I take my little shot and feel like I’m doing something good for myself. It’s not a cure-all, and I don’t pretend it is. But it’s a small, consistent act of care that adds up over time.
I’d love to hear how yours turns out. Did you add something unexpected? Did you dial up the heat or mellow it out? Drop a comment below and let me know—I read every single one. And if you’re looking for another cozy winter project, try pairing this with a batch of loaded pasta e fagioli soup for the ultimate cold-weather comfort combo.
Stay warm, stay well, and keep that jar shaking.
Frequently Asked Questions
Can I drink fire cider every day?
Yes, most people can safely take a small amount daily—about 1 to 2 tablespoons. Start with less if you’re new to it, especially if you have a sensitive stomach or acid reflux. The vinegar is acidic, so it’s best to take it with food or diluted in water if needed.
How long does homemade fire cider last?
Stored in the refrigerator in a sealed glass container, fire cider will keep for 6 months or longer. The flavor will mellow over time, but it stays safe to consume as long as there’s no mold or off smells. I’ve kept batches for up to a year with no issues.
Can I use dried herbs instead of fresh?
You can, but fresh herbs give a much brighter, more vibrant flavor. If you only have dried, use about half the amount and expect a slightly different taste. Dried rosemary and thyme work okay, but fresh really is better here.
Do I have to use raw apple cider vinegar?
For the best results, yes. Raw, unfiltered vinegar with the mother contains beneficial bacteria and enzymes that contribute to the fermentation and health benefits. Pasteurized vinegar will still work in terms of flavor, but you’ll miss out on some of the good stuff.
Can I make this without honey for a sugar-free version?
Absolutely. Skip the honey entirely or use a few drops of stevia if you want some sweetness. The fire cider will be much sharper and more acidic without it, but it’s still perfectly drinkable. I’ve made it both ways, and I honestly enjoy the unsweetened version in salad dressings even more than the sweetened one.
Pin This Recipe!

Homemade Fire Cider Shots: Easy Winter Wellness Recipe
This homemade fire cider recipe is a potent, customizable tonic made with raw apple cider vinegar, ginger, turmeric, horseradish, garlic, and other immune-supporting ingredients. It’s a cost-effective, deeply satisfying winter wellness staple that can be taken as a daily shot or used in salad dressings and marinades.
- Prep Time: 20 minutes
- Cook Time: 0 minutes
- Total Time: 3 to 4 weeks (steeping time) + 20 minutes active time
- Yield: Approximately 4 cups (32 oz) 1x
- Category: Wellness Tonic
- Cuisine: American
Ingredients
- 4 cups (960 ml) raw apple cider vinegar (with the mother)
- 1/2 cup (about 85 g) fresh ginger root, thinly sliced
- 1/4 cup (about 50 g) fresh turmeric root, thinly sliced
- 1/4 cup (about 40 g) fresh horseradish root, grated or thinly sliced
- 10 to 12 garlic cloves, smashed
- 1 medium yellow onion, roughly chopped
- 1 medium jalapeño pepper, sliced (seeds included)
- 1 medium lemon, thinly sliced
- 2 to 3 sprigs fresh rosemary
- 4 to 5 sprigs fresh thyme
- 1 teaspoon whole black peppercorns
- 2 to 3 tablespoons raw honey (adjust to taste)
Instructions
- Wash all produce thoroughly. Scrub ginger and turmeric with a vegetable brush (no need to peel). Slice ginger and turmeric into thin coins about 1/8-inch thick. Smash garlic cloves with the flat side of a knife. Roughly chop onion. Slice jalapeño into rings, seeds included. Thinly slice lemon.
- Layer ingredients in a quart-sized glass jar: start with ginger, turmeric, and horseradish at the bottom. Add garlic, onion, jalapeño, and lemon slices. Tuck rosemary and thyme sprigs down the sides. Sprinkle in peppercorns. Do not pack too tightly.
- Slowly pour raw apple cider vinegar over the ingredients until everything is completely submerged. Leave about 1/2 inch of headspace at the top.
- Screw the lid on tightly and shake the jar well.
- Store the jar in a cool, dark place (like a kitchen cabinet) for 3 to 4 weeks. Shake the jar every few days to redistribute ingredients.
- After 3 weeks, start tasting. It should be pungent, spicy, and slightly sour with a hint of sweetness. If it needs more time, let it steep another week.
- When flavor is to your liking, strain the liquid through a cheesecloth-lined strainer into a clean bowl or large measuring cup. Squeeze or press solids to extract as much liquid as possible. Discard solids.
- Stir in raw honey until dissolved. Start with 2 tablespoons and add more if desired.
- Pour finished fire cider into clean glass bottles or jars using a funnel. Store in the refrigerator.
Notes
Don’t skimp on horseradish—it’s the backbone of the recipe. Slice ginger and turmeric into coins rather than grating for a cleaner final product. Use raw, unfiltered apple cider vinegar with the mother. Patience is key: flavor develops over 3-4 weeks. Label your jar with the date. For a milder version, reduce horseradish and remove jalapeño seeds. For extra heat, use habanero with caution. Fire cider can be used in salad dressings, marinades, soups, and stews. Store in the refrigerator for up to 6 months. Freeze in ice cube trays for longer storage.
Nutrition
- Serving Size: 1 ounce (30 ml)
- Calories: 1015
- Sugar: 12
- Sodium: 25
- Carbohydrates: 23
Keywords: fire cider, homemade fire cider, winter wellness, immune support, apple cider vinegar tonic, ginger, turmeric, horseradish, garlic, natural remedy, DIY tonic


