“Wait—are those actual black cupcakes?” My neighbor Jen leaned over the fence, coffee mug in hand, eyeing the cooling rack on my kitchen counter. I’d been testing recipes all morning, and the kitchen looked like a goth bakery exploded. She wasn’t wrong. There they sat—six perfect black velvet cupcakes, dark as midnight, waiting for their cream cheese frosting. I handed her one (unfrosted, sorry Jen) and she took a bite. Her eyebrows shot up. “Okay, but they actually taste good? Not just for show?” That was the moment I knew I’d cracked it.
Getting a cupcake that’s genuinely black—not dark gray, not muddy brown—without tasting like a chemistry experiment took some trial and error. I wanted that dramatic Halloween look without sacrificing the tender, buttery crumb of a classic velvet cake. And honestly? The first few batches were rough. Too dry. Too chalky. One batch turned my tongue blue for hours. But this version? This one’s the real deal. It’s moist, it’s rich, and it gets its color from a smart combo of black cocoa powder and food coloring, not a bottle of artificial regret.
These black velvet Halloween cupcakes are the kind of thing that stops a party. People see them and do a double-take. Then they taste the tangy cream cheese frosting and suddenly there’s no more talking—just quiet, happy chewing. Whether you’re hosting a Halloween bash, sending treats to a school party, or just want to make October feel special, these cupcakes deliver on looks and flavor. No compromise. No tricks. Just treats.
Why You’ll Love This Recipe
I’ve tested this recipe six times to get the texture just right—not too dense, not too fluffy, with that signature velvet tenderness. Here’s why it’s become my go-to Halloween bake:
- Dramatic Black Color : The combination of black cocoa powder and a small amount of gel food coloring gives you that deep, true-black finish without staining every surface in your kitchen. Trust me, I learned the hard way.
- Perfect Velvet Crumb : This isn’t a dry chocolate cake in disguise. The buttermilk, oil, and vinegar create that classic velvet texture—tender, moist, and melt-in-your-mouth soft.
- Cream Cheese Frosting That Holds Its Shape : No runny, sliding-off-the-cupcake frosting here. This version is stable enough for piping but still light and tangy.
- No Fancy Equipment Needed : You don’t need a stand mixer or specialty pans. A bowl, a whisk, and a muffin tin are all it takes.
- Customizable for Any Spooky Occasion : Halloween, birthday parties, themed weddings—these work for any event that calls for a little darkness.
The first time I brought these to a friend’s Halloween potluck, they vanished in ten minutes. Someone actually asked if I’d ordered them from a bakery. That’s when you know you’ve got a winner.
What Ingredients You Will Need
This recipe uses simple, everyday ingredients to create something that looks anything but ordinary. Most of these are pantry staples—the only special addition is black cocoa powder, which is worth tracking down for the authentic color and flavor.
For the Cupcakes
- All-purpose flour (1 ½ cups / 190g) – Provides structure. Spoon and level it for accuracy—don’t scoop straight from the bag.
- Black cocoa powder (½ cup / 45g) – This is the secret weapon. It’s darker than regular cocoa and has a subtle Oreo-like flavor. I prefer the brand Rodelle for its intensity.
- Granulated sugar (1 cup / 200g) – Sweetens and helps keep the crumb tender.
- Baking soda (1 teaspoon) – Reacts with the vinegar and buttermilk for lift.
- Salt (½ teaspoon) – Balances sweetness and enhances flavor.
- Buttermilk (¾ cup / 180ml), room temperature – Adds tang and activates the baking soda. No buttermilk? Add 1 tablespoon lemon juice to regular milk and let it sit 5 minutes.
- Vegetable oil (½ cup / 120ml) – Keeps the cupcakes moist for days. Don’t substitute melted butter here—oil gives better texture.
- Eggs (2 large), room temperature – Binds everything together. Cold eggs can seize the batter.
- White vinegar (1 teaspoon) – Reacts with the baking soda for that perfect rise.
- Vanilla extract (1 teaspoon) – Rounds out the flavor profile.
- Black gel food coloring (2-3 teaspoons) – Optional but helps deepen the color. I use Americolor Super Black—it’s concentrated so a little goes a long way.
For the Cream Cheese Frosting
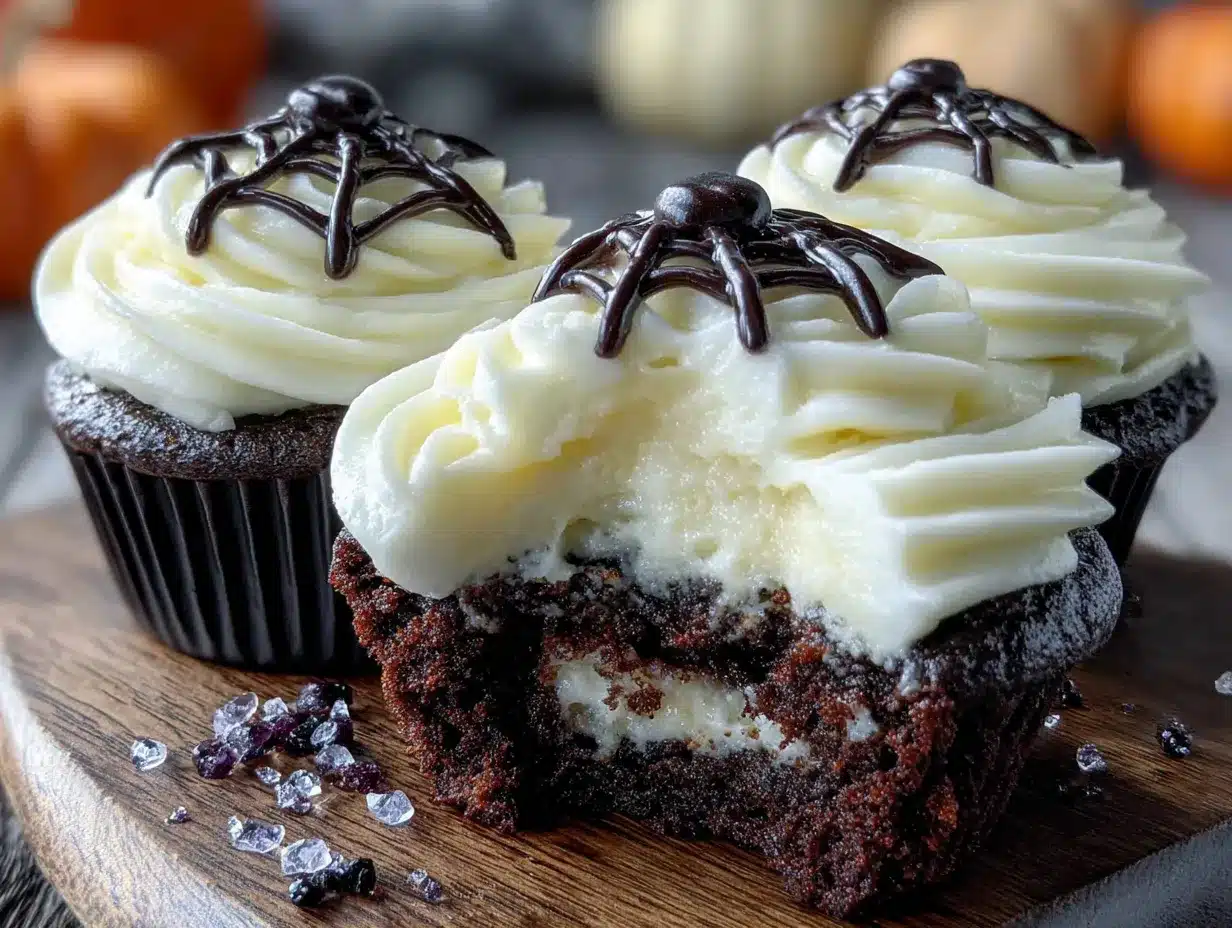
- Cream cheese (8 oz / 226g), softened – Use full-fat block cream cheese, not the spreadable kind in a tub. It makes a difference in stability.
- Unsalted butter (½ cup / 113g), softened – Adds richness and helps the frosting hold its shape.
- Powdered sugar (3 ½ cups / 440g) – Sifted to avoid lumps.
- Vanilla extract (1 ½ teaspoons) – Pure, not imitation, for the best flavor.
- Pinch of salt – Cuts the sweetness and brightens the tang.
For a fun twist, I sometimes add a drop of purple gel food coloring to the frosting to give it a subtle grayish-purple tone that looks gorgeous against the black cupcake. Totally optional, but it’s a nice touch.
Equipment Needed
You don’t need a professional bakery setup for these, but having the right tools makes the process smoother. Here’s what I use:
- 12-cup muffin tin – Standard size works best. If you only have a 6-cup tin, just bake in batches.
- Paper cupcake liners – I recommend black or dark purple liners to complement the cake color. White liners will show through the dark batter.
- Mixing bowls – One large, one medium.
- Whisk and rubber spatula – A whisk for dry ingredients, spatula for folding.
- Electric hand mixer or stand mixer – For the frosting. You can do it by hand, but your arm will thank you for the mixer.
- Piping bag with star tip – A Wilton 1M tip creates those beautiful rosettes. No piping bag? A sturdy zip-top bag with the corner snipped off works in a pinch.
- Cooling rack – Essential for even cooling so the frosting doesn’t melt.
- Sifter – For the powdered sugar and cocoa powder. Lumps are the enemy of smooth frosting.
If you don’t have black cocoa powder, you can order it online or find it at specialty baking stores. I’ve also seen it at some well-stocked grocery stores in the baking aisle. Worth the hunt!
Preparation Method
Let me walk you through this step by step. I’ve included all the little details that make the difference between good cupcakes and unforgettable ones.
Step 1: Preheat and Prep
Preheat your oven to 350°F (175°C). Line your muffin tin with 12 paper liners. I like to give the liners a quick spray of non-stick cooking spray—just a light mist—to make peeling them off later a breeze.
Step 2: Mix the Dry Ingredients
In a large bowl, whisk together the flour, black cocoa powder, sugar, baking soda, and salt. Whisk for about 30 seconds to aerate everything and break up any cocoa lumps. You’ll notice the black cocoa has a slightly grayish tint—that’s normal. It’ll darken as it bakes.
Step 3: Combine the Wet Ingredients
In a medium bowl or large liquid measuring cup, whisk together the buttermilk, vegetable oil, eggs, vinegar, and vanilla extract. Whisk until the eggs are fully incorporated and the mixture looks smooth and slightly frothy.
Step 4: Make the Batter
Pour the wet ingredients into the dry ingredients. Stir gently with a rubber spatula until just combined—about 15 strokes. A few lumps are fine. Overmixing will make the cupcakes tough. Now add the black gel food coloring, starting with 2 teaspoons, and fold it in. The batter will look dark gray at this point. If you want it more intense, add another teaspoon. I usually use 3 teaspoons for that true black color.
Step 5: Fill and Bake
Divide the batter evenly among the 12 liners, filling each about ⅔ full. I use a cookie scoop for this—it’s cleaner and ensures even portions. Bake for 18-22 minutes, or until a toothpick inserted into the center comes out with a few moist crumbs (not wet batter). The tops should spring back when lightly touched.
Let the cupcakes cool in the pan for 5 minutes, then transfer them to a wire rack to cool completely. This is crucial—frosting warm cupcakes will result in a melty mess. I’ve made that mistake, and it’s not pretty.
Step 6: Make the Cream Cheese Frosting
While the cupcakes cool, make the frosting. In a large bowl (or the bowl of a stand mixer), beat the softened cream cheese and butter together on medium speed until smooth and creamy—about 2 minutes. Scrape down the sides of the bowl. Add the sifted powdered sugar, one cup at a time, beating on low speed to avoid a sugar cloud. Add the vanilla and salt, then increase to medium-high and beat for 2-3 minutes until the frosting is light, fluffy, and spreadable. Don’t overbeat, or it can become too soft.
Step 7: Frost and Decorate
Once the cupcakes are completely cool, spoon the frosting into a piping bag fitted with a star tip. Pipe a generous swirl onto each cupcake, starting from the outside and working inward. If you don’t have a piping bag, you can simply spread the frosting with a knife—it’ll still taste amazing.
For decoration, I like to add a sprinkle of black sanding sugar or a few edible glitter stars. Candy eyeballs are also a huge hit with kids. The contrast of the white frosting against the black cake is so striking that even simple decorations look professional.
Cooking Tips & Techniques
After making these about a dozen times, I’ve collected a few hard-won lessons. Here’s what I wish someone had told me:
Don’t skip the vinegar. I know it sounds weird in a cupcake, but the vinegar reacts with the baking soda to create the perfect rise. Without it, your cupcakes will be dense and flat. I once forgot it and ended up with hockey pucks.
Room temperature ingredients matter. Cold buttermilk and eggs can make the batter seize up, leading to a less tender crumb. Take them out of the fridge 30 minutes before you start baking. If you’re in a hurry, warm the buttermilk in the microwave for 10 seconds and place the eggs in a bowl of warm water for 5 minutes.
Black cocoa is not the same as Dutch-process. Black cocoa is heavily alkalized—it’s what gives Oreos their color. It has a milder chocolate flavor and can be slightly bitter on its own. That’s why we use both black cocoa and a little vanilla to balance it out. If you can only find Dutch-process cocoa, add an extra tablespoon of it and increase the food coloring to 4 teaspoons.
Test your food coloring. Not all black food colorings are created equal. Gel or paste colors are much more concentrated than liquid drops. I’ve had liquid colors turn my batter purple instead of black. Stick with gel, and add it gradually until you’re happy with the shade.
Let the frosting chill if it’s too soft. If your kitchen is warm, the cream cheese frosting can get a little loose. Pop it in the fridge for 15 minutes before piping—it’ll hold its shape much better.
Variations & Adaptations
One of the best things about this recipe is how versatile it is. Here are some ways I’ve adapted it over the years:
Gluten-Free Version : Substitute the all-purpose flour with a high-quality 1:1 gluten-free baking flour blend. I’ve had good results with King Arthur’s Measure for Measure. Add 1 teaspoon of xanthan gum if your blend doesn’t already include it. The texture is slightly more delicate, but the flavor is spot-on.
Vegan Adaptation : Replace the eggs with flax eggs (2 tablespoons ground flaxseed mixed with 6 tablespoons water, let sit for 5 minutes). Use plant-based buttermilk (add 1 tablespoon lemon juice to oat milk). For the frosting, use vegan cream cheese and butter—I like Miyoko’s brand. The texture is a bit softer, but it’s still delicious.
Spooky Spiderweb Design : Pipe the cream cheese frosting in a smooth layer, then use a toothpick to drag thin lines of black gel from the center outward to create a web pattern. Place a candy spider on top for maximum Halloween effect.
Chocolate Lover’s Twist : Add ½ cup mini chocolate chips to the batter before baking. They sink slightly during baking, creating little pockets of melted chocolate. It’s over-the-top in the best way.
Peppermint Black Velvet : Add ½ teaspoon peppermint extract to the batter and another ¼ teaspoon to the frosting. The cool mint flavor pairs surprisingly well with the dark cocoa. Perfect for a Christmas-themed twist.
Serving & Storage Suggestions
These cupcakes are best served at room temperature—the cream cheese frosting softens slightly and the cake crumb is at its most tender. If you’ve refrigerated them, let them sit out for about 20 minutes before serving.
For a Halloween party spread, I like to arrange them on a black cake stand with some fake cobwebs and plastic spiders scattered around. They also look incredible next to a batch of my gooey cast iron s’mores dip for a full spooky dessert table.
Storage: Store unfrosted cupcakes in an airtight container at room temperature for up to 2 days. Frosted cupcakes should be refrigerated in a sealed container for up to 4 days. The cream cheese frosting needs to stay chilled, but the cake itself stays moist thanks to the oil.
Freezing: You can freeze the unfrosted cupcakes for up to 3 months. Wrap each one individually in plastic wrap, then place them in a freezer bag. Thaw at room temperature before frosting. I’ve also frozen the frosting itself in a piping bag—just thaw it in the fridge overnight and give it a quick re-whip before using.
Reheating: If you prefer your cupcakes slightly warm (I do on chilly fall evenings), microwave an unfrosted cupcake for 8-10 seconds. Add frosting after warming—never microwave frosting, it’ll turn into soup.
Nutritional Information & Benefits
Let’s be real—these are a treat, not a health food. But here’s the breakdown if you’re curious. Per cupcake (with frosting): approximately 380 calories, 18g fat, 52g carbohydrates, 4g protein, 2g fiber, 35g sugar.
The black cocoa powder does offer some antioxidants—dark cocoa is rich in flavonoids, which are good for heart health. The cream cheese provides a small amount of calcium and protein. But honestly, I make these because they make people smile, not because they’re a superfood.
If you’re looking for a lighter option, you can reduce the sugar in the frosting by using a sugar substitute like Swerve Confectioners. The texture will be slightly grainier, but the flavor still works. For a dairy-free version, use vegan cream cheese and butter alternatives—just note that the frosting will be softer and may need a longer chill time before piping.
These cupcakes contain wheat, dairy, and eggs. For nut-free preparation, ensure your cocoa powder and food coloring are processed in nut-free facilities (most major brands are).
Frequently Asked Questions
Can I make these cupcakes ahead of time?
Absolutely. Bake the cupcakes up to 2 days ahead and store them unfrosted in an airtight container. Make the frosting the day you plan to serve them, or freeze the frosting for up to a month. Just thaw and re-whip before piping.
Why did my cupcakes turn out gray instead of black?
This usually happens when you don’t use enough black cocoa powder or gel food coloring. Black cocoa is naturally a dark gray-brown, so it needs the food coloring to push it to true black. Also, check that your food coloring is gel-based, not liquid—liquid colors are too diluted.
Can I use this recipe to make a cake instead of cupcakes?
Yes! Pour the batter into two greased 8-inch round cake pans and bake at 350°F (175°C) for 25-30 minutes. You’ll need to double the frosting recipe to cover both layers. The cake layers are stunning for a Halloween birthday cake.
My cream cheese frosting turned out runny. What went wrong?
Most likely, the cream cheese was too soft or you overbeat it. Cream cheese should be softened but still cool to the touch. If your kitchen is warm, chill the bowl and beaters before starting. Also, make sure you’re using block cream cheese, not the spreadable kind in a tub—it has a higher moisture content.
Can I skip the food coloring entirely?
You can, but the cupcakes will be a dark charcoal gray rather than black. The black cocoa powder gives a beautiful dark color on its own, just not quite as dramatic. If you’re avoiding artificial colors, this is still a great option—the flavor is identical.
Conclusion
These black velvet Halloween cupcakes have become my signature fall bake, and for good reason. They deliver on every front—the dramatic color stops people in their tracks, the tender crumb keeps them coming back for more, and the tangy cream cheese frosting is the perfect finishing touch. They’re the kind of recipe that makes you look like you spent hours in the kitchen when really, they come together in under an hour.
I love that they’re not just a gimmick. So many holiday treats prioritize looks over taste, but these cupcakes are genuinely delicious. The black cocoa gives them a subtle Oreo-like flavor that pairs beautifully with the sweet, tangy frosting. Every time I make them, someone asks for the recipe.
If you’re planning a Halloween party, I’d also recommend checking out my individual flag cupcakes for a patriotic twist, or my loaded strawberry cake for something a little brighter. But for October? These black velvet beauties are where it’s at.
I’d love to hear how yours turn out! Drop a comment below and let me know what decorations you used—I’m always looking for new ideas. And if you tweaked the recipe to make it your own, share that too. Happy baking, and have a wonderfully spooky Halloween!
Pin This Recipe!
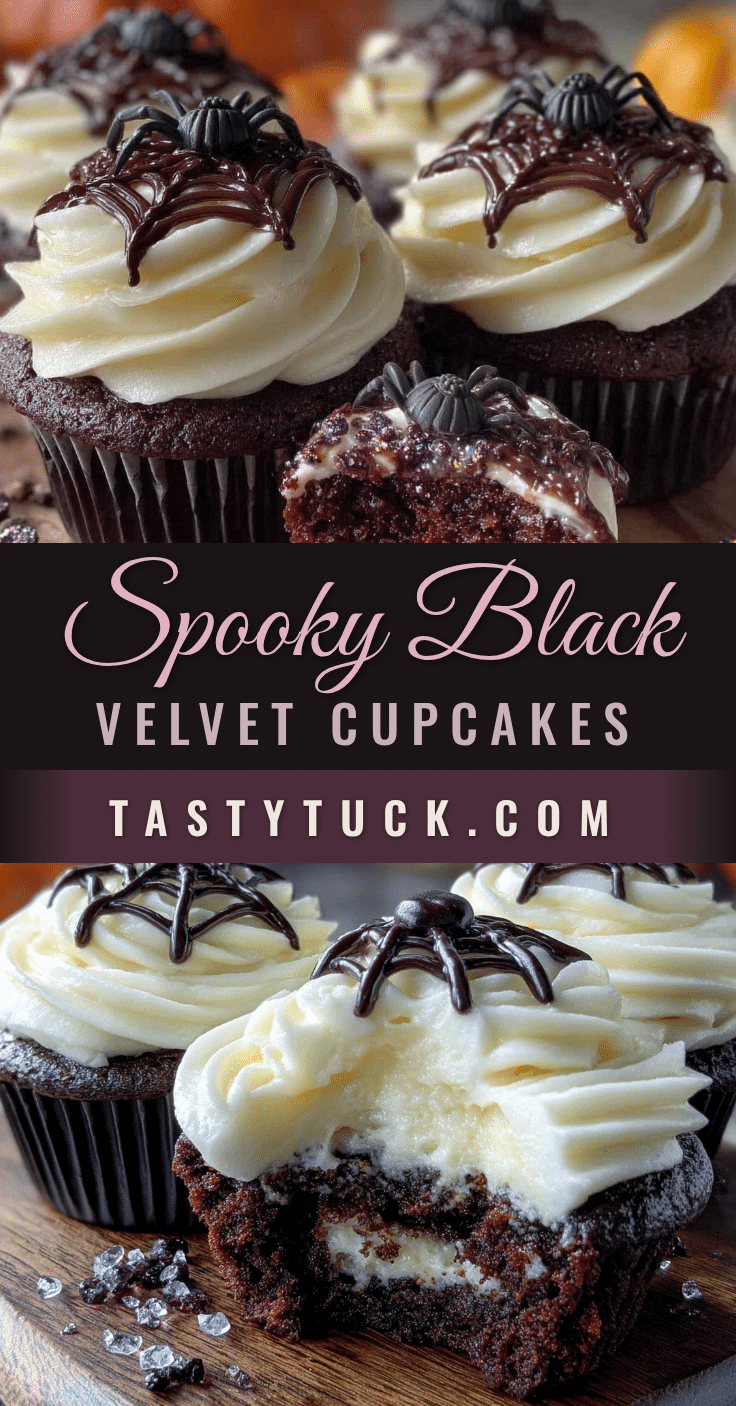
Perfect Black Velvet Halloween Cupcakes: Easy Recipe
These black velvet Halloween cupcakes are moist, rich, and get their dramatic color from black cocoa powder and gel food coloring. Topped with a tangy cream cheese frosting, they’re the perfect spooky treat that tastes as good as they look.
- Prep Time: 20 minutes
- Cook Time: 20 minutes
- Total Time: 40 minutes
- Yield: 12 cupcakes 1x
- Category: Dessert
- Cuisine: American
Ingredients
- 1 ½ cups (190g) all-purpose flour
- ½ cup (45g) black cocoa powder
- 1 cup (200g) granulated sugar
- 1 teaspoon baking soda
- ½ teaspoon salt
- ¾ cup (180ml) buttermilk, room temperature
- ½ cup (120ml) vegetable oil
- 2 large eggs, room temperature
- 1 teaspoon white vinegar
- 1 teaspoon vanilla extract
- 2–3 teaspoons black gel food coloring
- 8 oz (226g) cream cheese, softened
- ½ cup (113g) unsalted butter, softened
- 3 ½ cups (440g) powdered sugar, sifted
- 1 ½ teaspoons vanilla extract
- Pinch of salt
Instructions
- Preheat oven to 350°F (175°C). Line a 12-cup muffin tin with paper liners and lightly spray with non-stick cooking spray.
- In a large bowl, whisk together flour, black cocoa powder, sugar, baking soda, and salt for about 30 seconds.
- In a medium bowl, whisk together buttermilk, vegetable oil, eggs, vinegar, and vanilla extract until smooth and slightly frothy.
- Pour wet ingredients into dry ingredients and stir gently with a rubber spatula until just combined (about 15 strokes). Add black gel food coloring starting with 2 teaspoons and fold in; add more if desired for deeper color.
- Divide batter evenly among the 12 liners, filling each about ⅔ full. Bake for 18-22 minutes, or until a toothpick inserted into the center comes out with a few moist crumbs. Cool in pan for 5 minutes, then transfer to a wire rack to cool completely.
- For the frosting: In a large bowl, beat cream cheese and butter on medium speed until smooth and creamy (about 2 minutes). Gradually add sifted powdered sugar, beating on low speed. Add vanilla and salt, then increase to medium-high and beat for 2-3 minutes until light and fluffy.
- Once cupcakes are completely cool, pipe or spread frosting onto each cupcake. Decorate as desired.
Notes
For best results, use room temperature ingredients. Black cocoa powder is key for color and flavor; if unavailable, use Dutch-process cocoa with extra food coloring. Gel food coloring is recommended over liquid. Frosting can be chilled for 15 minutes if too soft. Unfrosted cupcakes can be stored at room temperature for up to 2 days; frosted cupcakes should be refrigerated for up to 4 days.
Nutrition
- Serving Size: 1 cupcake
- Calories: 380
- Sugar: 35
- Sodium: 220
- Fat: 18
- Saturated Fat: 8
- Carbohydrates: 52
- Fiber: 2
- Protein: 4
Keywords: black velvet cupcakes, Halloween cupcakes, black cocoa cupcakes, cream cheese frosting, spooky desserts, easy Halloween recipe


