I’d spent three years dodging Halloween baking. Not because I’m a grinch—I love a good costume party and will happily eat my weight in candy corn. But the pressure? The expectation that every dessert needs to look like it was piped by a professional pastry chef who moonlights as a special effects artist? That got old fast. I’d scroll past those impossibly perfect spider web cupcakes on Pinterest, muttering about lighting and food styling and how nobody actually lives like that.
Then my best friend Sarah threw her annual Halloween bash last October, and I got voluntold to bring dessert. I showed up with a sad store-bought sheet cake and watched her cousin’s girlfriend unveil these gorgeous chocolate cupcakes with intricate white spider webs painted across the frosting. Everyone lost their minds. I stood there with my plastic fork, pretending I wasn’t jealous, but honestly? I was taking mental notes.
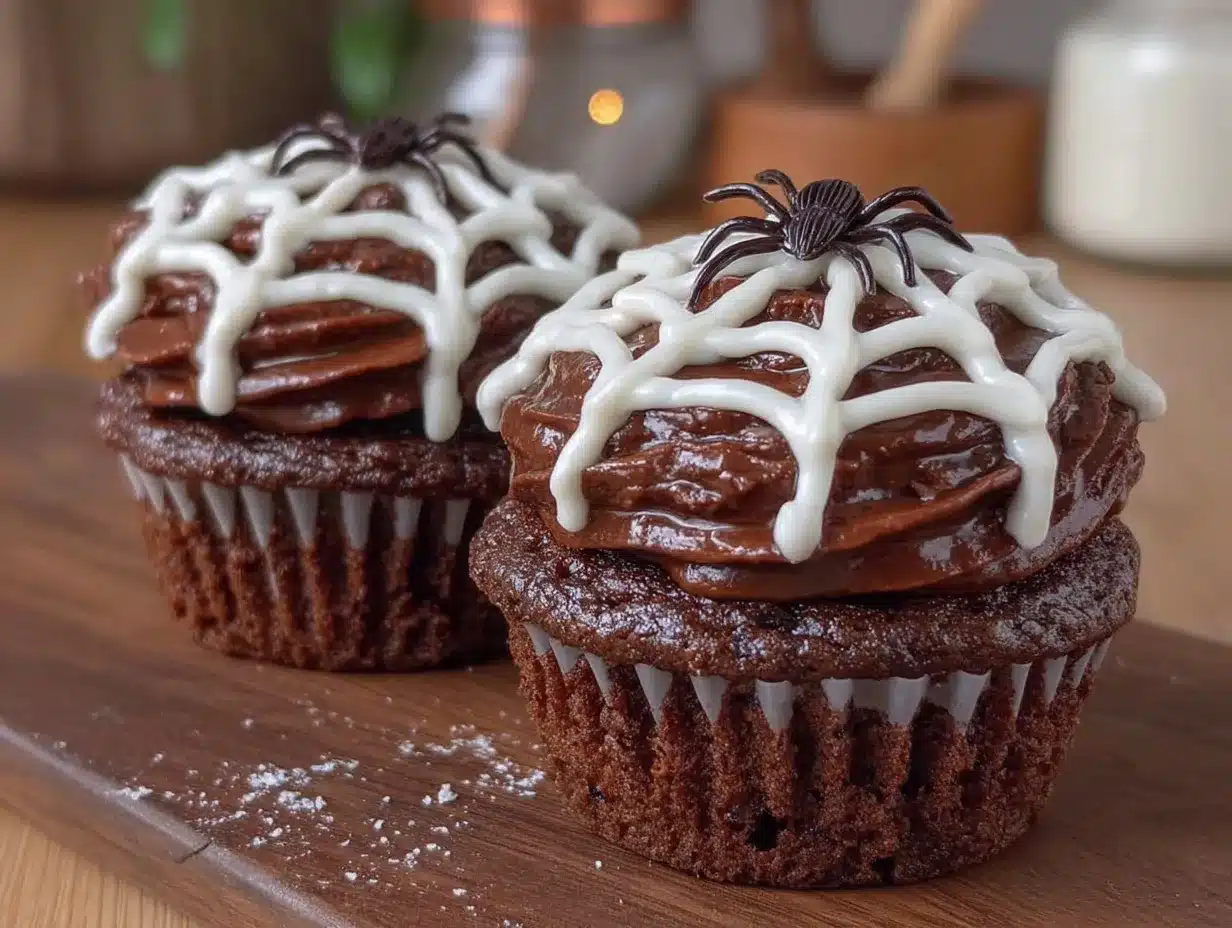
That night, I went home and started experimenting. I mean, I’d seen the technique before—you pipe concentric circles of white icing onto chocolate frosting, then drag a toothpick through them to create the web effect. Simple in theory, but my first attempt looked like a toddler had drawn on my cupcakes with a glue gun. The icing was too thick, the circles were uneven, and the webs just collapsed into a sad white smear. I almost gave up right there. But the next morning, with fresh eyes and a slightly less defeated attitude, I tried again. Thinner icing, steadier hand, better chocolate base. And it worked. It actually worked. I brought that batch to work and my coworker Dave—who once told me my banana bread was “fine”—asked for the recipe twice. That’s when I knew I had something.
So here’s the thing about these Perfect Chocolate Spider Web Cupcakes. They look like you spent hours fussing over them, but the secret is that the technique is almost foolproof once you know a few tricks. They’re the kind of dessert that makes people say “wow” before they even take a bite, and then the rich chocolate flavor keeps them quiet while they eat. Maybe you’ve been there too—wanting to bring something impressive to a party but feeling like you don’t have the skills or the time. I promise, this is the recipe that changes that.
Why You’ll Love This Recipe
I’ve tested this recipe at four different parties now, and it’s never let me down. Here’s why it works so well for hosts like you:
- Looks Complicated, But Isn’t : The spider web design takes about 30 seconds per cupcake once you get the rhythm. No special equipment, no artistic talent required.
- Rich, Moist Chocolate Base : This isn’t one of those dry, crumbly chocolate cupcakes that falls apart when you bite into it. We’re using buttermilk and oil for a texture that stays tender for days.
- Perfect for Halloween Parties : These cupcakes are the star of any spooky spread. They’re dramatic enough for a costume party but approachable enough for a casual family gathering.
- Make-Ahead Friendly : You can bake the cupcakes and make the frosting a day ahead. Just assemble the webs a few hours before serving, and you’re golden.
- Crowd-Pleasing Flavor : The combination of deep dark chocolate frosting against the sweet white web icing is genuinely delicious. Even people who “don’t like Halloween desserts” (whatever that means) will grab seconds.
What makes this recipe different from all the other spider web tutorials out there? It’s the little details I figured out through trial and error. Like how the frosting needs to be the perfect temperature—too cold and the web icing won’t spread, too warm and it sinks into the chocolate. Or how a squeeze bottle gives you way more control than a piping bag for the web lines. These are the things you learn by making mistakes, and I’ve made plenty so you don’t have to.
Honestly, this recipe hits that sweet spot between impressive and doable. It’s the kind of dessert that makes you look like a hero at the party without spending your whole weekend in the kitchen. And isn’t that exactly what we all want?
What Ingredients You Will Need
This recipe uses simple, everyday ingredients to create something that looks like it came from a fancy bakery. Most of these are probably already in your pantry, which is exactly how I like to roll when I’m cooking for a crowd.
For the Chocolate Cupcakes
- 1 ¾ cups (220g) all-purpose flour (spooned and leveled—don’t scoop straight from the bag or you’ll pack it too tight)
- ¾ cup (75g) unsweetened cocoa powder (I prefer Dutch-process for a richer flavor, but natural works fine too)
- 1 ½ teaspoons baking powder
- 1 ½ teaspoons baking soda
- ½ teaspoon salt (just regular table salt, nothing fancy)
- 1 cup (200g) granulated sugar
- ½ cup (100g) packed light brown sugar (this adds moisture and a hint of molasses depth)
- 2 large eggs, at room temperature (cold eggs can make the batter seize up)
- ¾ cup (180ml) buttermilk, shaken (or make your own by adding 1 tablespoon lemon juice to ¾ cup milk and letting it sit for 5 minutes)
- ½ cup (120ml) vegetable oil (canola or any neutral oil works great)
- 2 teaspoons vanilla extract
- 1 cup (240ml) hot coffee (yes, coffee—it doesn’t make them taste like coffee, it just deepens the chocolate flavor. Trust me on this one)
For the Chocolate Buttercream Frosting
- 1 cup (226g) unsalted butter, softened to room temperature (I let mine sit out for about an hour)
- 3 ½ cups (420g) powdered sugar, sifted (sifting prevents lumps—I learned this the hard way)
- ½ cup (50g) unsweetened cocoa powder, sifted
- ¼ cup (60ml) heavy cream (or whole milk in a pinch)
- 2 teaspoons vanilla extract
- ¼ teaspoon salt
For the Spider Web Design
- ½ cup (60g) powdered sugar, sifted
- 1-2 tablespoons milk (start with 1 and add more as needed)
- ¼ teaspoon vanilla extract (optional, but nice)
- Small black fondant or candy spiders for decoration (optional, but they really sell the look)
Ingredient Tips from My Kitchen
The coffee in the batter is non-negotiable—I know it sounds weird, but it’s the secret to that deep, bakery-style chocolate flavor. I use whatever leftover coffee I have from the morning, or I just dissolve a teaspoon of instant espresso powder in hot water. Also, make sure your butter is truly softened for the frosting. If it’s too cold, you’ll end up with lumpy frosting that won’t pipe smoothly. I’ve been there, and it’s frustrating.
For the web icing, a squeeze bottle works way better than a piping bag. You can find them at any grocery store or online for a few bucks. If you don’t have one, a small piping bag with a tiny round tip works too, but the squeeze bottle gives you so much more control.
Equipment Needed
You don’t need a fancy kitchen to pull these off, but a few specific tools will make your life easier:
- 12-cup muffin tin (standard size—mini or jumbo won’t work for this recipe)
- Paper cupcake liners (I like the black or orange ones for Halloween, but any color works)
- Two large mixing bowls (one for dry ingredients, one for wet)
- Whisk and rubber spatula
- Electric hand mixer or stand mixer (for the frosting—you can do it by hand, but your arm will hate you)
- Piping bag with a large round tip (for the chocolate frosting base)
- Squeeze bottle or small piping bag with a tiny round tip (for the web icing)
- Toothpicks (the most important tool—get a bunch, because you’ll go through them)
- Cooling rack (absolutely necessary—don’t skip this or your cupcakes will get soggy bottoms)
If you don’t have a piping bag for the chocolate frosting, you can just spread it with a knife. The webs will still work, they just won’t look as neat. And honestly, a slightly messy web looks more authentically spooky anyway. Budget-friendly tip: use a zip-top bag with the corner snipped off instead of a piping bag. It works perfectly fine.
Preparation Method
Let’s get to the fun part. I’ve broken this down into clear steps, and I’ve included all the little sensory cues I wish someone had told me the first time I made these.
Step 1: Make the Cupcake Batter
Preheat your oven to 350°F (175°C). Line your muffin tin with 12 paper liners—no need to grease them, the liners do the work. In a large bowl, whisk together the flour, cocoa powder, baking powder, baking soda, and salt. Make sure there are no lumps in the cocoa powder; if there are, just press them against the side of the bowl with your whisk. In another bowl, whisk the granulated sugar, brown sugar, eggs, buttermilk, oil, and vanilla extract until everything is smooth and combined. It should look like a thick, glossy chocolate milk. Pour the wet ingredients into the dry ingredients and stir with a rubber spatula until just combined. A few streaks of flour are okay—don’t overmix or the cupcakes will be tough. Now, slowly pour in the hot coffee while stirring gently. The batter will suddenly become very thin and liquidy. Don’t panic—this is exactly what should happen. It should smell intensely chocolatey with a hint of coffee.
Step 2: Bake the Cupcakes
Divide the batter evenly among the 12 liners. I use a ⅓-cup measuring cup and fill each liner about ⅔ full. Bake for 18-22 minutes, until a toothpick inserted into the center comes out clean or with a few moist crumbs. The tops should spring back when you gently press them. Let the cupcakes cool in the pan for 5 minutes, then transfer them to a cooling rack. This is crucial—if you leave them in the hot pan, they’ll keep cooking and dry out. Let them cool completely before frosting. I usually make these a day ahead and store them in an airtight container at room temperature overnight.
Step 3: Make the Chocolate Buttercream
In a large bowl, beat the softened butter with an electric mixer on medium speed until it’s smooth and creamy, about 2 minutes. It should look pale yellow and fluffy. Add the sifted powdered sugar and cocoa powder one cup at a time, beating on low speed after each addition. The mixture will look dry and crumbly at first—that’s normal. Add the heavy cream, vanilla extract, and salt, then increase the speed to medium-high and beat for 3-4 minutes until the frosting is light, fluffy, and spreadable. If it’s too thick, add another tablespoon of cream. If it’s too thin, add a bit more powdered sugar. The finished frosting should hold its shape when you scoop it but still feel soft and silky.
Step 4: Frost the Cupcakes
Fit a piping bag with a large round tip and fill it with the chocolate buttercream. Pipe a generous swirl onto each cooled cupcake, starting from the outside and working inward. You want a smooth, domed surface for the web design. If you don’t have a piping bag, just spread the frosting with a knife in a smooth, even layer. Place the frosted cupcakes in the refrigerator for 15-20 minutes to firm up the frosting. This is important—the web icing will sink into soft frosting, and we want it to sit on top.
Step 5: Make the Web Icing
In a small bowl, whisk together the sifted powdered sugar, 1 tablespoon of milk, and the vanilla extract. You’re looking for a consistency that’s thick but still flows smoothly through a squeeze bottle. It should be about the consistency of thin pancake batter. If it’s too thick, add a few drops of milk. If it’s too thin, add a bit more powdered sugar. Transfer the icing to your squeeze bottle or small piping bag.
Step 6: Create the Spider Webs
This is where the magic happens. Take a chilled frosted cupcake and use the squeeze bottle to pipe a small circle in the center of the frosting. Then pipe a larger circle around it, about halfway to the edge. Then pipe a third circle near the edge of the frosting. You should have three concentric circles of white icing on the chocolate frosting. Immediately take a toothpick and drag it from the center circle outward through all three circles to the edge. Wipe the toothpick clean, then drag from the edge back toward the center, angling slightly so you’re creating a different line. Repeat this around the entire cupcake, spacing the lines evenly, until you have a complete spider web pattern. You should end up with about 6-8 lines radiating from the center. The icing will pull into points as you drag, creating the classic web look. Work quickly—the icing sets fast. If you mess up, just wipe the frosting clean and start over. I’ve done it dozens of times.
Step 7: Add the Spiders
If you’re using fondant or candy spiders, place one on each web while the icing is still slightly wet so it sticks. You can also pipe a small spider shape using leftover chocolate frosting. I like to place the spider slightly off-center, as if it’s crawling across the web. It adds a nice touch of drama.
Cooking Tips & Techniques
I’ve made these cupcakes at least a dozen times now, and I’ve collected a few tricks that make the process smoother. First, the temperature of your frosting matters more than you think. If the chocolate frosting is too soft, the web icing will just sink in and disappear. That’s why I pop the frosted cupcakes in the fridge for 15-20 minutes before adding the webs. If you’re short on time, even 10 minutes helps.
The consistency of the web icing is another thing I had to figure out. The first time I made this, my icing was too thick and it came out in blobs instead of smooth lines. The second time, it was too thin and just puddled on top of the frosting. You want it to flow smoothly from the squeeze bottle but still hold its shape when it hits the frosting. Think of it like a thick syrup—slow-moving but not stiff.
One mistake I made early on was trying to pipe too many circles. Three is the sweet spot. Any more and the web looks crowded and messy. Any fewer and it doesn’t look like a web at all. And don’t worry if your circles aren’t perfectly round—the toothpick drag will smooth everything out. Actually, a slightly imperfect circle looks more organic and web-like.
For the toothpick drag, wipe the toothpick clean after each line. If you don’t, the white icing will start to mix with the chocolate frosting and you’ll get a muddy brown color instead of a clean white web. Keep a paper towel handy and wipe between each drag. It takes two seconds and makes a huge difference.
If you’re making these for a party, I recommend assembling the webs no more than 4-6 hours before serving. The web icing can start to bleed into the chocolate frosting if it sits too long, especially in a warm room. If you need to prep earlier, frost the cupcakes and refrigerate them, then add the webs right before the party.
Variations & Adaptations
One of the best things about this recipe is how adaptable it is. I’ve tried several variations over the years, and here are my favorites:
Gluten-Free Version : Substitute the all-purpose flour with a 1:1 gluten-free baking flour blend. I’ve used Bob’s Red Mill with great results. The texture is slightly denser, but still delicious. Just make sure your blend contains xanthan gum for structure.
Dairy-Free Adaptation : Use a dairy-free butter substitute (I like Miyoko’s for baking) and replace the buttermilk with almond milk mixed with 1 tablespoon of lemon juice. For the frosting, use canned coconut cream instead of heavy cream. The flavor is a bit different, but the texture holds up well.
Orange Chocolate Spider Webs : Add 1 tablespoon of orange zest to the cupcake batter and ½ teaspoon of orange extract to the chocolate frosting. The orange-chocolate combo is surprisingly perfect for fall, and the orange flavor pairs beautifully with the dark chocolate.
White Chocolate Webs : Instead of the simple powdered sugar icing, use melted white chocolate thinned with a tiny bit of coconut oil. It sets up harder and gives a more dramatic white-on-black contrast. Just be careful not to overheat the white chocolate or it will seize up.
Mini Cupcake Version : Use a mini muffin tin and bake for 10-12 minutes. You’ll get about 36 mini cupcakes. The web design is trickier on a smaller surface, but you can just pipe a simple zigzag pattern that still looks spooky.
I’ve also tried adding a pinch of cayenne pepper to the chocolate frosting for a spicy kick. It’s not for everyone, but if you’re a fan of Mexican hot chocolate, it’s a fun twist. Just go easy—a little heat goes a long way.
Serving & Storage Suggestions
These cupcakes are best served at room temperature, so take them out of the fridge about 30 minutes before your guests arrive. The chocolate flavor is more pronounced when the frosting isn’t cold, and the texture is softer and more pleasant.
For presentation, I like to arrange them on a black or dark purple cake stand to make the white webs pop. A few fake spider webs draped around the base of the stand add to the spooky vibe without much effort. If you’re serving them at a party, place them on a table near other Halloween treats like caramel apples or pumpkin cookies. They pair beautifully with a hot apple cider or a spiced chai latte.
To store leftovers, place the cupcakes in an airtight container in the refrigerator for up to 3 days. The webs will soften slightly, but they’ll still look decent. If you need to store them longer, freeze the unfrosted cupcakes for up to 2 months. Wrap each one tightly in plastic wrap and then in foil. When you’re ready to serve, thaw them at room temperature, then frost and decorate. The frosting itself can be made ahead and refrigerated for up to a week—just let it come to room temperature and re-whip it before using.
One thing I’ve noticed is that the flavors actually get better after a day. The coffee in the batter mellows out and the chocolate deepens. So if you can, bake the cupcakes a day ahead. Your future self will thank you.
Nutritional Information & Benefits
Let’s be real—these are a treat, not a health food. But here’s the estimated nutrition per cupcake (based on 12 servings):
- Calories: 450-480
- Fat: 24g
- Carbohydrates: 58g
- Protein: 5g
- Fiber: 3g
- Sugar: 42g
That said, there are a few redeeming qualities. The cocoa powder is rich in antioxidants called flavonoids, which can support heart health. The coffee in the batter adds a small amount of caffeine and even more antioxidants. And the buttermilk provides calcium and probiotics. Are these enough to make the cupcakes healthy? No. But they’re not meant to be. They’re meant to be enjoyed on a spooky Halloween night with friends and family.
If you’re watching your sugar intake, you can reduce the sugar in the cupcake batter by ¼ cup without affecting the texture too much. The frosting is harder to adjust, but you can use a sugar-free powdered sugar substitute if needed. Just know that the texture will be slightly different.
These cupcakes contain gluten, dairy, and eggs, so they’re not suitable for those with allergies to those ingredients. The variations I mentioned above can help accommodate some dietary needs, but always check your specific ingredients.
Conclusion
These Perfect Chocolate Spider Web Cupcakes have become my go-to Halloween contribution, and I honestly don’t see that changing anytime soon. They’re the recipe that turned me from a Halloween baking skeptic into someone who actually looks forward to October. There’s something deeply satisfying about watching people’s faces light up when they see the webs, and then seeing them close their eyes in pleasure after the first bite.
I hope you give these a try, whether you’re hosting a big costume party or just want to surprise your family with something special. Don’t stress about making the webs perfect—the beauty of this design is that it looks best when it’s a little imperfect. That’s the whole point of spider webs, right? They’re not supposed to be symmetrical.
If you make these, I’d love to hear how they turned out. Drop a comment below and let me know if you tried any of the variations, or if you came up with your own twist. And if you have a photo, tag me on social media—I always love seeing your creations. Happy Halloween, and happy baking!
Frequently Asked Questions
Can I use a boxed cake mix for the cupcakes?
Absolutely. If you’re short on time, a chocolate boxed cake mix works perfectly. Just follow the package instructions and add a teaspoon of vanilla extract for extra flavor. The spider web design will work the same way on any chocolate cupcake base.
How far in advance can I make the spider web design?
I recommend adding the webs no more than 4-6 hours before serving. The white icing can start to bleed into the chocolate frosting if it sits too long, especially in a warm room. If you need to prep earlier, frost the cupcakes and refrigerate them, then add the webs right before the party.
My web icing is too thick/thin. How do I fix it?
If it’s too thick, add a few drops of milk and stir until it reaches a smooth, flowing consistency. If it’s too thin, add a bit more sifted powdered sugar. You want it to be about the consistency of thin pancake batter—thick enough to hold its shape but thin enough to flow smoothly through a squeeze bottle.
Can I use a different frosting flavor for the base?
Yes! Cream cheese frosting works beautifully with chocolate cupcakes, and the white color of the cream cheese creates a nice contrast with the web icing. Vanilla buttercream is also a great option if you want a less intense chocolate flavor. Just make sure whatever frosting you use is firm enough to hold the web design.
How do I transport these cupcakes without ruining the webs?
Place each cupcake in a cupcake carrier or a deep baking dish with a lid. If you don’t have a carrier, you can use a cardboard box lined with paper towels. The key is to make sure the cupcakes don’t slide around. I’ve also had success placing them in a single layer on a large platter and covering them loosely with plastic wrap, making sure the wrap doesn’t touch the webs.
Pin This Recipe!
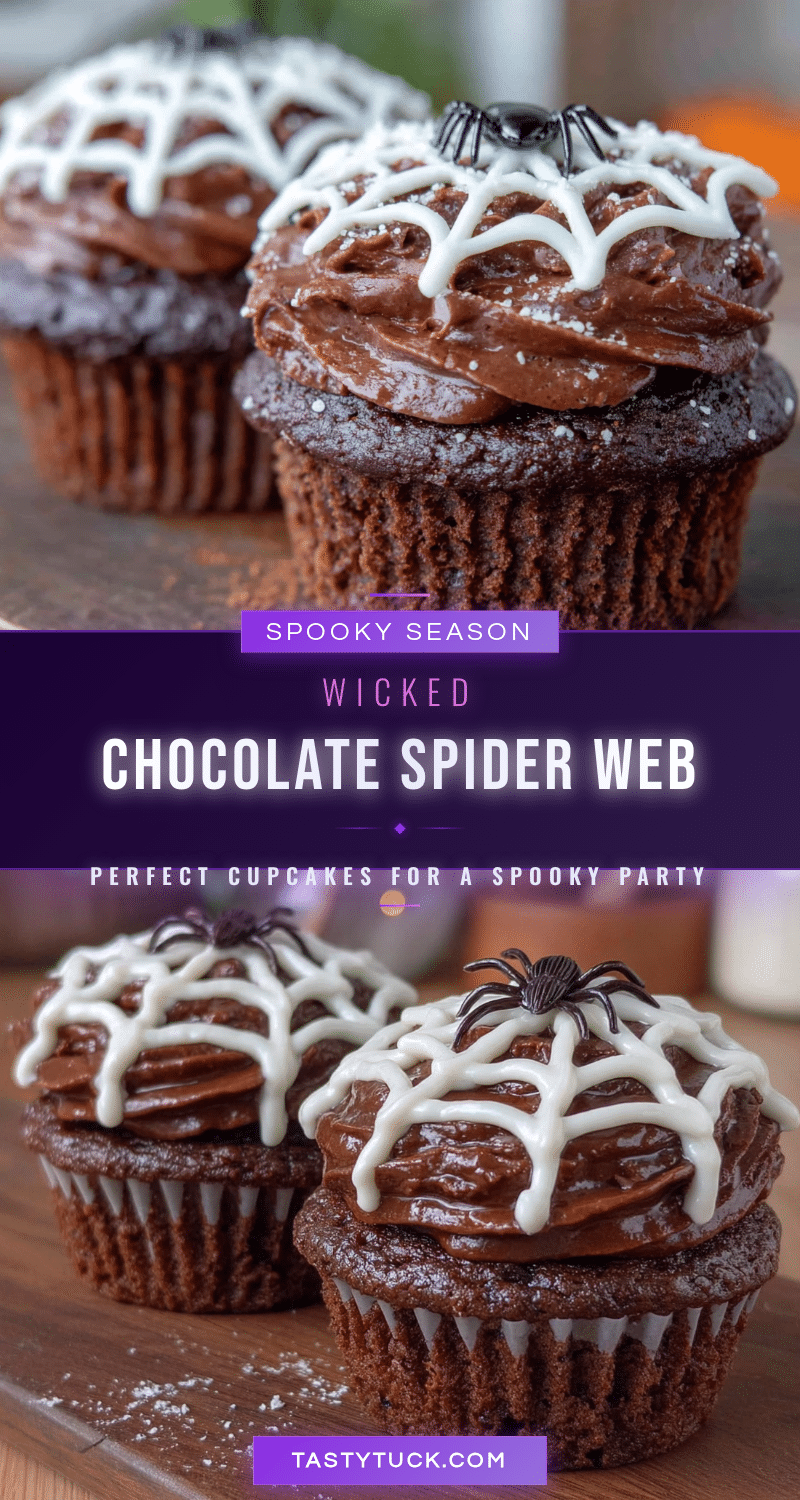
Perfect Chocolate Spider Web Cupcakes: Best Easy Halloween Recipe
These rich, moist chocolate cupcakes feature a dramatic spider web design that looks impressive but is surprisingly easy to create. Perfect for Halloween parties, this foolproof recipe delivers bakery-style results with simple ingredients and a few clever tricks.
- Prep Time: 30 minutes
- Cook Time: 20 minutes
- Total Time: 50 minutes
- Yield: 12 cupcakes 1x
- Category: Dessert
- Cuisine: American
Ingredients
- 1 ¾ cups (220g) all-purpose flour, spooned and leveled
- ¾ cup (75g) unsweetened cocoa powder (Dutch-process preferred)
- 1 ½ teaspoons baking powder
- 1 ½ teaspoons baking soda
- ½ teaspoon salt
- 1 cup (200g) granulated sugar
- ½ cup (100g) packed light brown sugar
- 2 large eggs, at room temperature
- ¾ cup (180ml) buttermilk, shaken
- ½ cup (120ml) vegetable oil
- 2 teaspoons vanilla extract
- 1 cup (240ml) hot coffee
- 1 cup (226g) unsalted butter, softened to room temperature
- 3 ½ cups (420g) powdered sugar, sifted
- ½ cup (50g) unsweetened cocoa powder, sifted
- ¼ cup (60ml) heavy cream
- 2 teaspoons vanilla extract
- ¼ teaspoon salt
- ½ cup (60g) powdered sugar, sifted
- 1–2 tablespoons milk
- ¼ teaspoon vanilla extract (optional)
- Small black fondant or candy spiders for decoration (optional)
Instructions
- Preheat oven to 350°F (175°C). Line a 12-cup muffin tin with paper liners.
- In a large bowl, whisk together flour, ¾ cup cocoa powder, baking powder, baking soda, and salt until no lumps remain.
- In another bowl, whisk granulated sugar, brown sugar, eggs, buttermilk, oil, and 2 teaspoons vanilla extract until smooth and glossy.
- Pour wet ingredients into dry ingredients and stir with a rubber spatula until just combined (a few streaks of flour are okay).
- Slowly pour in hot coffee while stirring gently until batter is thin and liquidy.
- Divide batter evenly among the 12 liners, filling each about ⅔ full.
- Bake for 18-22 minutes until a toothpick inserted in the center comes out clean or with a few moist crumbs. Cool in pan for 5 minutes, then transfer to a cooling rack to cool completely.
- For the frosting: Beat softened butter with an electric mixer on medium speed until smooth and creamy, about 2 minutes.
- Add sifted 3 ½ cups powdered sugar and ½ cup cocoa powder one cup at a time, beating on low after each addition.
- Add ¼ cup heavy cream, 2 teaspoons vanilla extract, and ¼ teaspoon salt. Beat on medium-high for 3-4 minutes until light, fluffy, and spreadable.
- Fit a piping bag with a large round tip and fill with chocolate buttercream. Pipe a generous swirl onto each cooled cupcake, starting from the outside and working inward.
- Place frosted cupcakes in the refrigerator for 15-20 minutes to firm up the frosting.
- For the web icing: In a small bowl, whisk together sifted ½ cup powdered sugar, 1 tablespoon milk, and ¼ teaspoon vanilla extract until smooth and about the consistency of thin pancake batter. Transfer to a squeeze bottle or small piping bag with a tiny round tip.
- Take a chilled frosted cupcake and pipe a small circle in the center of the frosting, then a larger circle halfway to the edge, then a third circle near the edge.
- Immediately drag a toothpick from the center circle outward through all three circles to the edge. Wipe the toothpick clean, then drag from the edge back toward the center at a slight angle. Repeat around the entire cupcake, spacing lines evenly, to create 6-8 radiating lines.
- If using, place a fondant or candy spider on each web while the icing is still slightly wet.
- Repeat steps 14-16 for remaining cupcakes. Serve at room temperature.
Notes
The coffee in the batter does not make the cupcakes taste like coffee; it deepens the chocolate flavor. For best results, chill the frosted cupcakes for 15-20 minutes before adding the web design to prevent the icing from sinking. The web icing should be the consistency of thin pancake batter. Wipe the toothpick clean after each drag to prevent muddy colors. Assemble webs no more than 4-6 hours before serving for best appearance. Cupcakes can be baked a day ahead and stored in an airtight container at room temperature.
Nutrition
- Serving Size: 1 cupcake
- Calories: 465
- Sugar: 42
- Sodium: 380
- Fat: 24
- Saturated Fat: 12
- Carbohydrates: 58
- Fiber: 3
- Protein: 5
Keywords: Halloween cupcakes, spider web cupcakes, chocolate cupcakes, easy Halloween dessert, spooky cupcakes, chocolate buttercream, Halloween baking


