The first Sunday of November, and the parking lot of the old high school football stadium was already half-full by 9 AM. I was wedged into the back of my buddy’s truck, holding a warm, foil-wrapped sheet pan on my lap, hoping the aluminum wouldn’t slide off the seat. The air smelled like damp grass, cold coffee, and anticipation. Tailgating has its own specific rhythm—the setup, the small talk, the way everyone pretends they’re not freezing until the first touchdown. But honestly, the real star of the morning wasn’t the game. It was that pan of ground beef nachos I’d spent the night before obsessing over. I had made versions of this before, but something clicked that day. The chips stayed crunchy. The cheese didn’t turn into a sad, congealed brick. And the ground beef—seasoned just right—held its own against all the toppings. I sat there, eating straight off the pan with a plastic fork, and realized I’d accidentally landed on the perfect portable crowd-pleaser. It wasn’t fancy. It wasn’t complicated. It was just right. And that’s the kind of recipe you keep close.
This Sheet Pan Ground Beef Nacho Bake is the kind of thing you make when you want to feed a hungry group without spending the whole party in the kitchen. You layer everything on one pan, let the oven do the heavy lifting, and then just let people dig in. It’s messy, it’s cheesy, and it’s exactly what a game day spread should be. I’ve tweaked this version over a few seasons of tailgates and backyard get-togethers, and I think I’ve finally cracked the code on keeping everything from turning into a soggy pile. There’s a trick to the layering, a little patience with the cheese, and a specific way to season the beef that makes it taste like you spent way more time on it than you actually did. Trust me on this one.
Why You’ll Love This Recipe
I’ve tested this nacho bake more times than I care to admit—some batches were glorious, others were a sad, soggy mess that I had to scrape into the trash. But this version? It’s the one I keep coming back to. Here’s why it works so well for tailgating, parties, or just a lazy Sunday at home.
- Quick & Easy: From start to finish, you’re looking at about 30 minutes of active work. The oven does the rest. No standing over a stove stirring cheese sauce for twenty minutes.
- Simple Ingredients: Everything here is stuff you probably already have in your pantry or can grab in one quick trip to the store. No weird specialty items.
- Perfect for Tailgating: It travels surprisingly well if you wrap it tight in foil. Just reheat it on the grill or in the oven when you get there.
- Crowd-Pleaser: I’ve yet to meet someone who doesn’t go back for seconds. It’s got that universal appeal that works for kids, picky eaters, and the guy who claims he doesn’t like “mexican food.”
- Unbelievably Delicious: The contrast between the crunchy chips, the seasoned beef, and the melty cheese is just… perfect. It’s comfort food at its most honest.
What makes this recipe different from all the other nacho bakes out there is the layering technique. Most recipes just dump everything on a pan and hope for the best. I’ve learned that you need a barrier between the chips and the wet ingredients to keep them from going soft. A thin layer of refried beans does the trick, acting like a shield. Plus, I use a specific blend of spices for the beef that gives it a deep, savory flavor without being too salty or overpowering. This isn’t just another nacho recipe—it’s the one you’ll bookmark and use for every game day from now on.
Honestly, this recipe is the kind that makes you close your eyes after the first bite. It’s warm, it’s cheesy, and it feels like a hug on a cold day. Perfect for impressing a crowd without any stress, or turning a simple game day into something memorable.
What Ingredients You Will Need
This recipe uses simple, honest ingredients to deliver big flavor without any fuss. Most of these are pantry staples, but a few key choices make all the difference. Let’s break down what you’ll need and why each ingredient matters.
- 1 lb ground beef (80/20): The 80/20 blend gives you enough fat for flavor without making the nachos greasy. I prefer ground chuck for its beefy taste. If you want a leaner option, ground sirloin works, but you might need to add a tablespoon of oil to the pan.
- 1 packet taco seasoning (or homemade blend): I use a store-bought packet for convenience, but if you have a favorite homemade mix, go for it. Just make sure it’s not too heavy on the cumin, which can overpower the dish.
- 1 can (15 oz) refried beans: This is your secret weapon. Spreading a thin layer of refried beans on the chips before adding the meat creates a moisture barrier. It keeps the chips crunchy and adds a creamy texture. I like the traditional kind, but vegetarian refried beans work just fine.
- 1 bag (13-16 oz) restaurant-style tortilla chips: Don’t use thin, delicate chips here. You need the sturdy, thick ones that can hold up to the weight of the toppings. Restaurant-style or scoop-shaped chips are your best bet.
- 2 cups shredded Mexican blend cheese: Pre-shredded cheese is fine, but if you have the time, shredding a block of cheese yourself will give you a much creamier melt. The anti-caking agents in pre-shredded cheese can sometimes prevent it from melting smoothly.
- 1 cup shredded cheddar cheese: I like adding a layer of sharp cheddar on top for extra color and a sharper flavor. It’s the finishing touch.
- 1/2 cup diced white onion: Adds a little bite and texture. If raw onion is too strong for you, you can sauté it with the ground beef for a milder flavor.
- 1 jalapeño, thinly sliced (optional): For heat. I leave the seeds in for extra kick, but you can remove them if you prefer a milder nacho. Pickled jalapeños also work great here.
- 1/2 cup black olives, sliced: A classic topping that adds a briny, salty pop. I know some people hate them, so feel free to leave them off or serve them on the side.
- 1/2 cup diced tomatoes: Use Roma tomatoes for best results—they’re less watery than other varieties. Pat them dry with a paper towel before adding to avoid soggy chips.
- 1/4 cup chopped fresh cilantro: For freshness and color. Add it right before serving so it doesn’t wilt.
- 1/2 cup sour cream (for drizzling): I like to put the sour cream in a small zip-top bag, snip the corner, and drizzle it over the top. It looks fancy with zero effort.
- 1/2 cup salsa or pico de gallo: Adds acidity and freshness. If you’re using jarred salsa, drain off some of the liquid first.
- Optional toppings: Guacamole, sliced radishes, pickled red onions, or a squeeze of lime juice.
Equipment Needed
You don’t need a lot of fancy gear for this recipe, which is part of its beauty. Here’s what you’ll need to pull it off.
- Large sheet pan (half-sheet, 18×13 inches): This is non-negotiable. A half-sheet pan is the perfect size for a generous layer of nachos. If you use a smaller pan, the chips will be piled too high and won’t cook evenly.
- Large skillet or frying pan: For browning the ground beef. A cast-iron skillet works great, but any non-stick or stainless steel pan will do.
- Wooden spoon or spatula: For breaking up the ground beef as it cooks.
- Cheese grater (if shredding your own cheese): A box grater is fine, but a rotary grater makes quick work of it.
- Sharp knife and cutting board: For dicing the onion, tomatoes, and slicing the jalapeño.
- Measuring cups and spoons: For the seasoning and toppings.
- Aluminum foil: For easy cleanup. I always line my sheet pan with foil before adding the chips. It makes washing up a breeze.
If you don’t have a half-sheet pan, you can use a 9×13 baking dish, but you’ll need to adjust the layering. The chips will be thicker, so you might need to add a few minutes to the baking time.
Preparation Method
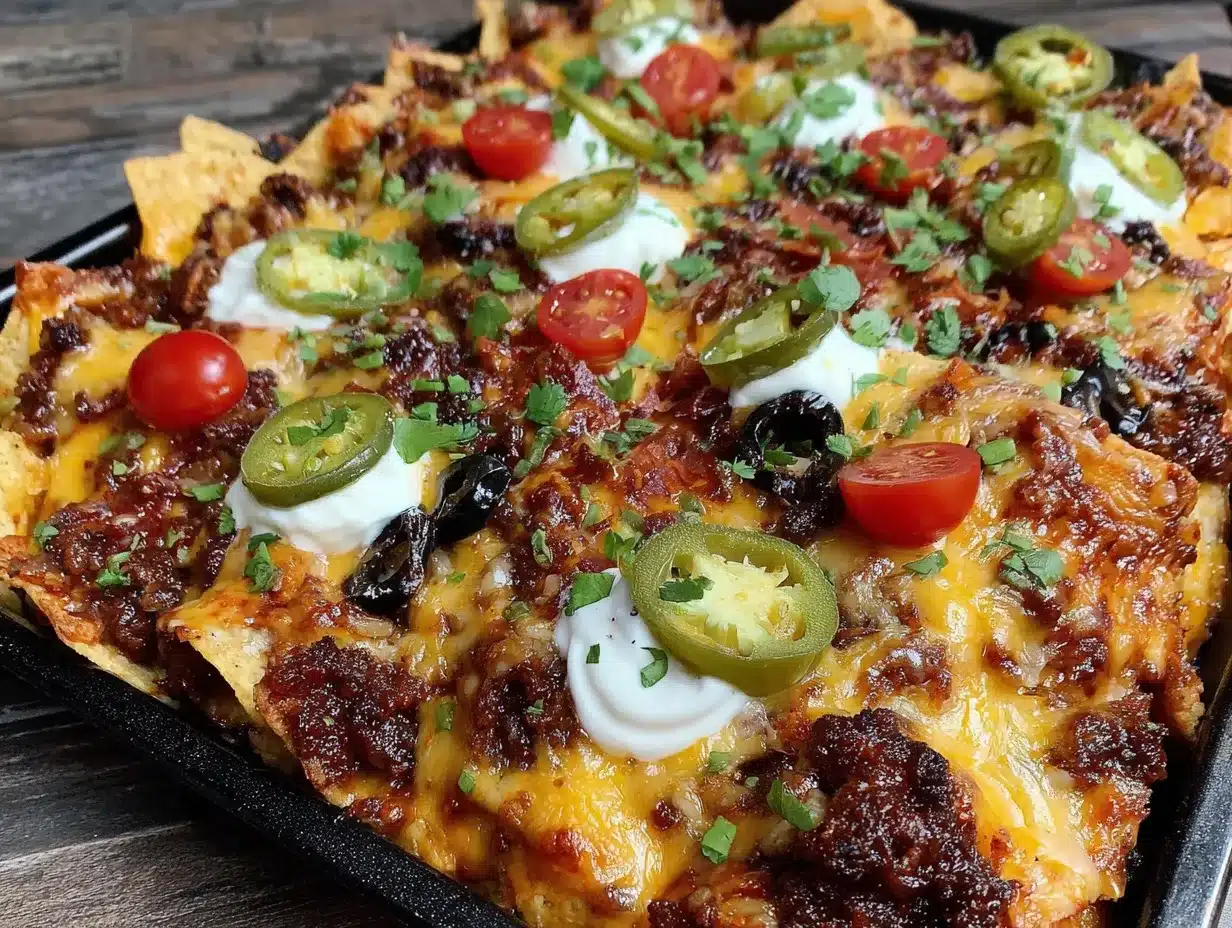
Alright, let’s get cooking. This is the part where the magic happens. I’ve broken it down into simple steps so you don’t miss a thing.
- Preheat your oven to 375°F (190°C). Line your sheet pan with aluminum foil for easy cleanup. Set it aside for now.
- Cook the ground beef. Place a large skillet over medium-high heat. Add the ground beef and cook, breaking it up with a wooden spoon, until it’s browned and no longer pink. This should take about 6-8 minutes. Don’t drain all the fat—leave about a tablespoon in the pan for flavor. If you’re using lean beef, you might need to add a splash of oil.
- Season the beef. Reduce the heat to low. Add the taco seasoning packet and 1/4 cup of water. Stir everything together and let it simmer for 2-3 minutes until the sauce thickens and coats the meat. Turn off the heat and set the pan aside.
- Warm the refried beans. In a small microwave-safe bowl, heat the refried beans for about 30 seconds. You want them to be spreadable, not piping hot. Stir them with a fork to loosen them up. If they’re too thick, add a tablespoon of water.
- Layer the chips. Spread the tortilla chips in an even layer on your prepared sheet pan. Don’t pile them too high—you want a single, even layer with a few overlapping edges. This ensures every chip gets some topping.
- Spread the refried beans. Using a small spatula or the back of a spoon, gently spread the warmed refried beans over the chips. Don’t worry about covering every single chip—just get a nice, thin layer across the top. This is your moisture barrier.
- Add the ground beef. Spoon the seasoned ground beef evenly over the beans. Try to distribute it so every chip gets a little bit of meat. Use your fingers to break up any large clumps of beef.
- Top with cheese. Sprinkle the Mexican blend cheese evenly over the beef. Then, sprinkle the shredded cheddar on top. This double layer of cheese is what gives you that glorious, melty crust.
- Add the toppings (half of them). Sprinkle the diced onion, half the jalapeño slices, and half the black olives over the cheese. You’ll add the fresh toppings later, but these can go in the oven.
- Bake. Place the sheet pan in the preheated oven and bake for 12-15 minutes, or until the cheese is fully melted and bubbly. The edges of the chips should be lightly golden. Keep an eye on it—you don’t want the chips to burn.
- Rest and finish. Remove the pan from the oven and let it rest for 2-3 minutes. This allows the cheese to set slightly, so it doesn’t slide off the chips when you pick them up. While it’s resting, sprinkle the diced tomatoes, remaining jalapeño slices, and black olives over the top. Finish with a generous drizzle of sour cream and a sprinkle of fresh cilantro.
- Serve immediately. Place the sheet pan in the center of the table with a stack of small plates and forks. Let everyone dig in straight from the pan. That’s the tailgating way.
Cooking Tips & Techniques
I’ve made this recipe more times than I can count, and I’ve learned a few things the hard way. Here are my best tips to make sure your nacho bake turns out perfect every time.
- Don’t skip the refried beans. I know it seems like an extra step, but it’s the single most important thing you can do to keep your chips from getting soggy. The beans create a barrier that prevents the moisture from the beef and cheese from soaking into the chips. Trust me on this one.
- Use room temperature ingredients. If your cheese and sour cream are cold from the fridge, they won’t melt or spread as evenly. Let them sit on the counter for 15 minutes before you start assembling.
- Don’t over-bake. The goal is melted cheese, not burnt chips. Once the cheese is bubbly and the edges of the chips are just starting to turn golden, pull it out. Over-baking will give you hard, crunchy chips that are difficult to eat.
- Layer strategically. Put the heavier toppings (like the beef and beans) on the bottom, and the lighter, fresh toppings (like tomatoes and cilantro) on top. This keeps the chips from getting weighed down and crushed.
- Make it ahead. You can cook the ground beef and prep all your toppings the night before. Store everything in the fridge separately. When you’re ready to bake, just assemble and pop it in the oven. It’s a huge time-saver on game day.
- One mistake I made early on: I once used low-fat cheese to try to be healthier. Don’t do it. Low-fat cheese doesn’t melt well and ends up with a rubbery texture. Stick with full-fat cheese for the best results.
Variations & Adaptations
One of the best things about this recipe is how easy it is to change it up. Here are a few variations I’ve tried and loved.
- Chicken Nacho Bake: Swap the ground beef for shredded rotisserie chicken. Just toss the chicken with the taco seasoning and a little chicken broth before adding it to the chips. It’s a lighter option that’s still incredibly satisfying.
- Vegetarian Nacho Bake: Skip the meat entirely and double up on the beans. Use a can of black beans (rinsed and drained) along with the refried beans. You can also add sautéed bell peppers, onions, and corn for extra texture.
- Spicy Chorizo Version: Replace the ground beef with Mexican chorizo. Cook it the same way, but be careful—chorizo releases a lot of fat. Drain most of it before adding the seasoning. The smoky, spicy flavor is incredible.
- Breakfast Nachos: This is a fun twist for a morning tailgate. Use the same base, but top with scrambled eggs, crumbled bacon, and a drizzle of hot sauce. It’s a game-changer.
- Low-Carb Option: Swap the tortilla chips for thick-cut slices of zucchini or bell pepper. Roast them for 5 minutes first to soften them, then layer everything on top. It’s not the same texture, but it scratches the itch if you’re watching your carbs.
I personally love the chorizo version. I made it for a friend’s birthday party last summer, and it disappeared in about 10 minutes. The smoky, spicy flavor pairs perfectly with the cool sour cream and fresh cilantro.
Serving & Storage Suggestions
This nacho bake is best served fresh out of the oven, but here’s how to handle leftovers if you have any (which is rare).
- Serving temperature: Serve it hot, straight from the oven. The cheese should be stretchy and the chips should still have a little crunch. If it sits out for more than 30 minutes, the chips will start to soften.
- Presentation: I like to put the sheet pan on a wooden board or a trivet in the center of the table. Let everyone grab a plate and serve themselves. It’s casual and encourages sharing.
- What to serve with it: This dish is a meal on its own, but it pairs beautifully with a simple side salad or a bowl of loaded corn salad hotdish for a full spread. For drinks, a cold beer or a margarita is the perfect match.
- Storing leftovers: If you have leftovers, let them cool completely, then transfer them to an airtight container. Store in the fridge for up to 3 days. The chips will be soft, but the flavor is still great.
- Reheating: The best way to reheat is in the oven. Spread the leftovers on a sheet pan and bake at 350°F for 5-7 minutes. The microwave will make the chips soggy, so avoid it if you can.
- Flavor development: Honestly, the flavors meld together even more the next day. The beef and cheese get all cozy, and it tastes almost like a different dish. I’ve been known to eat cold leftovers straight from the fridge the next morning.
Nutritional Information & Benefits
Let’s be real—this isn’t a health food. But it’s made with real ingredients, and there are a few redeeming qualities worth mentioning.
- Estimated per serving (based on 8 servings): Calories: 485, Fat: 28g, Carbs: 35g, Protein: 24g, Fiber: 6g.
- Protein punch: The ground beef and cheese provide a solid amount of protein, which helps keep you full and satisfied. It’s a great option for a post-game meal when you need energy.
- Fiber from beans: The refried beans and black beans (if you use them) add fiber, which is good for digestion. Plus, they help balance out the richness of the cheese.
- Vitamins from toppings: The tomatoes, onions, and cilantro add a small amount of vitamins A and C, along with antioxidants. It’s not a salad, but every little bit helps.
- Dietary considerations: This recipe can be made gluten-free by using certified gluten-free tortilla chips and taco seasoning. It’s also nut-free and egg-free.
- Potential allergens: Contains dairy (cheese, sour cream). If you’re dairy-free, use vegan cheese and a plant-based sour cream alternative.
I’m not here to pretend this is a health food, but I feel good about feeding it to my family. It’s real food, made from scratch, and shared with people I love. That counts for something, right?
Conclusion
This Sheet Pan Ground Beef Nacho Bake is the kind of recipe that earns a permanent spot in your rotation. It’s easy, it’s forgiving, and it always gets rave reviews. Whether you’re feeding a crowd at a tailgate, hosting a game day party, or just looking for a fun weeknight dinner, this dish delivers. I love how it brings people together—everyone huddled around the pan, grabbing chips, laughing, and talking. That’s what cooking is all about for me.
Don’t be afraid to make it your own. Swap the toppings, adjust the spice level, or try one of the variations I mentioned. The beauty of this recipe is that it works with whatever you have on hand. If you make it, I’d love to hear how it turned out. Drop a comment below and let me know your favorite topping combination. And if you’re looking for another crowd-pleasing dish for your next gathering, you might also enjoy this Midwest walking taco casserole—it’s got that same fun, shareable vibe. Happy cooking, and go team!
Frequently Asked Questions
Can I make this nacho bake in advance?
Yes, you can prep the ground beef and chop all the toppings a day ahead. Store everything separately in the fridge. When you’re ready to eat, just assemble and bake. It’s a great time-saver for busy game days.
How do I keep the chips from getting soggy?
The key is the refried beans. Spread a thin layer over the chips before adding any wet ingredients. The beans act as a barrier, preventing moisture from soaking into the chips. Also, don’t over-bake—pull the pan out as soon as the cheese is melted.
Can I use ground turkey instead of beef?
Absolutely. Ground turkey works well, but it’s leaner, so you’ll need to add a tablespoon of oil to the pan when cooking. Season it the same way, and you won’t notice much difference in flavor.
What’s the best way to reheat leftovers?
The oven is your best friend here. Spread the leftovers on a sheet pan and reheat at 350°F for 5-7 minutes. The microwave will make the chips soft and chewy. If you’re in a rush, a toaster oven works great too.
Can I freeze this nacho bake?
I don’t recommend freezing it after it’s been baked. The chips will turn into a mushy mess when thawed. However, you can freeze the cooked ground beef separately for up to 3 months. Just thaw, reheat, and assemble fresh chips when you’re ready.
Pin This Recipe!

Sheet Pan Ground Beef Nacho Bake Best Easy Tailgate Recipe
This Sheet Pan Ground Beef Nacho Bake is the perfect portable crowd-pleaser for tailgating, parties, or a lazy Sunday at home. It’s easy, cheesy, and features a clever layering technique to keep chips crunchy.
- Prep Time: 15 minutes
- Cook Time: 15 minutes
- Total Time: 30 minutes
- Yield: 8 servings 1x
- Category: Main Course
- Cuisine: Mexican-American
Ingredients
- 1 lb ground beef (80/20)
- 1 packet taco seasoning (or homemade blend)
- 1 can (15 oz) refried beans
- 1 bag (13-16 oz) restaurant-style tortilla chips
- 2 cups shredded Mexican blend cheese
- 1 cup shredded cheddar cheese
- 1/2 cup diced white onion
- 1 jalapeño, thinly sliced (optional)
- 1/2 cup black olives, sliced
- 1/2 cup diced tomatoes
- 1/4 cup chopped fresh cilantro
- 1/2 cup sour cream (for drizzling)
- 1/2 cup salsa or pico de gallo
- Optional toppings: guacamole, sliced radishes, pickled red onions, lime juice
Instructions
- Preheat your oven to 375°F (190°C). Line your sheet pan with aluminum foil for easy cleanup.
- Cook the ground beef: Place a large skillet over medium-high heat. Add the ground beef and cook, breaking it up with a wooden spoon, until browned and no longer pink (6-8 minutes). Leave about a tablespoon of fat in the pan.
- Season the beef: Reduce heat to low. Add taco seasoning packet and 1/4 cup water. Stir and simmer for 2-3 minutes until sauce thickens. Turn off heat and set aside.
- Warm the refried beans: In a microwave-safe bowl, heat refried beans for about 30 seconds until spreadable. Stir with a fork; add a tablespoon of water if too thick.
- Layer the chips: Spread tortilla chips in an even layer on the prepared sheet pan, not too high.
- Spread the refried beans: Using a small spatula, gently spread warmed refried beans over the chips in a thin layer.
- Add the ground beef: Spoon seasoned ground beef evenly over the beans, breaking up any large clumps.
- Top with cheese: Sprinkle Mexican blend cheese evenly over the beef, then sprinkle shredded cheddar on top.
- Add half the toppings: Sprinkle diced onion, half the jalapeño slices, and half the black olives over the cheese.
- Bake: Place sheet pan in preheated oven and bake for 12-15 minutes, until cheese is melted and bubbly and chip edges are lightly golden.
- Rest and finish: Remove from oven and let rest 2-3 minutes. Sprinkle diced tomatoes, remaining jalapeño slices, and black olives on top. Drizzle with sour cream and sprinkle fresh cilantro.
- Serve immediately: Place sheet pan in center of table with small plates and forks for everyone to dig in.
Notes
Don’t skip the refried beans—they create a moisture barrier to keep chips crunchy. Use room temperature ingredients for even melting. Don’t over-bake; pull out as soon as cheese is bubbly. Layer heavier toppings on bottom, fresh ones on top. Can prep beef and toppings night before.
Nutrition
- Serving Size: 1 serving (based on
- Calories: 485
- Sugar: 3
- Sodium: 980
- Fat: 28
- Saturated Fat: 12
- Carbohydrates: 35
- Fiber: 6
- Protein: 24
Keywords: nachos, ground beef, sheet pan, tailgate, game day, easy, crowd-pleaser, cheesy


