It was 10:47 PM on a random Thursday in mid-October, and I had a ridiculous, almost feral craving for something that tasted like childhood but looked like a haunted house. I didn’t have the energy for a fancy layer cake or the patience for intricate fondant work, but I had a box of devil’s food cake mix, a bag of giant marshmallows, and a truly questionable amount of white candy melts left over from last year’s Christmas baking. The idea just sort of arrived, fully formed, in that drowsy, uncensored way ideas do when you’re too tired to talk yourself out of them.
I mean, honestly, the concept felt a little unhinged at first. A ghost on a stick, perched on a cupcake? It sounded like something my five-year-old self would have drawn on a napkin. But there I was, in my pajamas, dipping marshmallows into melted candy coating and sticking lollipop sticks into them while a horror movie played on low volume in the background. Let me tell you, there’s something deeply satisfying about creating something this cute when the rest of the world is asleep. It felt like a secret—a little bit of Halloween magic made just for me.
The first ghost I made was a total disaster. The candy coating was too thick, the marshmallow tore, and the eyes I piped on looked more like surprised caterpillars than spooky specters. But by the third one, I had found my rhythm. The ghosts were floating, the cupcakes were cooling, and the whole kitchen smelled like chocolate and vanilla. Maybe you’ve been there—that moment when a silly, late-night experiment turns into something you genuinely can’t wait to share. That’s exactly what this recipe is. It’s not fancy, it’s not perfect, but it is absolutely, undeniably fun. And honestly, that’s the whole point of Halloween.
Why You’ll Love This Recipe
I’ve tested this recipe about four times now, tweaking the candy melt consistency and the best way to get those ghostly eyes just right. After a few kitchen mishaps—including one ghost that literally fell off its stick into a bowl of sprinkles—I can confidently say this version is foolproof. Here’s why it works so well.
- Quick & Easy: From start to finish, you’re looking at about 45 minutes. The cupcakes bake while you prep the ghosts, and assembly takes maybe ten minutes. Perfect for a last-minute Halloween party or a classroom treat.
- Simple Ingredients: You probably already have most of this stuff in your pantry. Cake mix, eggs, oil, marshmallows, and candy melts. No weird specialty items that you’ll never use again.
- Perfect for Halloween: These little guys are the star of any spooky spread. They’re cute without being creepy, which makes them great for kids’ parties or even office potlucks where you want to be festive without scaring anyone.
- Crowd-Pleaser: I brought a batch to my neighbor’s Halloween block party, and they were gone in fifteen minutes. Kids loved the marshmallow pop, adults appreciated the moist chocolate cake underneath. It’s a win-win.
- Unbelievably Delicious: The combination of rich chocolate cake, fluffy marshmallow, and creamy white chocolate coating is honestly next-level. It’s like a s’more and a cupcake had a baby, and that baby is wearing a tiny ghost costume.
What makes this recipe different from the dozens of other ghost cupcake ideas out there is the marshmallow pop itself. Instead of just plopping a marshmallow on top, you’re creating a standalone treat that sits on a stick, giving it that fun, fairground feel. The ghosts are sturdy enough to hold their shape, and the cupcake base is moist and rich, providing the perfect contrast. This isn’t just another version—it’s the best version I’ve made, and I’m pretty picky about my Halloween baking.
What Ingredients You Will Need
This recipe uses simple, everyday ingredients to create something that looks like it took hours of effort. The magic is really in the assembly, not the complexity of the components. Here’s what you’ll need to gather.
For the Cupcakes:
- 1 box (15.25 oz) chocolate cake mix (I prefer Duncan Hines Devil’s Food for the richest flavor)
- 3 large eggs, room temperature (helps the batter emulsify better)
- 1/2 cup vegetable oil (or melted coconut oil for a subtle hint of flavor)
- 1 cup water (you can substitute strong brewed coffee for a deeper chocolate taste)
For the Ghost Marshmallow Pops:
- 12 large marshmallows (the standard size, not the jumbo ones for s’mores—trust me on this)
- 12 lollipop sticks (available at craft stores or online; you can also use sturdy straws in a pinch)
- 2 cups white candy melts (I like Wilton brand for their smooth melting consistency)
- 1 tablespoon coconut oil or shortening (this is the secret to a perfectly smooth, dippable coating)
- Black gel food coloring or a black edible marker (for the ghost faces)
For Decoration (Optional but Fun):
- Orange and black sprinkles (for a festive touch on the cupcake frosting)
- White sparkling sugar (gives the ghosts a subtle shimmer)
- Halloween-themed cupcake liners (because presentation matters)
A few notes on ingredients: If you’re using a different brand of cake mix, just follow the box instructions for the cupcake version. The marshmallows should be fresh—stale ones are harder to dip and won’t hold the candy coating as well. For the candy melts, don’t skip the coconut oil. I learned this the hard way when my first batch seized up and became a clumpy mess. A little bit of fat keeps the coating silky and easy to work with.
Equipment Needed
You don’t need a professional bakery setup for these, but a few specific tools will make your life much easier. Here’s what I use every time.
- Standard 12-cup muffin tin (non-stick is ideal, but paper liners work with any pan)
- Muffin liners (Halloween-themed ones add so much charm)
- Large mixing bowl and whisk (or a hand mixer if you want to speed things up)
- Lollipop sticks (12 of them; I get mine in bulk from Amazon)
- Small, deep microwave-safe bowl (for melting the candy coating; a tall glass measuring cup also works great)
- Parchment paper or a silicone baking mat (for drying the ghost pops)
- Styrofoam block or a cardboard box with holes poked in it (to hold the ghosts upright while they set)
- Piping bag or a small zip-top bag (for piping the eyes and mouth)
- Cooling rack (for the cupcakes)
If you don’t have lollipop sticks, you can use pretzel sticks instead—they add a salty contrast to the sweet marshmallow. Just be aware that pretzels are more fragile and can break if you push them in too hard. I’ve also used paper straws in a pinch, and they work fine for a single serving, though they aren’t as sturdy for transport.
Preparation Method
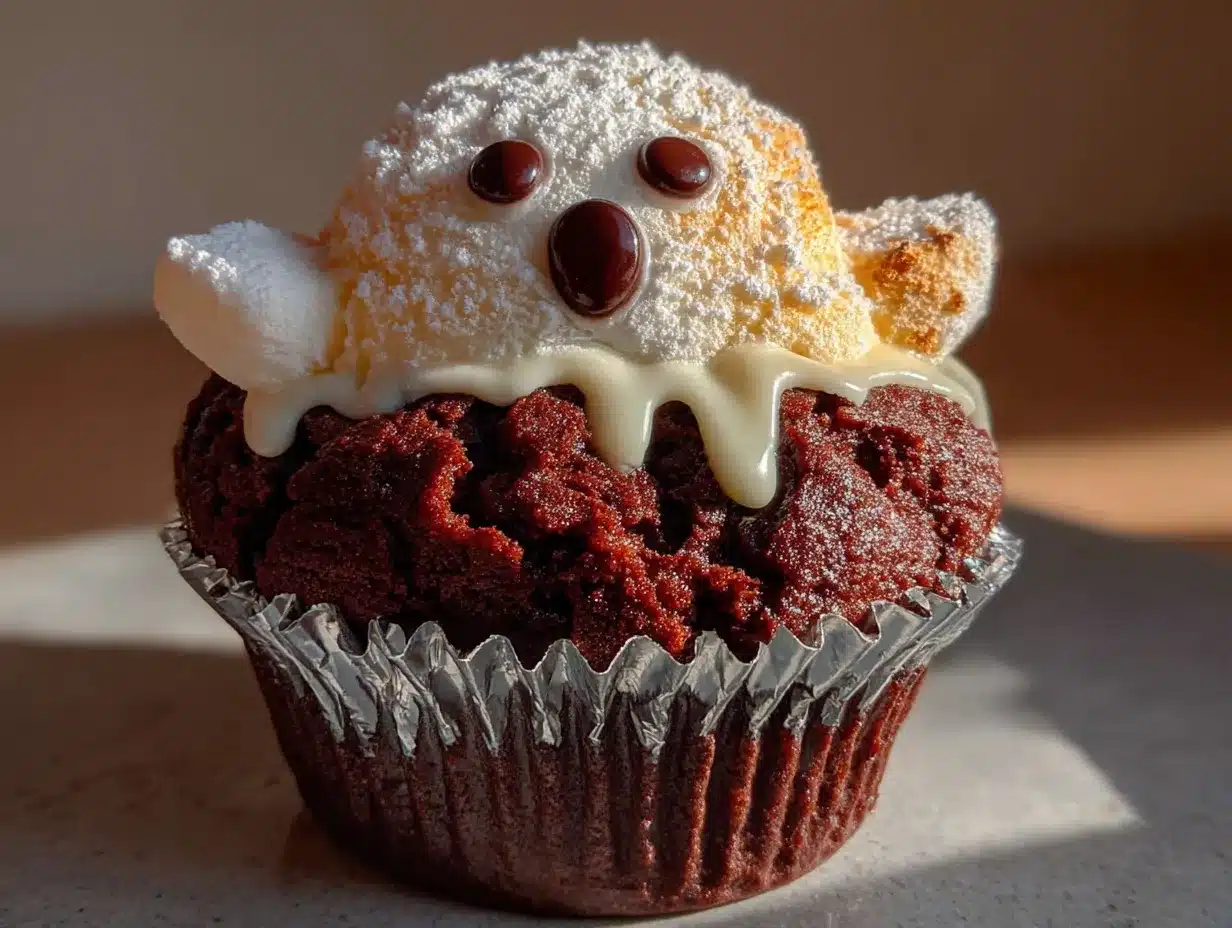
Alright, let’s get into the nitty-gritty. I’ve broken this down into clear steps so you can follow along without any confusion. Take your time, especially with the ghost assembly—it’s the most fun part.
- Preheat and Prep: Preheat your oven to 350°F (175°C). Line your muffin tin with 12 Halloween-themed cupcake liners. This is a small step, but it really sets the festive tone.
- Make the Cupcake Batter: In a large bowl, combine the chocolate cake mix, eggs, vegetable oil, and water. Mix until just combined—about 2 minutes with a hand mixer on medium speed, or about 50 strokes by hand. Don’t overmix, or the cupcakes will be tough. The batter should be smooth and slightly thick, with a rich chocolate aroma.
- Bake the Cupcakes: Divide the batter evenly among the 12 liners, filling each about two-thirds full. Bake for 18-22 minutes, or until a toothpick inserted into the center comes out clean. The tops should be domed and spring back when lightly touched. Let them cool in the pan for 5 minutes, then transfer to a wire rack to cool completely. Do not frost them while they’re warm, or the frosting will slide right off.
- Prepare the Ghost Pops: While the cupcakes are cooling, it’s ghost time. Insert a lollipop stick about halfway into each marshmallow, pushing gently but firmly. The marshmallow should feel secure on the stick. Set them aside on a piece of parchment paper.
- Melt the Candy Coating: Place the white candy melts and 1 tablespoon of coconut oil in a microwave-safe bowl. Microwave in 30-second intervals, stirring well after each, until completely smooth. This usually takes about 1.5 to 2 minutes total. The mixture should be runny enough to coat the back of a spoon but not so thin that it’s watery. If it’s too thick, add another teaspoon of coconut oil.
- Dip the Ghosts: Holding each marshmallow pop by the stick, dip it into the melted candy coating. Tilt the bowl slightly to get full coverage. Let the excess drip off back into the bowl—you want a thin, even layer, not a thick blob. Gently tap the stick on the edge of the bowl to encourage the excess to fall off. Place the dipped ghost on the parchment paper. Repeat with all 12 marshmallows.
- Add the Faces: While the coating is still wet, it’s time to add the eyes and mouth. You have two options here. Option one: use a toothpick dipped in black gel food coloring to paint tiny faces. Option two: wait for the coating to set slightly (about 5 minutes), then use a black edible marker to draw the faces. I prefer the marker method because it’s more precise and less messy. Aim for classic ghost expressions—two oval eyes and an open “O” mouth. Don’t worry about perfection; slightly wonky ghosts are actually more charming.
- Set the Ghosts: Place the finished ghost pops into a styrofoam block or a cardboard box with holes, stick-side down, so they stand upright. Let them set completely, which takes about 20-30 minutes at room temperature. If you’re in a hurry, you can pop them in the refrigerator for 10 minutes.
- Assemble the Cupcakes: Once the cupcakes are completely cool and the ghosts are set, it’s time to put it all together. You can frost the cupcakes with a simple buttercream or leave them unfrosted—the ghost pop is the star. If you do use frosting, pipe a small swirl on top of each cupcake. Before the frosting sets, gently insert the ghost pop into the center of the cupcake, pushing down until it feels secure. The marshmallow should sit just above the cupcake, like it’s floating.
- Final Touch: If you’re using sprinkles, now is the time. Sprinkle a few orange and black jimmies around the base of the ghost pop. This adds a pop of color and hides any small cracks in the frosting.
Cooking Tips & Techniques
I’ve made these cupcakes about half a dozen times now, and I’ve collected a few tricks that make the process smoother. Let me share what I’ve learned, including the mistakes I’ve made so you don’t have to repeat them.
The biggest challenge is getting the candy coating to the right consistency. If it’s too thick, it will clump on the marshmallow and look lumpy. If it’s too thin, it will run off and pool at the bottom. The coconut oil is non-negotiable here—it keeps the coating fluid without making it greasy. I also recommend working in small batches. Don’t try to dip all 12 ghosts at once. Dip 3 or 4, draw their faces, and then move on. The coating can start to set in the bowl if you take too long, especially if your kitchen is cool.
Another thing I learned the hard way: don’t over-microwave the candy melts. They can burn easily, and burnt white chocolate has a bitter, unpleasant taste that ruins the whole treat. Always use 30-second intervals and stir thoroughly between each one. The residual heat will continue to melt the chips even after you take the bowl out.
For the ghost faces, less is more. I made the mistake of making the eyes too big on my first batch, and they looked more like surprised frogs than ghosts. Small, oval-shaped eyes and a tiny round mouth give the most classic ghostly expression. If you’re not confident in your freehand skills, you can use a stencil or even a tiny round piping tip to stamp the eyes.
Finally, timing is everything. The cupcakes need to be completely cool before you add the ghost pop. If they’re even slightly warm, the marshmallow will start to soften and the candy coating might melt. I usually bake the cupcakes the night before and store them in an airtight container. Then, on the day of the party, I make the ghost pops and assemble everything. It takes the pressure off and means I’m not rushing.
Variations & Adaptations
One of the best things about this recipe is how easy it is to adapt. I’ve tried a few different versions, and they all turned out great in their own way. Here are some ideas to make this recipe your own.
Gluten-Free Version: Swap the regular cake mix for a gluten-free chocolate cake mix. Most brands work well, though you might need to add an extra egg or a tablespoon of applesauce for moisture. The marshmallows and candy melts are naturally gluten-free, so this is an easy adaptation.
Vegan Option: Use a vegan chocolate cake mix and replace the eggs with flax eggs (1 tablespoon ground flaxseed mixed with 3 tablespoons water per egg). For the ghosts, look for vegan marshmallows—Dandies is a reliable brand. Use vegan white chocolate chips instead of candy melts, and add a teaspoon of coconut oil for smooth melting.
Flavor Twists: Instead of chocolate cupcakes, try vanilla, red velvet, or even pumpkin spice for a fall twist. You can also flavor the candy coating with a drop of peppermint extract for a wintery ghost, or add a pinch of cinnamon for warmth. I made a batch with orange zest in the candy coating once, and the citrus-chocolate combo was unexpectedly amazing.
Different Ghost Styles: Not all ghosts have to be white. Try using black candy melts for a shadow ghost, or pink for a friendly, not-spooky ghost. You can also add edible glitter to the coating for a magical, shimmering effect. My kids loved the “glitter ghosts” I made for a birthday party last year.
Mini Version: Use mini marshmallows and mini cupcake pans for bite-sized treats. You’ll need shorter lollipop sticks, and the dipping process is a bit more fiddly, but the result is adorable and perfect for snacking.
Serving & Storage Suggestions
These cupcakes are best served at room temperature, which allows the cake to stay moist and the marshmallow to remain soft and chewy. If you’ve refrigerated them, let them sit out for about 20 minutes before serving. The contrast between the cool, creamy candy coating and the tender cake is absolutely delightful.
For presentation, I like to arrange them on a large platter or a tiered cake stand. A few scattered candy corn or chocolate spiders around the base adds to the Halloween vibe without overwhelming the ghosts. If you’re serving them at a party, consider placing them on a bed of orange and black tissue paper for an extra festive touch.
When it comes to storage, these cupcakes are a bit tricky because of the marshmallow pop. The marshmallow can become sticky and the candy coating can soften if exposed to humidity. Store them in an airtight container at room temperature for up to 2 days. If you need to store them longer, keep them in the refrigerator for up to 5 days. Just be aware that the marshmallow will firm up in the cold, and the cake might dry out slightly. Let them come to room temperature before serving for the best texture.
I don’t recommend freezing these cupcakes. The marshmallow and candy coating don’t thaw well, and the texture can become grainy. If you want to make ahead, freeze the unfrosted cupcakes for up to a month, then make the ghost pops fresh on the day you plan to serve them.
One more tip: the flavors actually develop a bit overnight. The chocolate cake absorbs some of the moisture from the marshmallow, creating a fudgier, more intense chocolate flavor. So if you can, make them a day ahead and let them sit in the fridge. The ghosts will still look great, and the taste will be even better.
Nutritional Information & Benefits
Let’s be real—these are a treat, not a health food. But knowing what’s in them can help you enjoy them mindfully. Each cupcake (with frosting) contains approximately 320-380 calories, depending on the specific brands and ingredients you use. The breakdown is roughly 15g fat, 48g carbohydrates, and 4g protein.
The chocolate cake mix provides a small amount of iron and calcium, while the eggs add protein and healthy fats. Marshmallows are mostly sugar, but they do contain a tiny bit of gelatin, which is good for joint health. The white candy coating is essentially sugar and cocoa butter, so it’s mostly empty calories. However, if you use dark chocolate melts instead, you’ll get a dose of antioxidants.
For those with dietary restrictions, please note that this recipe contains gluten (unless you use a gluten-free mix), dairy (in the candy melts and possibly the cake mix), and eggs. It is not suitable for vegans unless you make the substitutions listed in the variations section. If you’re watching your sugar intake, you can reduce the amount of frosting or skip it entirely—the ghost pop provides plenty of sweetness on its own.
I personally believe that treats like these have a place in a balanced diet. Halloween comes once a year, and sharing something fun and delicious with the people you love is good for the soul. So go ahead, enjoy one (or two). You’ve earned it.
Conclusion
These Spooky Ghost Marshmallow Pop Cupcakes are everything I want in a Halloween treat—fun to make, adorable to look at, and absolutely delicious to eat. They capture that perfect balance between spooky and sweet, and they’re guaranteed to bring a smile to anyone who sees them. Whether you’re hosting a costume party, sending treats to school, or just looking for a fun weekend baking project, this recipe delivers every time.
I’d love to see how your ghosts turn out! Don’t be afraid to get creative with the faces or experiment with different colors and flavors. The best part about this recipe is that there’s no wrong way to do it—every ghost has its own personality. If you make these, tag me in your photos or leave a comment below telling me about your favorite Halloween memory. And if you’re looking for more spooky treats, check out my crispy garlic chicken for a savory alternative, or my pumpkin spice latte cookies for another fall favorite.
Happy Halloween, and happy baking! Remember, the best treats are the ones made with a little bit of love and a whole lot of fun.
Frequently Asked Questions
Can I use homemade cake batter instead of a box mix?
Absolutely! If you have a favorite chocolate cake recipe, use it. Just make sure it yields about 12 cupcakes and adjust the baking time as needed. The box mix is convenient, but homemade can be even more delicious.
How do I keep the ghost pops from falling over?
The key is to push the lollipop stick deep enough into the marshmallow—about halfway works well. When inserting into the cupcake, make sure the cupcake is stable and the frosting is thick enough to hold the stick upright. If the ghost feels wobbly, you can add a dab of melted candy coating to the base of the stick before inserting it.
Can I use chocolate melts instead of white for the ghosts?
Of course! Dark or milk chocolate ghosts are delicious and have a different, richer look. Just be aware that the white coating gives the classic ghost appearance. If you use dark chocolate, consider adding white eyes with a toothpick for contrast.
How far in advance can I make these?
You can bake the cupcakes up to 2 days in advance and store them in an airtight container. The ghost pops can be made 1 day ahead and kept at room temperature. Assemble everything no more than 6 hours before serving for the best texture and appearance.
My candy coating is too thick. What do I do?
Add a small amount of coconut oil or shortening—about 1 teaspoon at a time—and stir until smooth. You can also microwave it for 5-10 seconds to loosen it up. Avoid adding water, as that will cause the coating to seize and become unusable.
Pin This Recipe!
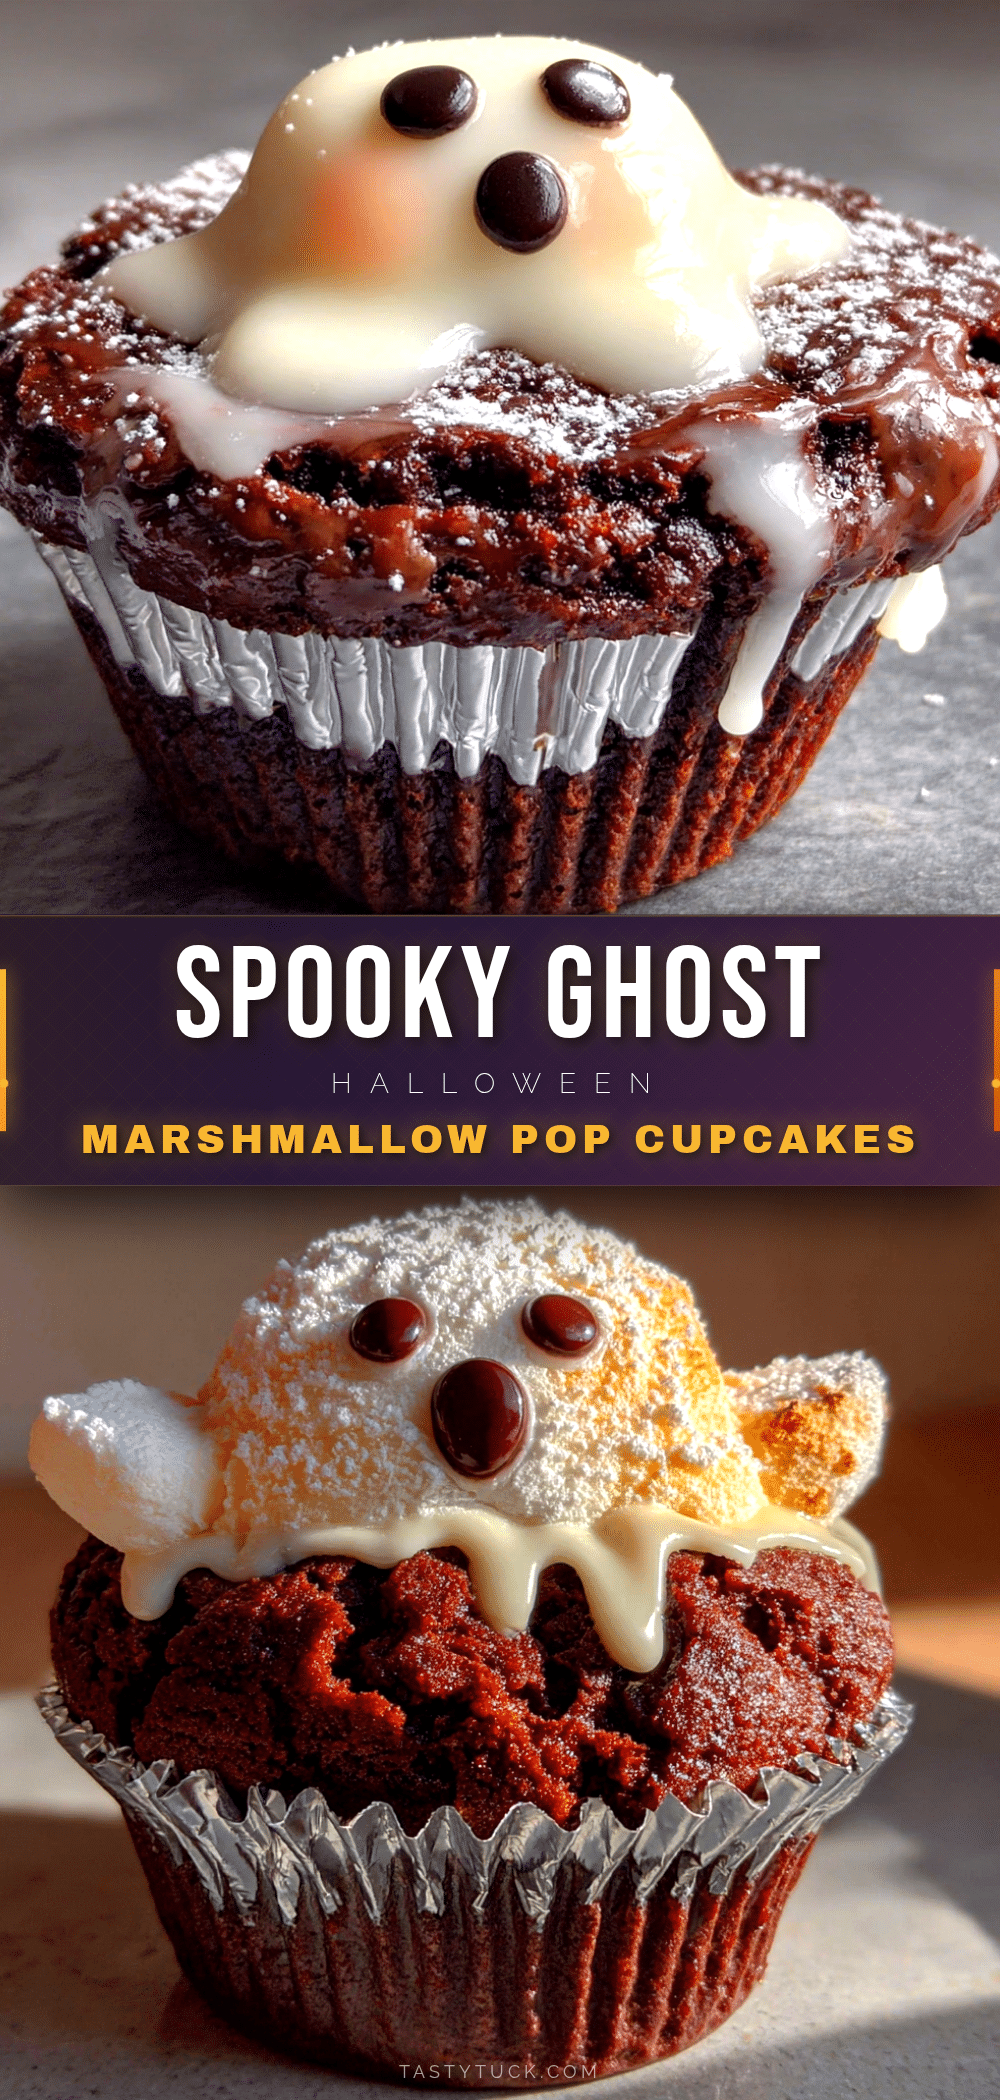
Spooky Ghost Marshmallow Pop Cupcakes: Easy Halloween Treat
These spooky ghost marshmallow pop cupcakes are a fun and easy Halloween treat featuring rich chocolate cupcakes topped with a ghost-shaped marshmallow pop on a stick. Perfect for parties and guaranteed to delight kids and adults alike.
- Prep Time: 15 minutes
- Cook Time: 20 minutes
- Total Time: 45 minutes
- Yield: 12 servings 1x
- Category: Dessert
- Cuisine: American
Ingredients
- 1 box (15.25 oz) chocolate cake mix (e.g., Duncan Hines Devil’s Food)
- 3 large eggs, room temperature
- 1/2 cup vegetable oil (or melted coconut oil)
- 1 cup water (or strong brewed coffee)
- 12 large marshmallows (standard size)
- 12 lollipop sticks
- 2 cups white candy melts (e.g., Wilton brand)
- 1 tablespoon coconut oil or shortening
- Black gel food coloring or black edible marker
- Orange and black sprinkles (optional)
- White sparkling sugar (optional)
- Halloween-themed cupcake liners (optional)
Instructions
- Preheat oven to 350°F (175°C). Line a 12-cup muffin tin with Halloween-themed cupcake liners.
- In a large bowl, combine chocolate cake mix, eggs, vegetable oil, and water. Mix until just combined (about 2 minutes with a hand mixer or 50 strokes by hand). Do not overmix.
- Divide batter evenly among the 12 liners, filling each about two-thirds full. Bake for 18-22 minutes, or until a toothpick inserted into the center comes out clean. Cool in pan for 5 minutes, then transfer to a wire rack to cool completely.
- While cupcakes cool, insert a lollipop stick about halfway into each marshmallow. Set aside on parchment paper.
- In a microwave-safe bowl, combine white candy melts and 1 tablespoon coconut oil. Microwave in 30-second intervals, stirring well after each, until completely smooth (about 1.5-2 minutes total).
- Holding each marshmallow pop by the stick, dip into melted candy coating. Tilt bowl to get full coverage. Let excess drip off, then place on parchment paper. Repeat with all 12 marshmallows.
- While coating is still wet, use a toothpick dipped in black gel food coloring or a black edible marker to draw two oval eyes and an open ‘O’ mouth on each ghost.
- Place finished ghost pops into a styrofoam block or cardboard box with holes, stick-side down, to set completely (20-30 minutes at room temperature or 10 minutes in the refrigerator).
- Once cupcakes are cool and ghosts are set, optionally frost cupcakes with buttercream. Gently insert a ghost pop into the center of each cupcake, pushing down until secure.
- If desired, sprinkle orange and black sprinkles around the base of the ghost pop. Serve at room temperature.
Notes
For best results, use fresh marshmallows and do not skip the coconut oil in the candy coating—it ensures a smooth, dippable consistency. Work in small batches when dipping ghosts to prevent the coating from setting in the bowl. Cupcakes must be completely cool before adding ghost pops to avoid melting. Store assembled cupcakes in an airtight container at room temperature for up to 2 days, or refrigerate for up to 5 days. Let refrigerated cupcakes come to room temperature before serving.
Nutrition
- Serving Size: 1 cupcake
- Calories: 350
- Sugar: 32
- Sodium: 320
- Fat: 15
- Saturated Fat: 6
- Carbohydrates: 48
- Fiber: 1
- Protein: 4
Keywords: Halloween cupcakes, ghost cupcakes, marshmallow pops, easy Halloween treats, chocolate cupcakes, spooky desserts


