The summer I turned thirty, I found myself at a hardware store on a Tuesday afternoon, buying a new mop. Not exactly the stuff of great stories, right? But there I was, standing in the checkout line behind a man who looked like he’d just crawled out of a classic car engine—grease under his nails, a faded flannel shirt, and a surprisingly gentle smile. He was holding a single can of pumpkin puree and a bag of dark chocolate chips. I wasn’t trying to eavesdrop, I swear, but when the cashier asked what he was making, he turned to me and said, “For the kids at the shelter. They need something that feels like Halloween but doesn’t make them feel terrible after.”
That was the moment I first heard about the concept of a “wholesome” Halloween treat. He wasn’t a chef. He wasn’t a food blogger. He was just a guy named Frank who volunteered at a local youth center and had figured out how to make a chocolate cupcake that was actually good for you—or at least, not bad for you. He scribbled a rough version of the recipe on the back of a receipt, and I’ve been tweaking it ever since. Honestly, I’ve made a mess of my kitchen more times than I can count trying to get it perfect. I once forgot the eggs entirely and ended up with something that looked like chocolate soup. But this version? This is the one.
Maybe you’ve been there—scrolling through Pinterest, looking for a Halloween treat that doesn’t require a chemistry degree or a truckload of refined sugar. You want something spooky, sure, but you also want to feel good about what you’re serving. That’s where these Wholesome Chocolate Spiderweb Cupcakes come in. They’re the treat that Frank inspired, the one that makes you close your eyes after the first bite. It’s the recipe that stayed with me because it proved you can have your spiderweb and eat it, too.
Why You’ll Love This Recipe
Let’s be real for a second. Halloween treats are usually a sugar bomb that leaves you crashing before the trick-or-treaters even knock on your door. These Wholesome Chocolate Spiderweb Cupcakes are different. They’re the kind of recipe that makes you feel like you’ve hacked the system. I’ve tested this in my own kitchen more times than I can count, and I can tell you with confidence—it works.
- Quick & Easy : From start to finish, these come together in about 35 minutes. That’s less time than it takes to untangle a string of Halloween lights.
- Simple Ingredients : You probably have most of this stuff in your pantry right now. No weird stabilizers or hard-to-find flours.
- Perfect for Halloween Parties : Whether it’s a school bake sale, a family gathering, or just a fun weekend project, these fit right in.
- Crowd-Pleaser : I’ve served these to kids who swear they hate whole wheat and adults who are skeptical of “healthy” desserts. They disappear every time.
- Unbelievably Delicious : The texture is moist, the chocolate flavor is deep, and the spiderweb design makes everyone think you spent hours on them.
What makes these stand out from every other Halloween cupcake recipe? It’s the secret ingredient—a little bit of Greek yogurt and some whole wheat pastry flour. The yogurt keeps them incredibly moist without needing a ton of butter, and the whole wheat flour adds a nutty richness that actually makes the chocolate taste better. Plus, the spiderweb design is deceptively simple. You don’t need a piping bag or a steady hand. Just a toothpick and a little bit of confidence.
This recipe isn’t just good—it’s the kind that makes you feel proud to serve it. It’s comfort food reimagined for a Halloween that doesn’t have to mean a sugar hangover the next morning. Perfect for impressing guests without stress, or turning a simple October evening into something memorable.
What Ingredients You Will Need
This recipe uses simple, wholesome ingredients to deliver bold flavor and satisfying texture without the fuss. Most of these are pantry staples, which makes this an easy last-minute Halloween project.
For the Cupcakes
- 1 cup whole wheat pastry flour (I prefer Bob’s Red Mill for consistent texture)
- 1/2 cup unsweetened cocoa powder (look for Dutch-processed for a richer flavor)
- 1 teaspoon baking soda
- 1/2 teaspoon baking powder
- 1/4 teaspoon salt
- 1/2 cup coconut sugar (or light brown sugar, packed)
- 1/4 cup maple syrup (the real stuff, not pancake syrup)
- 1/2 cup plain Greek yogurt (full-fat works best for moisture)
- 1/4 cup coconut oil, melted and cooled slightly
- 2 large eggs, room temperature
- 1 teaspoon vanilla extract
- 1/2 cup hot water (or hot coffee, if you want to deepen the chocolate flavor)
For the Frosting & Spiderweb Decoration
- 1 cup heavy cream (cold, straight from the fridge)
- 2 tablespoons powdered sugar (or maple sugar for a less refined option)
- 1/2 teaspoon vanilla extract
- 2 tablespoons unsweetened cocoa powder (for a chocolate whipped cream)
- 2 tablespoons white chocolate chips, melted (for the spiderweb drizzle)
One thing I’ve learned the hard way—don’t skip the Greek yogurt. It’s not just a healthy swap; it’s the thing that makes these cupcakes stay moist for days. I once tried using applesauce instead, and the texture was gummy. Not good. Also, if you’re dairy-free, you can use a good-quality coconut yogurt, but make sure it’s thick and not watery. The same goes for the heavy cream—coconut cream works beautifully for the frosting if you chill it overnight.
Equipment Needed
You don’t need a professional bakery setup for these. Here’s what you’ll actually use:
- Muffin tin (standard 12-cup) – I’ve used both non-stick and silicone. Both work, but silicone cups can be a little flimsy.
- Paper cupcake liners – Go for the unbleached ones if you want to keep things wholesome. They look nicer, too.
- Mixing bowls – One large, one medium. Nothing fancy.
- Whisk – For the dry ingredients. A fork works in a pinch.
- Electric hand mixer or stand mixer – For the frosting. You can whisk by hand, but your arm will hate you.
- Toothpick – This is your secret weapon for the spiderweb design. Don’t overthink it.
- Small piping bag or zip-top bag – For the melted white chocolate drizzle.
- Cooling rack – Essential for even cooling. I once stacked hot cupcakes on a plate, and they got soggy bottoms.
If you don’t have a piping bag, just snip a tiny corner off a zip-top bag. It works exactly the same. I’ve been doing that for years and honestly prefer it—less cleanup.
Preparation Method
- Preheat and Prep : Preheat your oven to 350°F (175°C). Line your muffin tin with 12 paper liners. This is one of those steps you shouldn’t skip, even if you have a non-stick pan. Trust me.
- Mix the Dry Ingredients : In a large bowl, whisk together the whole wheat pastry flour, cocoa powder, baking soda, baking powder, and salt. Make sure there are no lumps. The cocoa powder can be stubborn, so give it a good whisk. Set this aside.
- Combine the Wet Ingredients : In a separate medium bowl, whisk together the coconut sugar, maple syrup, Greek yogurt, melted coconut oil, eggs, and vanilla extract. Whisk until it’s smooth and glossy. Don’t overmix—just get it combined. A few small lumps are fine.
- Bring It Together : Pour the wet ingredients into the dry ingredients. Stir gently with a spatula until just combined. It will be thick—that’s normal. Now, slowly pour in the hot water (or coffee) and stir until the batter is smooth and thin. This is the moment where the batter transforms. It should look like a milkshake, not a paste.
- Fill the Liners : Divide the batter evenly among the 12 liners. I use a 1/4-cup measuring scoop for this. Each liner should be about 2/3 full. If you overfill, they’ll spill over and look messy.
- Bake : Place the tin in the center of the oven and bake for 15-18 minutes. At the 15-minute mark, insert a toothpick into the center of a cupcake. If it comes out clean or with just a few moist crumbs, they’re done. If it’s wet, give them 2 more minutes. My oven runs hot, so I always check early.
- Cool Completely : Let the cupcakes cool in the tin for 5 minutes, then transfer them to a cooling rack. This is crucial—if you leave them in the tin too long, they’ll steam and get soggy. Let them cool completely before frosting. I usually wait about 30 minutes.
- Make the Frosting : In a large chilled bowl, combine the cold heavy cream, powdered sugar, vanilla extract, and cocoa powder. Beat with an electric mixer on medium-high speed until stiff peaks form. This takes about 3-4 minutes. Be careful not to overbeat, or you’ll end up with butter. Stop when it looks like thick, fluffy clouds.
- Frost the Cupcakes : Spread a generous dollop of the chocolate whipped cream on each cooled cupcake. Use the back of a spoon to smooth it into an even layer. Don’t worry about perfection—the spiderweb will cover any imperfections.
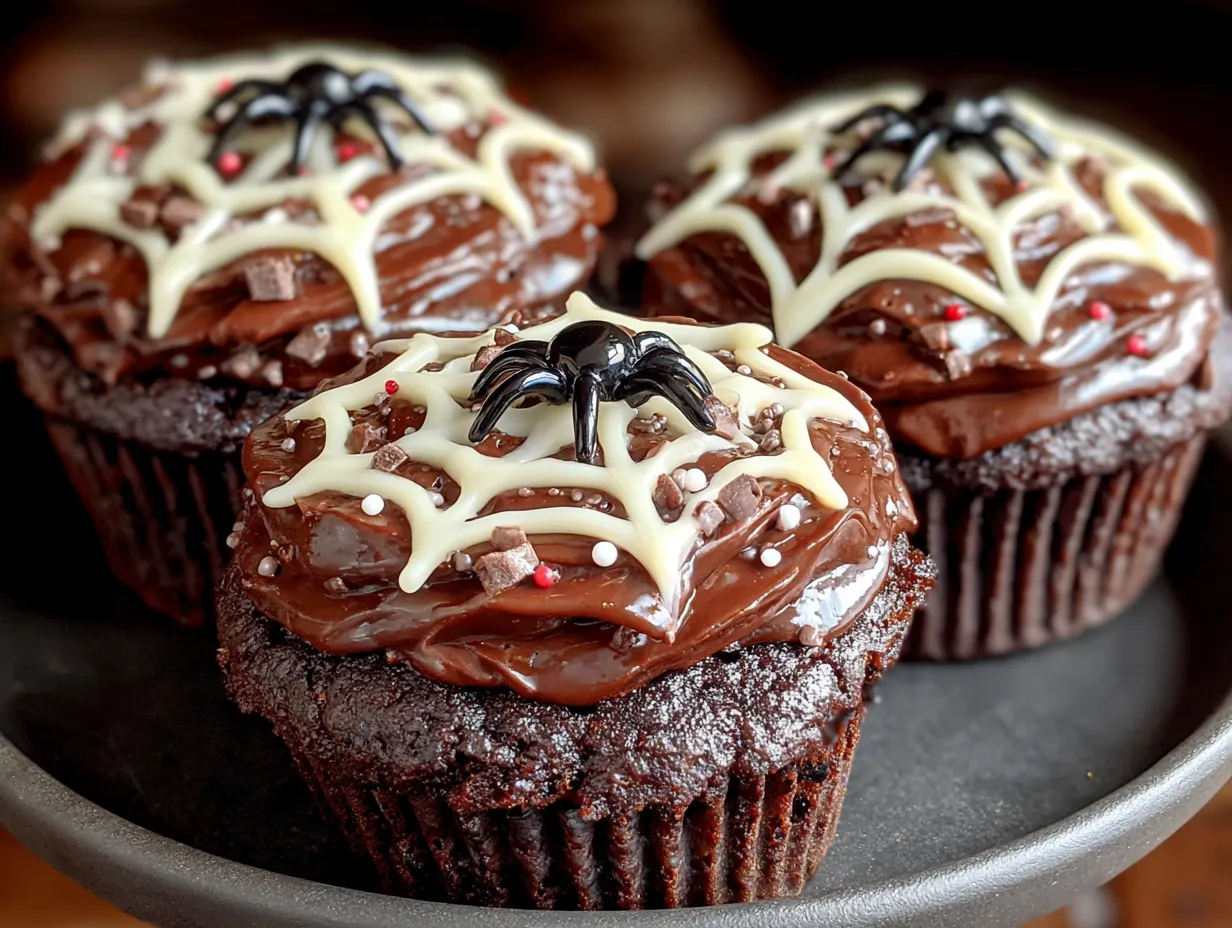
- Create the Spiderweb : Melt the white chocolate chips in a small microwave-safe bowl in 20-second bursts, stirring between each, until smooth. Transfer the melted white chocolate to a small piping bag or zip-top bag with a tiny snipped corner. Starting from the center of each cupcake, pipe a small circle. Then pipe a larger circle around it. Keep going until you have 3-4 concentric circles. Immediately, use a toothpick to drag lines from the center outward, through all the circles. Wipe the toothpick clean between each drag. This creates the classic spiderweb effect. Work quickly, as the white chocolate sets fast.
Cooking Tips & Techniques
I’ve made these Wholesome Chocolate Spiderweb Cupcakes at least a dozen times, and I’ve messed up more than a few. Here’s what I’ve learned the hard way so you don’t have to.
Don’t overmix the batter. I know it’s tempting to keep stirring until it’s perfectly smooth, but that develops the gluten and makes the cupcakes tough. Stir until the flour disappears, and then stop. A few tiny lumps are your friends.
The hot water trick is real. When you add hot water to a cocoa-based batter, it “blooms” the cocoa powder, which intensifies the chocolate flavor. If you use hot coffee instead, it adds a subtle depth that doesn’t taste like coffee at all. I use coffee every time now.
Room temperature eggs matter. Cold eggs can seize the coconut oil and make the batter lumpy. If you forgot to take them out of the fridge, just place them in a bowl of warm water for 5 minutes before cracking them.
For the spiderweb, less is more. The first time I tried this, I made the white chocolate circles too thick and the lines too close together. It looked like a tangled mess. Keep the circles thin and evenly spaced, and drag the toothpick from the very center to the edge in one smooth motion. Clean the toothpick between each drag for clean lines.
Chill the frosting bowl. If your kitchen is warm, pop your mixing bowl and beaters in the freezer for 10 minutes before making the whipped cream. It makes a huge difference in how fast the cream whips up.
Variations & Adaptations
One of the best things about this recipe is how flexible it is. Here are a few ways I’ve adapted it depending on what I have on hand or who I’m serving.
Vegan Version : Swap the Greek yogurt for a thick coconut yogurt, use flax eggs (1 tablespoon ground flaxseed + 3 tablespoons water per egg), and replace the heavy cream with chilled full-fat coconut cream. The texture will be slightly denser but still delicious.
Gluten-Free Option : Use a good quality gluten-free all-purpose flour blend that contains xanthan gum. I’ve had success with King Arthur’s Measure for Measure blend. Just note that the cupcakes might be a little more delicate, so handle them gently.
Spooky Color Twist : Instead of white chocolate for the spiderweb, use dark chocolate or even a colored candy melt (orange or green would be fun). Just make sure it’s the melting kind, not the baking kind.
Pumpkin Spice Addition : Add 1/2 teaspoon of pumpkin pie spice to the dry ingredients. It gives the cupcakes a subtle fall warmth that pairs beautifully with the chocolate. I tried this last October and it became an instant favorite.
Nut-Free and Soy-Free : This recipe is naturally nut-free and soy-free as written, which makes it great for school parties. Just double-check your chocolate chips and cocoa powder to make sure they’re processed in a nut-free facility if that’s a concern.
Serving & Storage Suggestions
These cupcakes are best served at room temperature, but honestly, I love them straight from the fridge on a warm day. The whipped cream frosting gets a little firmer and almost ice-cream-like. For a Halloween party, arrange them on a black or orange platter. Add a few fake plastic spiders for a fun garnish—just warn people before they bite!
Storage-wise, these are forgiving but not indestructible. Keep them in an airtight container in the refrigerator for up to 3 days. The cupcakes themselves stay moist thanks to the Greek yogurt, but the whipped cream frosting will start to soften after day 2. If you’re making them ahead, I recommend baking the cupcakes and storing them unfrosted at room temperature for up to 2 days. Then whip up the frosting and decorate on the day you plan to serve them.
For freezing, the unfrosted cupcakes freeze beautifully. Wrap each one individually in plastic wrap, then place them in a freezer-safe bag. They’ll keep for up to 3 months. Thaw at room temperature for about an hour before frosting. I don’t recommend freezing the frosted cupcakes—the whipped cream gets grainy when thawed.
One thing I’ve noticed—the flavors actually deepen overnight. If you can wait, make the cupcakes a day ahead and frost them the next morning. The chocolate flavor becomes richer and more pronounced. It’s worth the patience.
Nutritional Information & Benefits
Here’s the breakdown for one cupcake (with frosting). These are estimates, but they give you a good idea of what you’re working with.
| Nutrient | Amount per Cupcake |
|---|---|
| Calories | 210 |
| Total Fat | 12g |
| Saturated Fat | 8g |
| Cholesterol | 55mg |
| Sodium | 180mg |
| Total Carbohydrates | 24g |
| Dietary Fiber | 3g |
| Sugars | 12g |
| Protein | 4g |
What I love about these is the fiber and protein content. The whole wheat pastry flour and Greek yogurt add a surprising amount of staying power. You won’t get that sugar crash an hour later. Plus, the cocoa powder is rich in antioxidants. It’s not a health food, but it’s a treat that works with a balanced lifestyle rather than against it.
If you’re watching your sugar intake, you can reduce the maple syrup to 2 tablespoons. The cupcakes will be slightly less sweet, but still plenty chocolatey. For a lower-fat option, use low-fat Greek yogurt and skip the coconut oil, replacing it with unsweetened applesauce. The texture will be a little more cake-like and less tender, but it’s still good.
These are naturally nut-free and soy-free, which makes them a safe choice for school parties. Just always double-check your ingredient labels if allergies are a concern.
Conclusion
These Wholesome Chocolate Spiderweb Cupcakes are proof that Halloween treats don’t have to be a sugar nightmare. They’re the kind of recipe that makes you feel good about what you’re serving—and even better about eating. Whether you’re making them for a party, a bake sale, or just a fun afternoon with the kids, they deliver on flavor, fun, and feel-good ingredients.
I love how this recipe started with a stranger in a hardware store and ended up in my kitchen, becoming a tradition. It’s a reminder that the best recipes come from the most unexpected places. So go ahead, make a mess, forget an ingredient once or twice, and find your own version of this recipe. That’s what cooking is all about.
I’d love to hear how yours turn out! Drop a comment below and let me know if you tried any variations or if the spiderweb design gave you any trouble. And if you’re looking for more wholesome treats, check out my healthy pumpkin muffins or these no-bake energy bites for another quick, feel-good option. Happy Halloween!
Frequently Asked Questions
Can I make these cupcakes gluten-free?
Yes, absolutely. Use a good quality gluten-free all-purpose flour blend that contains xanthan gum. I’ve had the best results with King Arthur’s Measure for Measure. Just be gentle when mixing, as gluten-free batters can be more delicate.
How do I store leftover cupcakes?
Store them in an airtight container in the refrigerator for up to 3 days. The cupcakes stay moist, but the whipped cream frosting will soften after day 2. If you’re making them ahead, bake the cupcakes and store them unfrosted at room temperature for up to 2 days.
Can I freeze these cupcakes?
Yes, but freeze them unfrosted. Wrap each cupcake individually in plastic wrap and place them in a freezer-safe bag. They’ll keep for up to 3 months. Thaw at room temperature for about an hour before frosting and decorating.
What can I use instead of Greek yogurt?
If you’re dairy-free or just out of Greek yogurt, you can use a thick coconut yogurt or even unsweetened applesauce. The applesauce version will be slightly less tender, but still delicious. Just make sure whatever you use isn’t too watery.
My spiderweb design didn’t turn out. What went wrong?
Don’t worry—it happens to everyone! The most common issue is making the white chocolate circles too thick or the lines too close together. Keep the circles thin and evenly spaced, and drag the toothpick from the center outward in one smooth motion. Clean the toothpick between each drag for clean lines. Practice on a piece of wax paper first if you’re nervous.
Pin This Recipe!
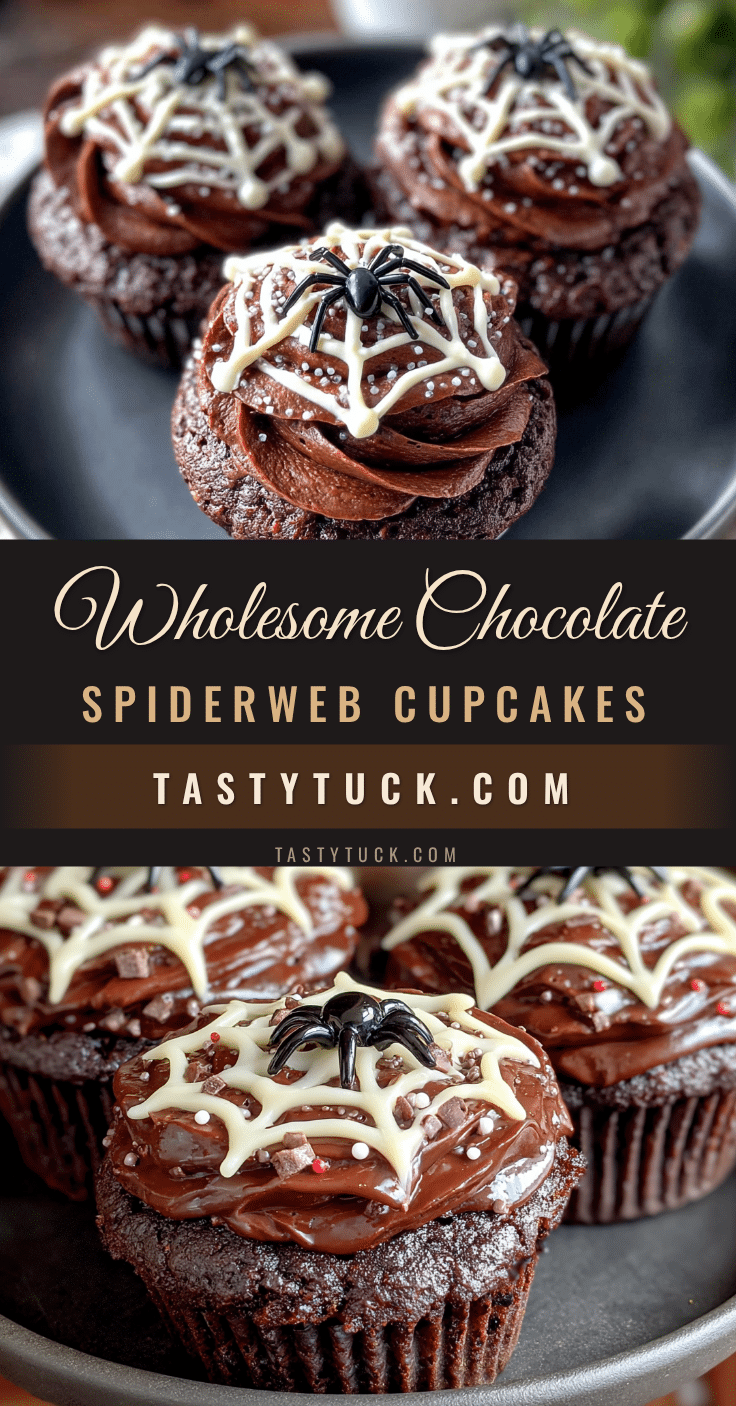
Wholesome Chocolate Spiderweb Cupcakes: Easy Halloween Treat
These Wholesome Chocolate Spiderweb Cupcakes are a healthier Halloween treat made with whole wheat pastry flour and Greek yogurt, topped with a chocolate whipped cream frosting and a simple spiderweb design. They’re quick, easy, and perfect for parties.
- Prep Time: 15 minutes
- Cook Time: 18 minutes
- Total Time: 35 minutes
- Yield: 12 cupcakes 1x
- Category: Dessert
- Cuisine: American
Ingredients
- 1 cup whole wheat pastry flour
- 1/2 cup unsweetened cocoa powder (Dutch-processed preferred)
- 1 teaspoon baking soda
- 1/2 teaspoon baking powder
- 1/4 teaspoon salt
- 1/2 cup coconut sugar (or light brown sugar, packed)
- 1/4 cup maple syrup
- 1/2 cup plain Greek yogurt (full-fat)
- 1/4 cup coconut oil, melted and cooled slightly
- 2 large eggs, room temperature
- 1 teaspoon vanilla extract
- 1/2 cup hot water (or hot coffee)
- 1 cup heavy cream, cold
- 2 tablespoons powdered sugar (or maple sugar)
- 1/2 teaspoon vanilla extract
- 2 tablespoons unsweetened cocoa powder
- 2 tablespoons white chocolate chips, melted
Instructions
- Preheat oven to 350°F (175°C). Line a 12-cup muffin tin with paper liners.
- In a large bowl, whisk together whole wheat pastry flour, cocoa powder, baking soda, baking powder, and salt.
- In a separate medium bowl, whisk together coconut sugar, maple syrup, Greek yogurt, melted coconut oil, eggs, and vanilla extract until smooth and glossy.
- Pour wet ingredients into dry ingredients and stir gently with a spatula until just combined. Slowly add hot water (or coffee) and stir until batter is smooth and thin.
- Divide batter evenly among the 12 liners, filling each about 2/3 full.
- Bake for 15-18 minutes, or until a toothpick inserted into the center comes out clean or with a few moist crumbs.
- Let cupcakes cool in the tin for 5 minutes, then transfer to a cooling rack to cool completely (about 30 minutes).
- For the frosting: In a large chilled bowl, combine cold heavy cream, powdered sugar, vanilla extract, and cocoa powder. Beat with an electric mixer on medium-high speed until stiff peaks form (3-4 minutes).
- Spread a generous dollop of chocolate whipped cream on each cooled cupcake and smooth into an even layer.
- Melt white chocolate chips in a microwave-safe bowl in 20-second bursts, stirring between each, until smooth. Transfer to a small piping bag or zip-top bag with a tiny snipped corner.
- Pipe a small circle in the center of each cupcake, then pipe larger concentric circles around it (3-4 circles total). Immediately use a toothpick to drag lines from the center outward through all circles, wiping the toothpick clean between each drag, to create a spiderweb effect.
Notes
Don’t overmix the batter to avoid tough cupcakes. The hot water (or coffee) blooms the cocoa powder for deeper flavor. Room temperature eggs prevent the coconut oil from seizing. For the spiderweb, keep white chocolate circles thin and evenly spaced, and clean the toothpick between each drag. Unfrosted cupcakes can be frozen for up to 3 months.
Nutrition
- Serving Size: 1 cupcake
- Calories: 210
- Sugar: 12
- Sodium: 180
- Fat: 12
- Saturated Fat: 8
- Carbohydrates: 24
- Fiber: 3
- Protein: 4
Keywords: Halloween cupcakes, healthy chocolate cupcakes, spiderweb cupcakes, whole wheat cupcakes, Greek yogurt cupcakes, easy Halloween treat


