“Hey, you brought those energy bites, right?” That text popped up just as I was scrambling to pack snacks for the Saturday morning soccer game. Honestly, I wasn’t sure if these little balls of goodness would really do the trick for all those running kids, but I figured, why not? They were quick to whip up and packed with stuff I trust. The warm kitchen smelled faintly of toasted oats and honey, and I remember thinking, “Well, if nothing else, these will keep my own energy up while I cheer from the sidelines.”
Turns out, those wholesome energy bites became the MVP of the snack table. Parents were asking for the recipe, players were sneaking a few extra, and I caught myself making them three times that week for every practice and game. They’re not just snacks; they’re little power pellets that somehow taste like a treat but feel like fuel. The mix of nuts, seeds, and a hint of cocoa wasn’t what I expected at first, but it clicked. And you know, sometimes the simplest things surprise you the most.
Whenever I make these energy bites now, I’m reminded of that chaos-turned-comfort morning, and how a quick snack can turn into a small ritual. Plus, it’s one less thing to worry about when you’re juggling carpool and halftime cheers. These bites stick with you, not just because they’re tasty but because they bring a little calm to the madness of game day. That’s probably why they’ve become a staple in my kitchen.
Why You’ll Love This Recipe
After countless trials and tweaks, I’m confident these wholesome energy bites stand out for several reasons:
- Quick & Easy: You can have them ready in under 20 minutes—ideal when you’re rushing to pack snacks before a game.
- Simple Ingredients: No fancy or hard-to-find items here. Just pantry staples like oats, nut butter, and a touch of honey.
- Perfect for Soccer Game Day Snacks: These bites provide steady energy without the crash that sugary treats bring.
- Crowd-Pleaser: Kids and adults alike love them. Trust me, I’ve seen the empty snack bowl after every match.
- Unbelievably Delicious: There’s a satisfying chewiness combined with a hint of sweetness and nuttiness that’s just right.
What makes this recipe different? I like to blend in flaxseed and chia seeds, which add fiber and omega-3s without changing the flavor. Plus, I toss in a little dark cocoa powder for depth—something I picked up from experimenting with a no-bake chocolate treat that had a similar twist. The balance between sweet and wholesome is just right, making these energy bites more than just a snack—they’re a reliable source of fuel that feels good to eat.
What Ingredients You Will Need
This recipe uses simple, wholesome ingredients to deliver bold flavor and satisfying texture without the fuss. Most of these are pantry staples, and you can often swap in alternatives depending on what you have on hand.
- Old-fashioned rolled oats (1 1/2 cups / 135g) – the base for chewiness and fiber
- Natural peanut butter (3/4 cup / 180g) – creamy binder and protein source (I prefer brands like Smucker’s Natural for that no-extra-sugar goodness)
- Honey (1/3 cup / 113g) – natural sweetness and helps everything stick
- Ground flaxseed (1/4 cup / 28g) – adds omega-3s and a subtle nutty flavor
- Chia seeds (2 tablespoons / 20g) – for texture and extra nutrition
- Mini dark chocolate chips (1/4 cup / 45g) – optional, but a favorite for a hint of indulgence
- Unsweetened cocoa powder (1 tablespoon / 7g) – enhances chocolate flavor without sweetness
- Vanilla extract (1 teaspoon / 5ml) – for a warm, inviting aroma
- Salt (a pinch) – balances flavors
If you’re short on peanut butter, almond or cashew butter works just as well. For a gluten-free version, make sure your oats are certified gluten-free. In summer, I like adding dried cranberries or chopped dried apricots for a fruity twist. Swapping honey for maple syrup keeps it vegan-friendly but expect a slightly different sweetness.
Equipment Needed
- Mixing bowl: A large bowl to combine all ingredients comfortably.
- Measuring cups and spoons: For precise ingredient amounts (I always keep a set handy in my kitchen drawer).
- Spoon or spatula: To mix—though your hands work best for kneading the mixture together.
- Baking sheet or plate: For placing the formed energy bites while they chill.
- Plastic wrap or airtight container: To store the bites once ready.
If you want to get fancy, a food processor can quickly grind flaxseed or combine ingredients, but it’s not necessary. I prefer mixing by hand because it lets me feel the texture and adjust the moisture if needed. No need for expensive tools here—just the basics you probably already own will do the job perfectly.
Preparation Method

- Combine dry ingredients: In your mixing bowl, add 1 1/2 cups (135g) rolled oats, 1/4 cup (28g) ground flaxseed, 2 tablespoons (20g) chia seeds, 1 tablespoon (7g) cocoa powder, a pinch of salt, and 1/4 cup (45g) mini dark chocolate chips. Stir well to distribute everything evenly. This usually takes about 2 minutes.
- Add wet ingredients: Pour in 3/4 cup (180g) natural peanut butter, 1/3 cup (113g) honey, and 1 teaspoon (5ml) vanilla extract. Use a spoon or spatula to mix until the wet ingredients start to coat the dry mixture. This part might take 3-4 minutes; the mixture should start to clump together but still be sticky, not dry.
- Mix and knead: This is where I usually roll up my sleeves. Using your clean hands, knead the mixture in the bowl until everything is fully combined and forms a dough-like consistency. If it feels too crumbly, add a teaspoon of water or a bit more honey. If it’s too sticky, sprinkle in a little more oats. This step takes about 2-3 minutes.
- Form the bites: Scoop out about 1 tablespoon (15g) of dough and roll into a ball between your palms. Place each ball on a baking sheet or plate. You should get about 20-24 bites. This step takes around 5-7 minutes, depending on your speed.
- Chill to set: Pop the tray into the fridge for at least 30 minutes. This helps the bites firm up and hold their shape. Once chilled, transfer them to an airtight container. They’re ready to go!
Watch out for overly dry bites—they tend to crumble, so tweak the wet ingredients if needed. Also, if you’re making these ahead, keep them chilled to maintain their texture. The cocoa powder gives a subtle earthy scent that’s a nice surprise in a snack like this.
Cooking Tips & Techniques
Here’s what I’ve learned after making these energy bites more times than I can count:
- Mixing by hand: It might sound old-school, but feeling the dough helps you sense if you need to adjust the moisture. I once forgot that step and ended up with crumbly bites that didn’t hold together well.
- Use natural nut butters: Skipping the sugary or overly processed types makes a world of difference in both taste and nutrition.
- Chilling is key: Don’t skip the fridge time. If you try to eat them right away, they’ll be too soft and sticky.
- Size matters: Making the bites too big can be overwhelming and messes with portion control. I stick to about 1 tablespoon each—perfect little energy boosts.
- Multitasking: While bites chill, I prep drinks or pack other snacks like some fresh fruit or even a savory grilled chicken kabob for a balanced game day spread.
One time, I overdid the cocoa powder, and the bites turned slightly bitter. Lesson learned: less is more with strong flavors here. Also, mixing in a handful of mini chocolate chips adds sweet pockets that kids love without turning the whole bite into a dessert.
Variations & Adaptations
Feel free to customize your energy bites to suit your taste or dietary needs:
- Nut-Free Version: Swap peanut butter for sunflower seed butter and replace flaxseed with extra oats or pumpkin seeds.
- Seasonal Twist: Add dried cranberries or chopped dried apricots in fall and winter, or swap in fresh blueberries (finely chopped) during summer.
- Extra Protein: Stir in a scoop of your favorite protein powder (vanilla or chocolate works well) to boost muscle fuel.
- Different Flavors: Try cinnamon instead of cocoa powder for a warm spice vibe or toss in shredded coconut for tropical flair.
- Cooking Method Alternative: If you prefer, press the mixture into a pan and refrigerate until firm, then slice into bars for easy grab-and-go snacks.
Personally, I once tried adding a dash of espresso powder for a subtle mocha hint, inspired by a rich chocolate treat I made before. It was unexpected but delicious. Don’t be afraid to experiment—these bites forgive a lot!
Serving & Storage Suggestions
These energy bites are best served chilled or at room temperature. I like to pack them in small containers lined with parchment paper to prevent sticking. They pair beautifully with a cold glass of milk or a refreshing iced tea for the sidelines.
Storing them is a breeze: keep them in an airtight container in the fridge for up to one week. If you want to save them longer, freeze the bites in a single layer on a baking sheet, then transfer to a freezer-safe bag. They thaw quickly at room temperature or can be popped straight into a lunchbox to soften by game time.
Over time, the flavors meld and deepen—if you make a batch a day ahead, the cocoa and vanilla notes become more pronounced. They’re great little power snacks that don’t lose their charm after sitting around.
Nutritional Information & Benefits
Each energy bite offers approximately:
| Calories | Protein | Carbohydrates | Fat | Fiber |
|---|---|---|---|---|
| 90 kcal | 3g | 10g | 5g | 2g |
Thanks to ingredients like flaxseed and chia, these bites provide omega-3 fatty acids and fiber, which support heart health and sustained energy release. The natural peanut butter delivers plant-based protein essential for muscle repair after a game. Plus, the moderate carbs from oats and honey fuel endurance without the sugar crash that many commercial snacks cause.
For those watching gluten, use certified gluten-free oats. The recipe is naturally vegetarian and can be vegan if you swap honey for maple syrup. Keep in mind nut allergies when serving—there are easy substitutions to keep everyone happy and fueled.
Conclusion
Wholesome energy bites are a simple, reliable snack that’s earned a permanent spot in my game day routine. Their mix of wholesome ingredients and satisfying flavor makes them perfect for fueling kids (and parents) through the highs and lows of soccer matches. What I love most is how easy they are to customize—whether you want a nut-free option or a little extra protein boost, these bites adapt without fuss.
Give them a try next time you’re packing up for a game or grabbing a quick snack between errands. And if you find your own twist or perfect flavor combo, I’d love to hear about it! Sharing these little wins makes the whole process even sweeter.
FAQs About Wholesome Energy Bites for Soccer Game Day Snacks
Are these energy bites suitable for kids with nut allergies?
Yes! You can swap peanut butter for sunflower seed butter and replace flaxseed with extra oats or pumpkin seeds to keep them nut-free and just as tasty.
How long do these energy bites stay fresh?
Stored in an airtight container in the fridge, they last about one week. For longer storage, freeze them for up to three months.
Can I make these energy bites ahead of time?
Absolutely. Making a batch a day or two before your event allows flavors to meld and saves you time on game day.
What if I don’t have cocoa powder—can I skip it?
You can leave it out or replace it with cinnamon or shredded coconut for a different flavor profile that kids often enjoy.
Are these energy bites gluten-free?
They are naturally gluten-free if you use certified gluten-free oats. Always check labels to avoid cross-contamination.
Pin This Recipe!
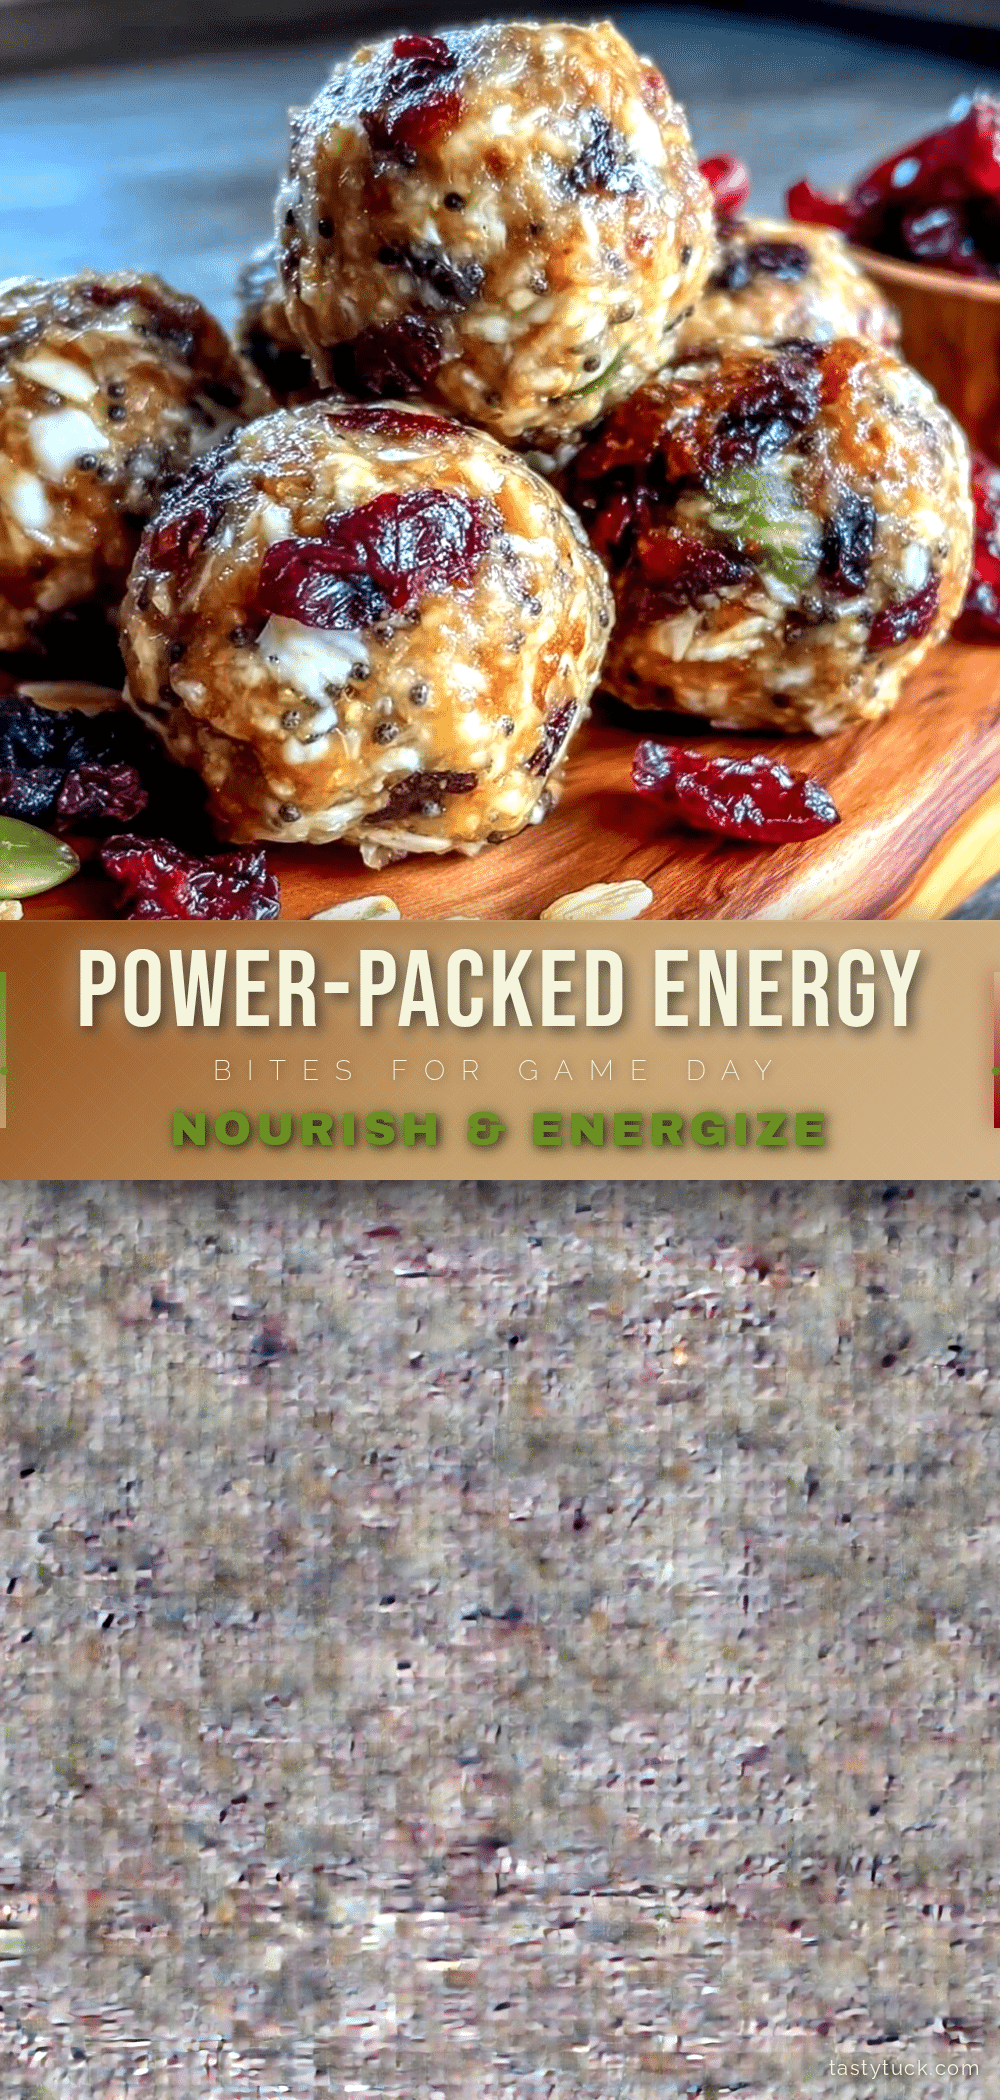
Wholesome Energy Bites

Quick and easy energy bites packed with oats, nut butter, seeds, and a hint of cocoa, perfect for soccer game day snacks that provide steady energy without a sugar crash.
- Prep Time: 10 minutes
- Cook Time: 0 minutes
- Total Time: 40 minutes
- Yield: 20-24 bites 1x
- Category: Snack
- Cuisine: American
Ingredients
- 1 1/2 cups (135g) old-fashioned rolled oats
- 3/4 cup (180g) natural peanut butter
- 1/3 cup (113g) honey
- 1/4 cup (28g) ground flaxseed
- 2 tablespoons (20g) chia seeds
- 1/4 cup (45g) mini dark chocolate chips (optional)
- 1 tablespoon (7g) unsweetened cocoa powder
- 1 teaspoon (5ml) vanilla extract
- Pinch of salt
Instructions
- Combine dry ingredients: In a mixing bowl, add rolled oats, ground flaxseed, chia seeds, cocoa powder, salt, and mini dark chocolate chips. Stir well to distribute evenly (about 2 minutes).
- Add wet ingredients: Pour in natural peanut butter, honey, and vanilla extract. Mix with a spoon or spatula until wet ingredients coat the dry mixture (3-4 minutes).
- Mix and knead: Using clean hands, knead the mixture until fully combined and dough-like. Adjust moisture by adding a teaspoon of water or more honey if too crumbly, or more oats if too sticky (2-3 minutes).
- Form the bites: Scoop about 1 tablespoon (15g) of dough and roll into balls. Place on a baking sheet or plate. Makes about 20-24 bites (5-7 minutes).
- Chill to set: Refrigerate for at least 30 minutes to firm up. Transfer to an airtight container once chilled.
Notes
Mixing by hand helps adjust moisture for perfect texture. Chilling is essential to firm the bites. Use natural nut butters for better taste and nutrition. Optional add-ins include dried fruit or protein powder. For vegan version, substitute honey with maple syrup. Nut-free version possible by swapping peanut butter with sunflower seed butter and flaxseed with extra oats or pumpkin seeds.
Nutrition
- Serving Size: 1 energy bite (about
- Calories: 90
- Fat: 5
- Carbohydrates: 10
- Fiber: 2
- Protein: 3
Keywords: energy bites, healthy snacks, soccer game snacks, no-bake, peanut butter snacks, quick snacks, wholesome snacks