The woman at the farm stand watched me pick up and put down the same bag of pumpkins three times. I was trying to be sensible—it was just me and my partner, and a whole pumpkin felt like a commitment. She didn’t say anything at first. Then she reached under her table, pulled out a small sugar pumpkin, and placed it gently on top of my canvas bag. “This one won’t overwhelm you,” she said with a wink. “It’s perfect for baking. Trust me.”
I didn’t even know her name, but I bought that pumpkin. And honestly, that little gesture changed my entire fall baking game. I roasted it that same afternoon, the house filling with that sweet, earthy smell that feels like a hug. I mashed the flesh, portioned it out, and froze most of it. But I kept one cup aside, knowing I wanted to do something special with it. Something that felt like a Tuesday morning but tasted like a celebration.
These Wholesome Maple Pumpkin Scones with Cinnamon Glaze were born from that exact moment. They’re not fussy or complicated—they’re the kind of thing you can whip up before the coffee finishes brewing. The pumpkin keeps them tender, the maple syrup adds a deep, woodsy sweetness, and that cinnamon glaze? Let me tell you, it’s the kind of thing that makes you close your eyes after the first bite. Maybe you’ve been there—standing in your kitchen, spatula in hand, wondering if a simple scone could actually feel this good. Trust me, it can.
I’ve made these scones at least a dozen times since that day at the farm stand. They’ve become my go-to for everything: lazy Saturday mornings, last-minute brunch invites, and those moments when I just need something homemade that doesn’t require a whole production. They’re wholesome without being preachy, sweet without being over the top, and they come together with ingredients I usually already have. That’s the kind of recipe that sticks with you.
Why You’ll Love This Recipe
These scones aren’t just another pumpkin recipe you’ll forget about by November. They’re the kind of baked good that earns a permanent spot in your rotation. Here’s why I keep coming back to them:
- Quick & Easy: From mixing bowl to oven in under 15 minutes. No chilling the dough, no complicated folds. Just stir, shape, slice, and bake.
- Simple Ingredients: You won’t need to hunt down specialty flours or obscure extracts. Pumpkin purée, maple syrup, butter, flour—these are pantry staples that pull together beautifully.
- Perfect for Fall Mornings & Cozy Gatherings: They’re elegant enough for a holiday brunch but humble enough for a Tuesday coffee break. They travel well, too, which makes them great for potlucks or dropping off at a friend’s house.
- Crowd-Pleaser: I’ve served these to kids who “don’t like pumpkin” and adults who claim they’re “not breakfast people.” The scones disappear every single time. The glaze is usually the first thing they mention.
- Unbelievably Delicious: The texture is what gets me every time—tender and slightly crumbly on the outside, soft and almost creamy on the inside. The maple flavor isn’t shy, and the cinnamon glaze adds that little hit of warmth that makes everything feel right.
What really sets these scones apart is the balance. I’ve tested versions that were too dry, too sweet, or too dense. This one hits the sweet spot. The pumpkin keeps the crumb moist without making it gummy, and the maple syrup adds sweetness that feels natural—not cloying. It’s comfort food you can feel good about eating, whether you’re grabbing one on your way out the door or sitting down with a second cup of coffee.
These scones are also incredibly forgiving. If you’ve ever had a scone dough turn into a sticky mess or a dry crumble, you’ll appreciate how easy this one is to work with. The dough comes together like a dream, and even if you overwork it slightly (which I’ve definitely done), they still turn out beautifully. That’s the kind of recipe confidence that makes baking feel like fun, not stress.
What Ingredients You Will Need
This recipe uses simple, wholesome ingredients that work together to create a tender, flavorful scone without any fuss. Most of these are pantry staples, and the few that aren’t are easy to find at any grocery store. Here’s what you’ll need and why each one matters:
For the Scones
- All-purpose flour, 2 cups (250g): This gives the scones their structure. I’ve tested this with whole wheat pastry flour, and it works in a pinch, but all-purpose gives the most tender crumb. Spoon and level your flour—don’t scoop straight from the bag, or you’ll end up with dry scones.
- Granulated sugar, 1/4 cup (50g): Just enough to add sweetness without overpowering the maple. You can reduce this slightly if you prefer a less sweet scone, but I wouldn’t go below 3 tablespoons.
- Baking powder, 1 tablespoon: This is your leavening agent. Make sure it’s fresh—if your baking powder is older than six months, it might not give you the rise you want. I like Rumford for its consistent results.
- Ground cinnamon, 1 teaspoon: Warmth and depth. This works alongside the cinnamon in the glaze to create layers of flavor.
- Ground nutmeg, 1/2 teaspoon: Freshly grated if you have it—the difference is subtle but real. If you only have pre-ground, that’s totally fine.
- Ground ginger, 1/4 teaspoon: A little warmth that complements the pumpkin without shouting.
- Salt, 1/2 teaspoon: Don’t skip this. Salt balances the sweetness and makes the other flavors pop.
- Unsalted butter, 1/2 cup (113g), cold and cubed: This is the key to flaky scones. The cold butter creates little pockets of steam as it bakes, giving you that tender, layered texture. I cut mine into small cubes and pop them back in the fridge while I measure the dry ingredients.
- Pumpkin purée, 1/2 cup (120g): Not pumpkin pie filling—make sure you grab plain pumpkin purée. Libby’s is my go-to for consistent moisture content. If you’re using homemade purée, drain off any excess liquid by letting it sit in a fine-mesh strainer for 10 minutes.
- Pure maple syrup, 1/4 cup (60ml): Use the real stuff, not pancake syrup. Grade A dark amber works beautifully here, giving the scones a rich, complex sweetness that you just can’t get from artificial syrup.
- Heavy cream, 1/4 cup (60ml), plus more for brushing: The cream adds richness and tenderness. You can use whole milk in a pinch, but the scones won’t be quite as tender. The extra cream brushed on top before baking gives them that golden, slightly crisp crust.
- Vanilla extract, 1 teaspoon: A little goes a long way in rounding out the flavors.
For the Cinnamon Glaze
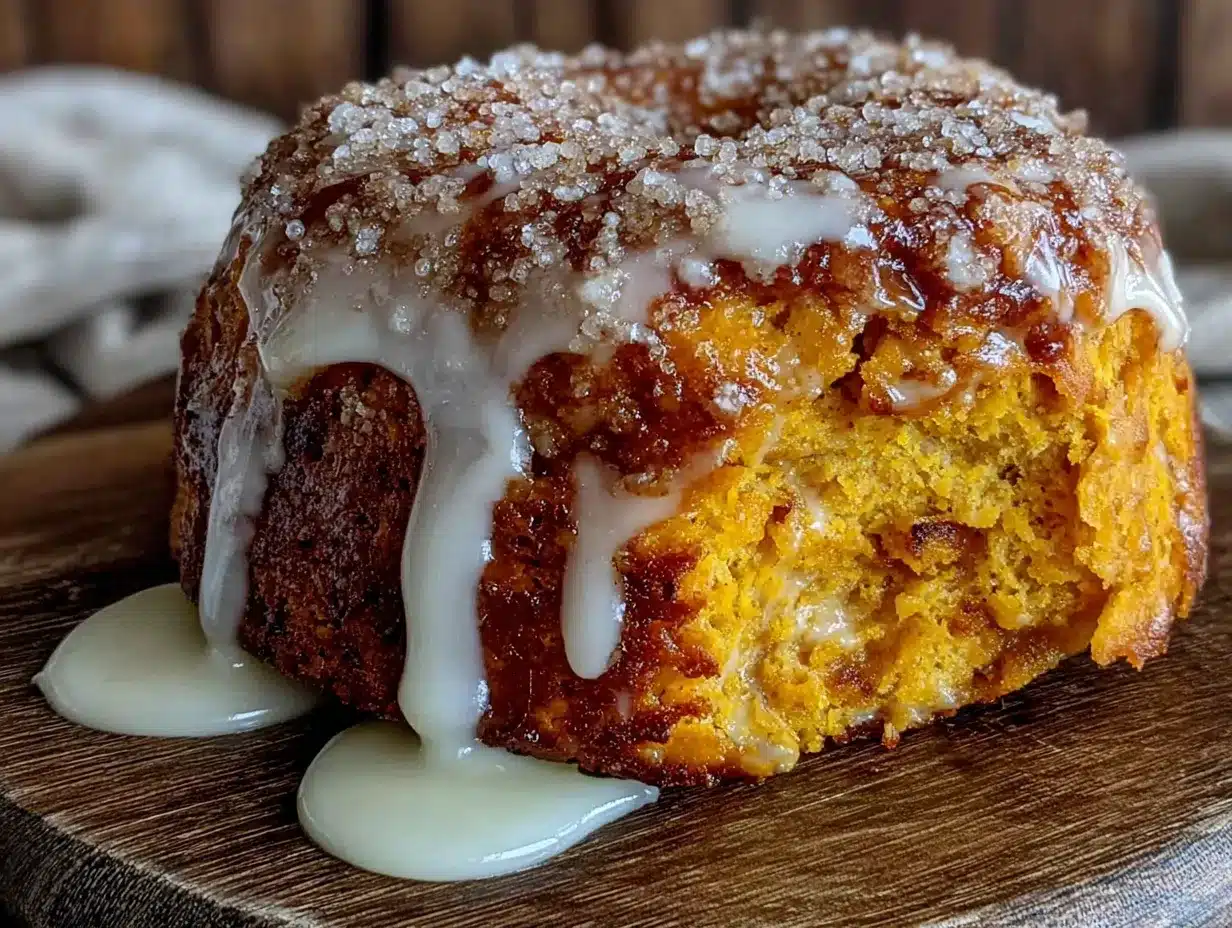
- Powdered sugar, 1 cup (120g): Sift it if you want a super smooth glaze, but I rarely bother and it turns out fine.
- Ground cinnamon, 1 teaspoon: This is where the cinnamon really shines. I use Saigon cinnamon for its bold, warm flavor.
- Pure maple syrup, 1 tablespoon (15ml): Adds a hint of maple that ties the glaze back to the scones.
- Milk or heavy cream, 2-3 tablespoons (30-45ml): Start with 2 tablespoons and add more a teaspoon at a time until you reach your desired consistency. Heavy cream makes a richer glaze, but milk works perfectly well.
- Vanilla extract, 1/2 teaspoon: Just a touch to round out the sweetness.
Equipment Needed
You don’t need a fully stocked bakery to make these scones. Here’s what I use every time:
- Large mixing bowl for combining dry ingredients
- Pastry cutter or two forks for cutting the butter into the flour. If you don’t have a pastry cutter, you can use your fingertips—just work quickly so the butter doesn’t warm up. I’ve also used a food processor in a pinch (just pulse 5-6 times).
- Baking sheet lined with parchment paper. I prefer light-colored baking sheets for even browning.
- Bench scraper or sharp knife for cutting the scones. A bench scraper makes clean cuts without dragging through the dough.
- Pastry brush for brushing the tops with cream before baking. A silicone brush works great and is easy to clean.
- Wire cooling rack so the scones cool evenly and the glaze sets properly.
- Small whisk or fork for mixing the glaze. A fork actually works better for small amounts of glaze—less waste.
If you don’t have a pastry cutter, honestly, two forks work fine. I used that method for years before I bought a proper cutter. The key is just to get the butter broken down into pea-sized pieces without melting it with your hands.
Preparation Method
Let’s get baking. I’ve broken this down step by step so you can follow along without any surprises.
- Preheat your oven to 400°F (200°C) and line a baking sheet with parchment paper. Getting the oven hot before you start mixing ensures even baking from the moment the scones go in.
- Whisk the dry ingredients together. In your large mixing bowl, combine the flour, sugar, baking powder, cinnamon, nutmeg, ginger, and salt. Whisk until everything is evenly distributed—about 15 seconds. This ensures your leavening and spices are spread throughout the dough.
- Cut in the cold butter. Add the cold, cubed butter to the flour mixture. Use your pastry cutter or two forks to cut the butter into the flour until the mixture resembles coarse meal with some pea-sized butter pieces remaining. Don’t overdo it—those little butter bits are what create flaky layers. If the butter starts feeling soft, pop the bowl in the fridge for 5 minutes.
- Mix the wet ingredients. In a separate small bowl or liquid measuring cup, whisk together the pumpkin purée, maple syrup, heavy cream, and vanilla extract until smooth. It should look like a thick, creamy orange mixture.
- Combine wet and dry ingredients. Make a well in the center of the flour mixture and pour in the wet ingredients. Stir gently with a fork or spatula until just combined. The dough will look shaggy and a little dry in spots—that’s exactly what you want. Overmixing at this stage will make the scones tough.
- Bring the dough together. Turn the dough out onto a lightly floured surface. Gently bring it together with your hands, folding it over itself 2-3 times to incorporate any loose flour. Don’t knead it like bread—just press it together until it holds. If it’s too sticky, sprinkle a tiny bit more flour on your hands.
- Shape the dough. Pat the dough into a circle about 3/4-inch thick and 7-8 inches across. Don’t roll it with a rolling pin—use your hands to gently press it out. The edges don’t need to be perfect; rustic scones have more charm.
- Cut the scones. Use a bench scraper or sharp knife to cut the circle into 8 wedges, like a pizza. For the cleanest cuts, slice straight down without dragging. This helps the scones rise evenly.
- Transfer to baking sheet. Carefully place the scones on the prepared baking sheet, spacing them about 2 inches apart. They won’t spread much, so you can fit all 8 on one standard sheet.
- Brush with cream. Lightly brush the tops of the scones with a little extra heavy cream. This gives them that beautiful golden crust. Don’t skip this step—it makes a real difference in the final look and texture.
- Bake for 14-16 minutes or until the scones are golden brown on the bottom and the tops are lightly browned. Your kitchen should smell like a fall candle at this point. Let them cool on the baking sheet for 5 minutes, then transfer to a wire rack to cool completely before glazing.
- Make the glaze. While the scones cool, whisk together the powdered sugar, cinnamon, maple syrup, vanilla, and 2 tablespoons of milk or cream. Add more liquid one teaspoon at a time until the glaze is thick but pourable—it should run slowly off a spoon.
- Glaze the scones. Once the scones are completely cool, drizzle the glaze over the tops. I like to use a spoon and let it drip naturally over the edges. Let the glaze set for about 10 minutes before serving.
Cooking Tips & Techniques
I’ve made these scones more times than I can count, and I’ve learned a few things along the way. Here are the tips that make the biggest difference:
Keep everything cold. This is the number one rule of scone making. Cold butter creates steam pockets as it bakes, which gives you that flaky, tender texture. If your kitchen is warm, chill your bowl and flour for 10 minutes before you start. I’ve even frozen my butter and grated it into the flour on hot summer days—works like a charm.
Don’t overwork the dough. I learned this the hard way. The first time I made scones, I kneaded them like bread dough, and they came out tough and flat. You want to handle the dough as little as possible. Stop mixing as soon as the flour is incorporated, and when you shape the dough, press gently. A shaggy dough is a good dough.
Use a light touch with the glaze. If you pour the glaze on while the scones are still warm, it’ll soak right in and disappear. Wait until they’re completely cool—about 20 minutes on a wire rack. The glaze will sit on top and set into that beautiful, slightly crackly layer that makes these scones look bakery-worthy.
Check your baking powder. I once made a batch that barely rose, and I couldn’t figure out why. Turns out my baking powder was over a year old. Test yours by dropping a teaspoon into hot water—if it fizzes vigorously, it’s still good. If not, buy a new can.
Freeze the unbaked scones for later. This is my favorite trick. Shape and cut the scones, then place them on a baking sheet in the freezer for an hour. Once frozen solid, transfer them to a freezer bag. You can bake them straight from frozen—just add 2-3 minutes to the baking time. Fresh scones anytime you want them.
Variations & Adaptations
One of the best things about this recipe is how adaptable it is. Here are some variations I’ve tried and loved:
Gluten-Free Version: Substitute the all-purpose flour with a 1:1 gluten-free baking flour blend that contains xanthan gum. I’ve had good results with King Arthur Measure for Measure. The texture will be slightly more tender and a bit more crumbly, but the flavor is spot on. Add an extra tablespoon of cream if the dough seems dry.
Vegan Adaptation: Use cold, cubed coconut oil or vegan butter in place of the butter. Replace the heavy cream with full-fat coconut cream or a thick oat milk. The scones will be a little less flaky but still delicious. For the glaze, use a plant-based milk and make sure your powdered sugar is vegan-friendly.
Add-In Options: Fold in 1/2 cup of toasted pecans or walnuts before shaping the dough. The crunch adds a lovely contrast to the tender scone. Dried cranberries or chopped crystallized ginger are also fantastic—about 1/3 cup is perfect. If you’re feeling decadent, add 1/2 cup of white chocolate chips.
Spice It Up: Swap the cinnamon, nutmeg, and ginger for 2 teaspoons of pumpkin pie spice if that’s what you have on hand. Or add a pinch of cardamom or cloves for a more complex flavor profile. I once added a teaspoon of orange zest to the dough, and it was incredible with the maple.
Savory Twist: Reduce the maple syrup to 2 tablespoons, omit the sugar, and add 1/2 cup of shredded sharp cheddar and 2 tablespoons of chopped fresh sage. Skip the sweet glaze and brush the baked scones with melted butter instead. These are amazing alongside a bowl of soup.
Serving & Storage Suggestions
These scones are at their absolute best the day they’re made, but they still hold up beautifully for a few days. Here’s how I handle them:
Serving: I like to serve these slightly warm or at room temperature. If you’re serving them the same day, let the glaze set fully before plating. They’re wonderful on their own, but if you want to go all out, split one in half and add a pat of salted butter or a dollop of clotted cream. A hot cup of coffee or chai tea is the perfect companion.
Storage: Store any leftover scones in an airtight container at room temperature for up to 2 days. If you’ve already glazed them, layer parchment paper between the scones so the glaze doesn’t stick. After 2 days, the texture starts to soften, but they’re still delicious.
Freezing Baked Scones: You can freeze the fully baked and cooled scones (without glaze) for up to 3 months. Wrap each one individually in plastic wrap, then place them in a freezer bag. To serve, thaw at room temperature for about 30 minutes, then warm in a 300°F oven for 5 minutes. Glaze after warming.
Reheating: The microwave works in a pinch, but it can make the scones a bit chewy. I prefer to reheat them in a toaster oven or regular oven at 300°F for 5-7 minutes. They come out crisp on the outside and tender on the inside, just like fresh-baked.
Flavor Development: Honestly, the flavors actually deepen a bit on day two. The maple and pumpkin meld together even more, and the spices become more pronounced. If you can resist eating them all on day one, you’re in for a treat.
Nutritional Information & Benefits
These scones are a treat, but they’re made with ingredients that offer some real nutritional benefits. Here’s a rough breakdown per scone (based on 8 servings with glaze):
- Calories: Approximately 320
- Fat: 14g
- Carbohydrates: 46g
- Protein: 4g
- Fiber: 2g
- Sugar: 24g
Pumpkin is the star here, and it brings more to the table than just moisture and flavor. It’s packed with vitamin A (in the form of beta-carotene), which supports eye health and immune function. It also provides fiber, which helps keep you full and supports digestion.
Maple syrup contains antioxidants and minerals like zinc and manganese. While it’s still sugar, it’s a less processed sweetener than refined white sugar and has a lower glycemic index, meaning it doesn’t spike your blood sugar as dramatically.
Cinnamon is more than just a flavor—it’s been shown to help regulate blood sugar levels and has anti-inflammatory properties. That’s a pretty good reason to be generous with the glaze.
Dietary Considerations: These scones are vegetarian. For a vegan version, see the variations section above. They can be made gluten-free with the right flour blend. They contain dairy and gluten in their standard form, so keep that in mind for guests with allergies.
I don’t pretend these are health food, but I feel good about eating one with my morning coffee. They’re made with real ingredients, they’re not overly sweet, and they satisfy that craving for something baked and comforting without sending you into a sugar coma. That’s a win in my book.
Conclusion
These Wholesome Maple Pumpkin Scones with Cinnamon Glaze have become my fall baking signature for a reason. They’re simple enough for a Tuesday morning, special enough for a holiday brunch, and they make the whole house smell like comfort. The pumpkin keeps them tender, the maple adds a deep sweetness that feels natural, and that cinnamon glaze is the kind of finishing touch that makes people think you spent hours in the kitchen.
What I love most about this recipe is how forgiving it is. You don’t need to be a pastry chef to pull these off. The dough comes together without fuss, the scones bake evenly, and even if they’re not perfectly shaped, they taste incredible. That’s the kind of recipe that builds confidence in the kitchen.
I’d love to hear how these turn out for you. Did you try a variation? Add something unexpected? Serve them with something amazing? Drop a comment below and let me know—I read every single one. And if you share a photo on Pinterest or Instagram, tag me so I can see your beautiful scones. Happy baking, friends!
Frequently Asked Questions
Can I use canned pumpkin pie filling instead of pumpkin purée?
No, I wouldn’t recommend that. Pumpkin pie filling is pre-sweetened and spiced, which will throw off the sugar and spice balance in the recipe. Stick with plain pumpkin purée—it gives you control over the sweetness and flavor.
Why did my scones turn out dry?
Dry scones usually come from one of two things: too much flour or overbaking. Make sure you’re spooning and leveling your flour rather than scooping directly from the bag. And check your scones at the 14-minute mark—ovens vary, and even one extra minute can make a difference.
Can I make the dough ahead of time?
Absolutely. You can shape the scones, place them on a baking sheet, and refrigerate them for up to 24 hours before baking. You may need to add 1-2 minutes to the baking time if they go in cold. For longer storage, freeze the unbaked scones as described in the tips section.
Can I skip the glaze?
You can, but I wouldn’t. The glaze adds sweetness and that beautiful cinnamon hit that really makes these scones special. If you want a less sweet version, you can make a lighter glaze with just powdered sugar and milk, or brush the warm scones with a little melted butter and sprinkle with cinnamon sugar.
How do I get my scones to rise higher?
Make sure your baking powder is fresh, and don’t twist the cutter (or knife) when cutting the scones. Twisting seals the edges and prevents them from rising. Cut straight down and lift straight up. Also, cold butter is crucial—if the butter melts before the scones hit the oven, they won’t rise as much.
Pin This Recipe!
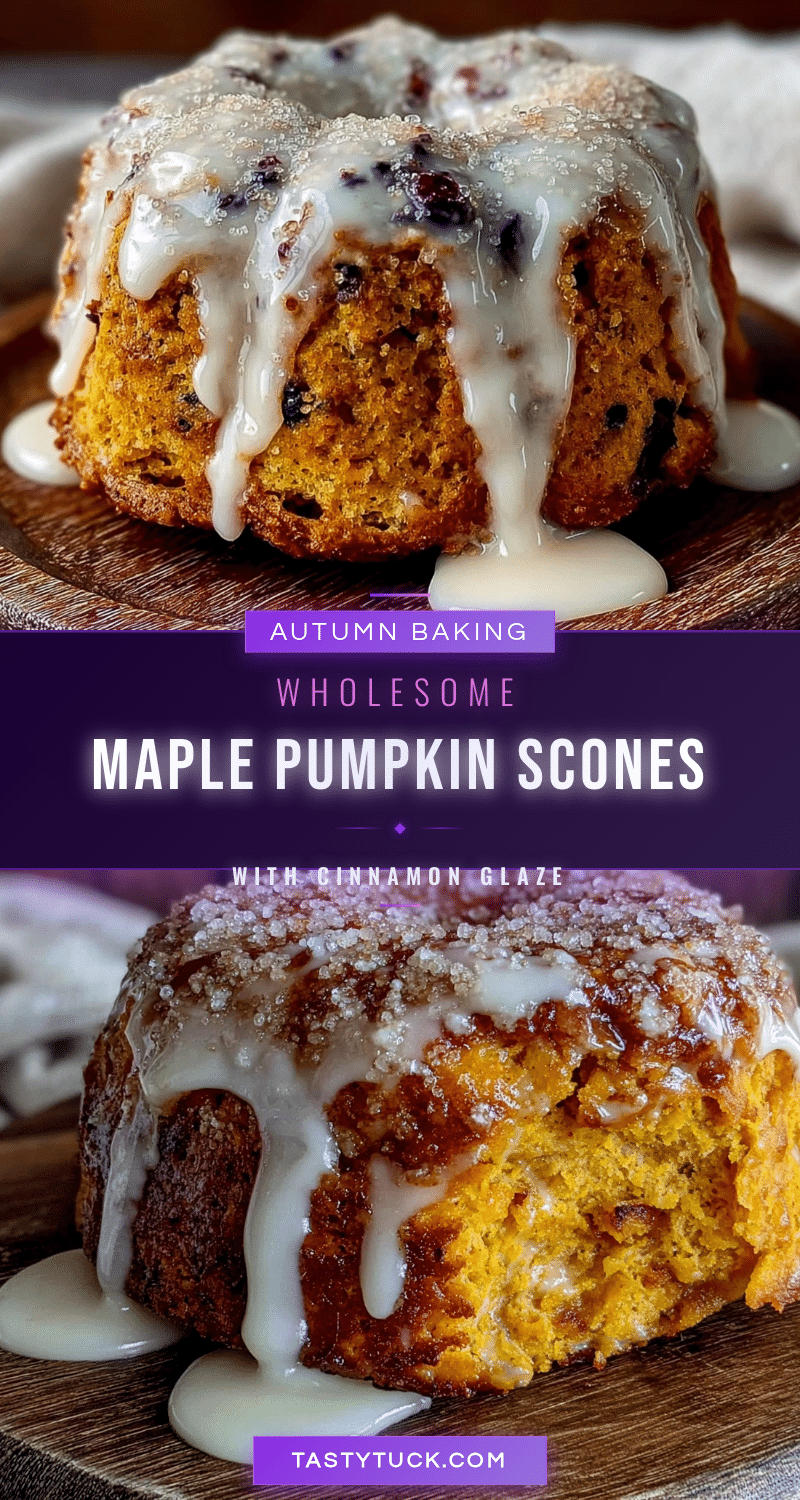
Wholesome Maple Pumpkin Scones with Easy Cinnamon Glaze
These tender, maple-sweetened pumpkin scones are topped with a warm cinnamon glaze. They’re quick to make with simple ingredients and perfect for fall mornings or cozy gatherings.
- Prep Time: 15 minutes
- Cook Time: 16 minutes
- Total Time: 31 minutes
- Yield: 8 servings 1x
- Category: Breakfast
- Cuisine: American
Ingredients
- 2 cups (250g) all-purpose flour
- 1/4 cup (50g) granulated sugar
- 1 tablespoon baking powder
- 1 teaspoon ground cinnamon
- 1/2 teaspoon ground nutmeg
- 1/4 teaspoon ground ginger
- 1/2 teaspoon salt
- 1/2 cup (113g) unsalted butter, cold and cubed
- 1/2 cup (120g) pumpkin purée
- 1/4 cup (60ml) pure maple syrup
- 1/4 cup (60ml) heavy cream, plus more for brushing
- 1 teaspoon vanilla extract
- 1 cup (120g) powdered sugar
- 1 teaspoon ground cinnamon (for glaze)
- 1 tablespoon (15ml) pure maple syrup (for glaze)
- 2–3 tablespoons (30-45ml) milk or heavy cream (for glaze)
- 1/2 teaspoon vanilla extract (for glaze)
Instructions
- Preheat your oven to 400°F (200°C) and line a baking sheet with parchment paper.
- In a large mixing bowl, whisk together the flour, sugar, baking powder, cinnamon, nutmeg, ginger, and salt until evenly distributed.
- Add the cold, cubed butter to the flour mixture. Use a pastry cutter or two forks to cut the butter into the flour until the mixture resembles coarse meal with some pea-sized butter pieces remaining.
- In a separate small bowl or liquid measuring cup, whisk together the pumpkin purée, maple syrup, heavy cream, and vanilla extract until smooth.
- Make a well in the center of the flour mixture and pour in the wet ingredients. Stir gently with a fork or spatula until just combined. The dough will look shaggy and a little dry in spots.
- Turn the dough out onto a lightly floured surface. Gently bring it together with your hands, folding it over itself 2-3 times to incorporate any loose flour. Do not knead.
- Pat the dough into a circle about 3/4-inch thick and 7-8 inches across. Use your hands to gently press it out.
- Use a bench scraper or sharp knife to cut the circle into 8 wedges, like a pizza. Cut straight down without dragging.
- Carefully place the scones on the prepared baking sheet, spacing them about 2 inches apart.
- Lightly brush the tops of the scones with a little extra heavy cream.
- Bake for 14-16 minutes or until the scones are golden brown on the bottom and the tops are lightly browned. Let them cool on the baking sheet for 5 minutes, then transfer to a wire rack to cool completely before glazing.
- While the scones cool, whisk together the powdered sugar, cinnamon, maple syrup, vanilla, and 2 tablespoons of milk or cream. Add more liquid one teaspoon at a time until the glaze is thick but pourable.
- Once the scones are completely cool, drizzle the glaze over the tops. Let the glaze set for about 10 minutes before serving.
Notes
Keep all ingredients cold for flaky scones. Do not overwork the dough. For best results, let scones cool completely before glazing. Unbaked scones can be frozen for up to 3 months.
Nutrition
- Serving Size: 1 scone
- Calories: 320
- Sugar: 24
- Fat: 14
- Carbohydrates: 46
- Fiber: 2
- Protein: 4
Keywords: pumpkin scones, maple scones, cinnamon glaze, fall baking, breakfast scones, pumpkin recipes


