That first bite of a thawed wrap — the way the turkey and cheese have settled together, the tortilla still soft, not soggy — it honestly took me back to a Tuesday night about two years ago. I was staring into my freezer, bleary-eyed, with a kid who suddenly decided school lunch was “gross” and a work meeting that ran long. I had a stack of flour tortillas, some deli turkey, and a block of cheddar that was staring back at me. I wrapped one up on autopilot, tossed it in a bag, and shoved it in the freezer out of pure desperation. The next morning, I grabbed it on my way out the door, not really thinking it would work. But when my kid came home and said, “Mom, that wrap was actually good,” I knew I had stumbled onto something. It wasn’t a recipe I learned from my grandma or saw on a cooking show. It was just a tired mom making a bet with her freezer. And honestly? The freezer won.
These Easy Freezer-Friendly Turkey and Cheese Lunchbox Wraps are the kind of thing you make when you’re tired of the morning scramble. You know the one — where you’re hunting for lunch containers, trying to find something that isn’t a sad granola bar. This recipe changes that. It’s built on a simple formula: good turkey, good cheese, a little spread to keep things from drying out, and a wrap that holds up to freezing. No fancy ingredients, no complicated steps. Just a solid, repeatable lunch option that takes the pressure off your mornings.
I’ve made these wraps more times than I can count now. They’ve been my go-to for school lunches, quick workday meals, and even road trip snacks. They freeze beautifully, thaw in the fridge overnight, and taste just as fresh as the day you made them. So if you’re looking for a way to make your life a little easier, this is it. No hype, no fuss — just a good wrap that’s ready when you are.
Why You’ll Love This Recipe
Let’s be real — finding a lunch that’s both kid-approved and adult-approved is like finding a unicorn. But these wraps? They come pretty close. Here’s why they work:
- Quick & Easy: You can prep a whole batch in under 15 minutes. No cooking, no complicated steps. Just wrap, roll, and freeze.
- Simple Ingredients: You probably already have everything in your fridge. Turkey, cheese, tortillas, and a spread of your choice. That’s it.
- Perfect for Meal Prep: Make a dozen on Sunday, and you’ve got lunches sorted for the whole week (or more). It’s a lifesaver for busy mornings.
- Crowd-Pleaser: Kids love them because they’re familiar. Adults love them because they’re satisfying. It’s a rare win-win.
- Unbelievably Convenient: They go straight from the freezer to a lunchbox. No thawing required if you eat them within a few hours. The texture stays perfect.
What makes these wraps different from just tossing turkey and cheese in a tortilla? It’s the technique. The trick is to use a thin layer of spread — cream cheese, hummus, or even a little mayo — to create a barrier that keeps the tortilla from getting soggy. I learned this the hard way after a few sad, wet wraps. The spread also helps the wrap hold together better when you roll it, so nothing falls out. Plus, I use a specific folding method that keeps everything tight and secure, even after freezing.
This recipe isn’t just about convenience. It’s about giving yourself a break. It’s the kind of thing that makes you feel like you’ve got your life together, even when you’re running on three hours of sleep. And honestly, that’s worth more than any fancy lunch.
What Ingredients You Will Need
This recipe uses simple, everyday ingredients to create a lunch that feels anything but boring. The key is choosing the right components that freeze and thaw well, so you get the best texture every time.
For the Wraps:
- Large flour tortillas (10-inch) — I prefer Mission or Ole brand for their flexibility. They don’t crack when you roll them, even after freezing. You can use whole wheat or spinach tortillas for a different flavor.
- Deli turkey breast (sliced) — Go for oven-roasted or smoked turkey. Avoid honey-roasted or flavored varieties, as they can get weird after freezing. About 4-5 slices per wrap.
- Cheese slices — Cheddar, provolone, or Swiss work best. They freeze well and don’t get rubbery. I like Sargento or Boar’s Head for consistent quality. Use 1-2 slices per wrap.
- Spread (cream cheese, hummus, or mayo) — This is the secret ingredient. A thin layer (about 1-2 tablespoons) prevents the tortilla from absorbing moisture from the turkey and cheese. I usually use cream cheese for a neutral flavor, but hummus adds a nice twist.
- Lettuce or spinach (optional) — If you want to add greens, use sturdy leaves like romaine or spinach. Avoid iceberg, as it gets watery after thawing. Add just a few leaves per wrap.
For the Assembly:
- Parchment paper or wax paper — To wrap each individual wrap before freezing. This prevents them from sticking together and makes it easy to grab one at a time.
- Freezer-safe zip-top bags — For storing the wrapped wraps. Ziploc or Glad brand works well.
Substitution Notes:
- Gluten-Free: Use gluten-free tortillas. They can be a bit more fragile, so handle them gently when rolling.
- Dairy-Free: Swap the cheese for dairy-free slices and use hummus or avocado as the spread.
- Higher Protein: Add a slice of ham or roast beef along with the turkey. Just make sure the total amount of meat doesn’t make the wrap too thick to roll.
- Vegetarian: Replace the turkey with roasted veggies (like bell peppers and zucchini) or use a plant-based deli slice.
I’ve tried different combinations over the years, and my go-to is always turkey, provolone, and a thin layer of cream cheese. It’s simple, but it just works. The cream cheese adds a slight tang that complements the turkey without overpowering it. If you’re feeling adventurous, try a sun-dried tomato or chive and onion cream cheese for extra flavor.
Equipment Needed
You don’t need any fancy gadgets for this recipe. Here’s what you’ll need:
- Cutting board — A sturdy one for assembling the wraps. I use a large wooden board, but any clean surface works.
- Butter knife or offset spatula — For spreading the cream cheese or hummus evenly. A regular butter knife is fine, but an offset spatula makes it easier to get a thin, even layer.
- Parchment paper or wax paper — For wrapping each individual wrap. Parchment is my preference because it doesn’t tear as easily.
- Freezer-safe zip-top bags — For bulk storage. I like the gallon-sized bags for storing multiple wraps.
- Sharp knife — For cutting the wraps in half (optional). A serrated knife works best for clean cuts without squishing the wrap.
Budget-Friendly Alternatives:
- If you don’t have parchment paper, you can use plastic wrap or aluminum foil. Just make sure the wrap is tightly sealed to prevent freezer burn.
- No offset spatula? A regular butter knife or even the back of a spoon works fine.
- You can also use reusable silicone bags instead of zip-top bags. They’re more eco-friendly and work just as well for freezing.
I’ve made these wraps with just a cutting board and a butter knife, and they turned out perfectly. The equipment is really just about making the process smoother, not essential for success.
Preparation Method

Making these wraps is incredibly straightforward. Once you get the hang of the rolling technique, you’ll be able to assemble a batch in no time. Here’s how to do it:
- Prepare your work surface. Lay a large flour tortilla flat on your cutting board. If the tortilla is cold, let it sit at room temperature for a few minutes — it will be more pliable and less likely to crack.
- Spread the barrier layer. Using a butter knife or offset spatula, spread about 1-2 tablespoons of your chosen spread (cream cheese, hummus, or mayo) evenly over the entire surface of the tortilla. Leave a 1-inch border around the edges. This layer is crucial — it prevents the tortilla from getting soggy when the wrap thaws.
- Layer the turkey. Place 4-5 slices of deli turkey in the center of the tortilla, overlapping them slightly. Make sure the turkey covers an area about 4-5 inches wide and 6-7 inches long. Don’t overstuff — you need room to roll.
- Add the cheese. Place 1-2 slices of cheese on top of the turkey. If you’re using larger slices, you can cut them in half and arrange them to cover the turkey evenly.
- Add optional greens. If you’re using lettuce or spinach, place a few leaves on top of the cheese. Don’t overdo it — too many greens can make the wrap hard to roll and cause it to fall apart.
- Roll the wrap. Start by folding the bottom edge of the tortilla up over the filling. Then, fold in the left and right sides toward the center. Finally, roll the wrap away from you, keeping it tight but not so tight that the filling squishes out. The seam should be on the bottom.
- Secure the wrap. Place the rolled wrap seam-side down on a piece of parchment paper (about 10×10 inches). Wrap it tightly, tucking the ends under like you’re wrapping a burrito. This keeps it secure during freezing.
- Repeat. Continue with the remaining tortillas and filling. You can make as many as you want — the recipe scales up easily.
- Freeze the wraps. Place all the wrapped wraps in a single layer in a freezer-safe zip-top bag. Squeeze out as much air as possible before sealing. Label the bag with the date and contents. They’ll keep for up to 3 months.
- Thaw and serve. To serve, simply remove a wrap from the freezer and place it in the fridge overnight to thaw. It will be ready to eat by morning. You can also eat it partially thawed if you’re in a hurry — the texture is still good.
Pro Tip: If you’re making a large batch, I recommend freezing the wraps individually on a baking sheet for about an hour before transferring them to a bag. This prevents them from sticking together, so you can grab just one at a time.
At this point, you might be thinking about other easy meal prep ideas. If you’re into batch cooking, you might also enjoy our easy BBQ loaded mini meatloaf muffins — another freezer-friendly option that’s perfect for busy weeks.
Cooking Tips & Techniques
After making these wraps more times than I can count, I’ve picked up a few tricks that make a big difference. Here are the ones I swear by:
- Don’t overfill. It’s tempting to pile on the turkey and cheese, but too much filling makes the wrap hard to roll and prone to bursting. Stick to 4-5 slices of turkey and 1-2 slices of cheese per wrap.
- Use room-temperature tortillas. Cold tortillas are more likely to crack when you roll them. Let them sit on the counter for 10-15 minutes before you start. If you’re in a hurry, you can microwave them for 10-15 seconds to soften them up.
- Spread all the way to the edges. The barrier layer (cream cheese, hummus, or mayo) should cover the entire tortilla, including the edges. This prevents moisture from seeping in and making the tortilla soggy.
- Roll tightly, but not too tight. You want the wrap to hold together, but if you roll it too tight, the filling might squish out. Aim for a firm, even roll.
- Label and date your bags. It’s easy to forget what’s in the freezer. I always write the date and contents on the bag with a permanent marker. Trust me, you’ll thank yourself later.
- Freeze individually first. If you’re making a big batch, freeze the wraps on a baking sheet for an hour before bagging them. This prevents them from sticking together, so you can grab just one.
Common Mistakes to Avoid:
- Using too much spread. A thin layer is all you need. Too much cream cheese or hummus can make the wrap messy and hard to eat.
- Not wrapping tightly enough. If the parchment paper is loose, the wrap can dry out in the freezer. Make sure it’s snug.
- Forgetting to remove air from the bag. Air in the bag can cause freezer burn. Squeeze out as much air as possible before sealing.
I once made a batch where I forgot the barrier layer entirely. The result was a sad, soggy mess that fell apart as soon as I unwrapped it. It was a hard lesson, but it taught me how important that step is. Now, I never skip it.
Variations & Adaptations
One of the best things about this recipe is how customizable it is. Here are a few variations I’ve tried and loved:
- Spicy Southwest Wrap: Use pepper jack cheese, add a few slices of jalapeño, and spread with a chipotle-flavored hummus. It adds a nice kick without being overwhelming.
- Mediterranean Wrap: Swap the turkey for roasted red peppers and cucumbers, use feta cheese, and spread with tzatziki sauce. It’s a fresh, vegetarian option that freeels surprisingly well.
- BBQ Chicken Wrap: Use shredded cooked chicken mixed with BBQ sauce, add cheddar cheese, and spread with ranch dressing. It’s a hearty option that tastes like a pulled chicken sandwich.
- Breakfast Wrap: Use scrambled eggs, cooked sausage or bacon, and cheddar cheese. Spread with cream cheese for extra richness. These are great for grab-and-go breakfasts.
- Veggie-Packed Wrap: Add shredded carrots, sliced bell peppers, and cucumber along with the turkey. The veggies add crunch and nutrition without making the wrap soggy.
Dietary Adaptations:
- Gluten-Free: Use gluten-free tortillas. They can be a bit more fragile, so handle them gently when rolling. I recommend Mission gluten-free tortillas for best results.
- Dairy-Free: Use dairy-free cheese slices and a dairy-free spread like hummus or avocado. Daiya and Violife are good cheese options.
- Low-Carb: Use low-carb tortillas or large lettuce leaves. Lettuce wraps are a bit more delicate but work well for a lighter option.
I’ve personally tried the Mediterranean variation, and it’s become a favorite for summer lunches. The tzatziki adds a cool, creamy element that pairs perfectly with the crunchy veggies. It’s a great way to switch things up when you’re tired of the classic turkey and cheese.
Serving & Storage Suggestions
These wraps are designed to be eaten cold or at room temperature, so they’re perfect for lunchboxes and picnics. Here’s how to serve and store them:
- Serving Temperature: Eat them straight from the fridge after thawing, or let them sit at room temperature for 10-15 minutes if you prefer a softer tortilla. They’re also good partially frozen on a hot day.
- Presentation: Cut the wrap in half diagonally for a nice presentation. You can also leave it whole and let the eater slice it themselves. For lunchboxes, I usually pack it whole with a side of fruit or chips.
- Complementary Sides: These wraps pair well with fresh fruit, baby carrots, apple slices, or a small bag of chips. For a more substantial meal, add a side of soup or a small salad.
- Beverage Pairings: A cold glass of milk, iced tea, or lemonade complements the savory flavors of the wrap. For adults, a light beer or a crisp white wine works well.
Storage Instructions:
- Refrigerator: Thawed wraps can be stored in the fridge for up to 3 days. Keep them wrapped in parchment paper or plastic wrap to prevent drying out.
- Freezer: Frozen wraps will keep for up to 3 months. Store them in a freezer-safe zip-top bag with as much air removed as possible.
- Reheating: These wraps are best eaten cold. If you prefer a warm wrap, you can microwave it for 15-20 seconds, but be careful not to overheat it, or the tortilla will become tough.
Flavor Development: Interestingly, these wraps taste even better after a day or two in the fridge. The flavors meld together, and the spread absorbs into the turkey and cheese, creating a more cohesive taste. So don’t be afraid to make them a day ahead.
If you’re looking for other make-ahead lunch ideas, check out our healthy high-protein loaded grilled chicken meal prep for another easy weekly option.
Nutritional Information & Benefits
These wraps are a balanced meal option, providing protein, healthy fats, and carbohydrates. Here’s a rough estimate per wrap (based on one wrap with turkey, provolone, and cream cheese):
| Nutrient | Amount |
|---|---|
| Calories | 320-380 |
| Protein | 22-28g |
| Fat | 14-18g |
| Carbohydrates | 30-35g |
| Fiber | 2-4g |
| Sugar | 3-5g |
| Sodium | 700-900mg |
Health Benefits:
- Turkey is a lean source of protein, which helps keep you full and supports muscle health.
- Cheese provides calcium and vitamin D for bone health.
- Cream cheese adds a small amount of healthy fats that aid in nutrient absorption.
- Tortillas provide carbohydrates for energy, making this a balanced meal.
Dietary Considerations:
- This recipe can be made gluten-free with appropriate tortillas.
- It can be made dairy-free with dairy-free cheese and spread.
- It is nut-free as written (check your hummus if using).
- It is egg-free as written.
I personally love that these wraps offer a good balance of protein and carbs without being too heavy. They keep me full through the afternoon without that post-lunch slump. It’s comfort food that actually works for your body.
Conclusion
So there you have it — Easy Freezer-Friendly Turkey and Cheese Lunchbox Wraps that actually deliver on their promise. They’re simple to make, they freeze beautifully, and they taste just as good as the day you made them. No more morning panic, no more sad lunches. Just a reliable, tasty option that’s ready when you are.
What I love most about this recipe is how forgiving it is. You can swap ingredients, adjust the fillings, and make it your own without worrying about ruining it. It’s a recipe that grows with you — perfect for busy parents, meal prep enthusiasts, or anyone who just wants one less thing to think about during the week.
I’d love to hear how these wraps turn out for you. Did you try a fun variation? Did your kids actually eat them without complaint? Drop a comment below and let me know. And if you found this helpful, share it with a friend who could use a little more ease in their lunch routine. Happy wrapping, friends.
Frequently Asked Questions
Can I use a different type of tortilla?
Absolutely! Whole wheat, spinach, tomato, or gluten-free tortillas all work well. Just make sure they’re large enough (10-inch) to hold the filling and roll easily.
How long do these wraps last in the freezer?
They’ll keep for up to 3 months in the freezer if stored properly in an airtight bag. After that, the texture may start to decline, but they’re still safe to eat.
Can I add vegetables to the wraps?
Yes, but stick to sturdy veggies like spinach, romaine, bell peppers, or shredded carrots. Avoid watery veggies like tomatoes or cucumbers, as they can make the wrap soggy after thawing.
Do I need to thaw the wraps before eating?
It’s best to thaw them in the fridge overnight. However, you can eat them partially frozen if you’re in a hurry — the texture is still good. Just don’t microwave them for too long, or the tortilla will become tough.
Can I make these wraps with a different protein?
Definitely! Ham, roast beef, chicken, or even plant-based deli slices all work well. Just adjust the seasoning or spread to complement the protein you choose.
Pin This Recipe!
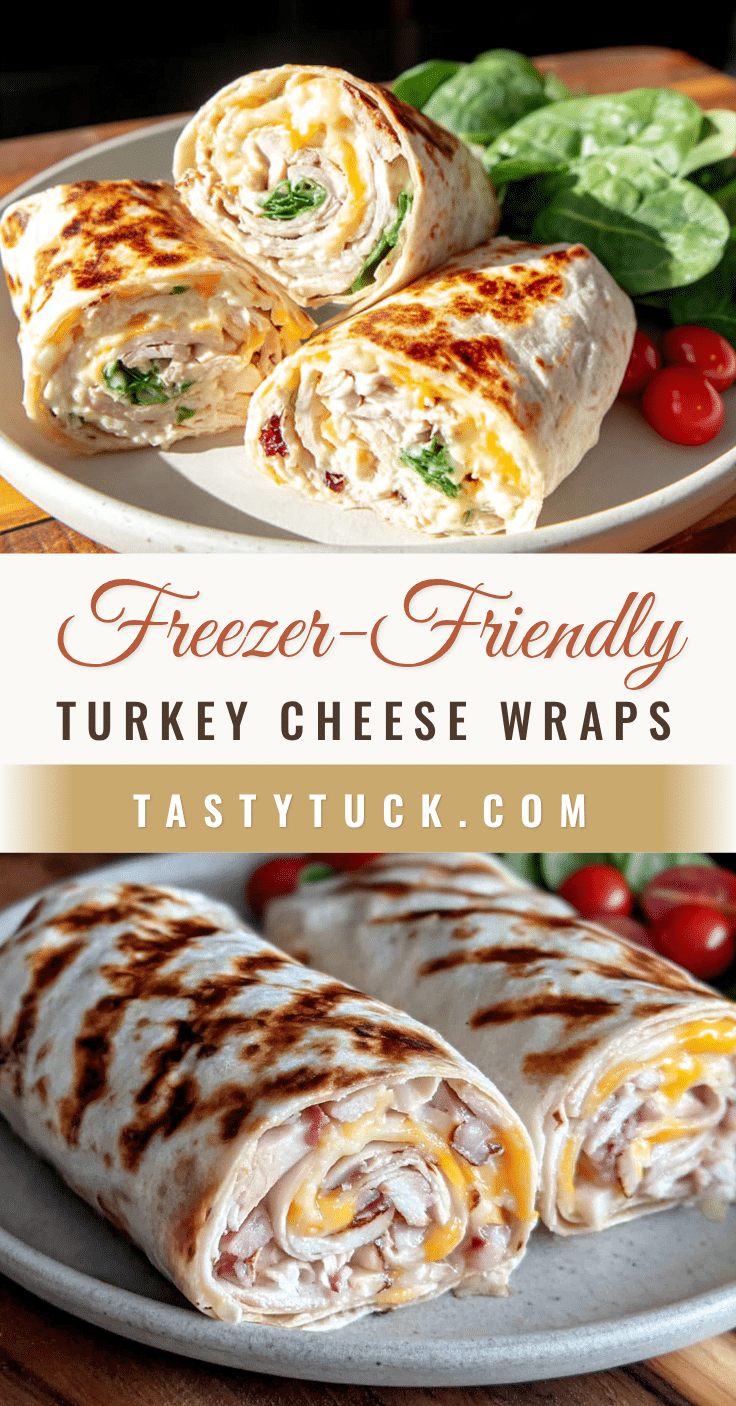
Easy Freezer-Friendly Turkey and Cheese Lunchbox Wraps

These freezer-friendly turkey and cheese wraps are a lifesaver for busy mornings. Made with simple ingredients, they freeze beautifully and taste fresh when thawed, making lunch prep effortless.
- Prep Time: 15 minutes
- Cook Time: 0 minutes
- Total Time: 15 minutes
- Yield: 4 servings
- Category: Lunch
- Cuisine: American
Ingredients
- Large flour tortillas (10-inch)
- Deli turkey breast (sliced), about 4-5 slices per wrap
- Cheese slices (cheddar, provolone, or Swiss), 1-2 slices per wrap
- Spread (cream cheese, hummus, or mayo), 1-2 tablespoons per wrap
- Lettuce or spinach (optional), a few leaves per wrap
- Parchment paper or wax paper
- Freezer-safe zip-top bags
Instructions
- Prepare your work surface. Lay a large flour tortilla flat on your cutting board. If the tortilla is cold, let it sit at room temperature for a few minutes.
- Spread the barrier layer. Using a butter knife or offset spatula, spread about 1-2 tablespoons of your chosen spread evenly over the entire surface of the tortilla, leaving a 1-inch border around the edges.
- Layer the turkey. Place 4-5 slices of deli turkey in the center of the tortilla, overlapping them slightly, covering an area about 4-5 inches wide and 6-7 inches long.
- Add the cheese. Place 1-2 slices of cheese on top of the turkey.
- Add optional greens. If using, place a few leaves of lettuce or spinach on top of the cheese.
- Roll the wrap. Fold the bottom edge of the tortilla up over the filling, then fold in the left and right sides toward the center. Roll the wrap away from you, keeping it tight but not too tight. The seam should be on the bottom.
- Secure the wrap. Place the rolled wrap seam-side down on a piece of parchment paper (about 10×10 inches). Wrap it tightly, tucking the ends under like a burrito.
- Repeat with remaining tortillas and filling.
- Freeze the wraps. Place all wrapped wraps in a single layer in a freezer-safe zip-top bag. Squeeze out as much air as possible before sealing. Label with date and contents. They will keep for up to 3 months.
- Thaw and serve. Remove a wrap from the freezer and place in the fridge overnight to thaw. Eat cold or at room temperature.
Notes
The barrier layer (cream cheese, hummus, or mayo) is crucial to prevent sogginess. Use room-temperature tortillas to avoid cracking. For best results, freeze wraps individually on a baking sheet for an hour before bagging to prevent sticking.
Nutrition
- Serving Size: 1 wrap
- Calories: 350
- Sugar: 4
- Sodium: 800
- Fat: 16
- Saturated Fat: 7
- Carbohydrates: 33
- Fiber: 3
- Protein: 25
Keywords: freezer-friendly, turkey wraps, lunchbox wraps, meal prep, easy lunch, kid-friendly


